Response Quota
|
|
|


The Response Quota feature in Dropthought is handy when you want to limit responses to specific audience segments, ensuring that your data collection aligns with project goals.
This article will help you understand:
What are the benefits of using response quotas?
How do you locate and set up response quotas?
Benefits of Using Response Quotas
Targeted Data Collection: Focus on specific groups or demographics to gather meaningful, segmented insights.
Enhanced Survey Management: Set logical limits on responses to prevent oversampling from any respondent segments.
Optimized Resource Use: Only gather the data needed, reducing analysis time and focusing on targeted areas.
Real-Time Control: Adjust quotas on active surveys for greater flexibility as data is collected.
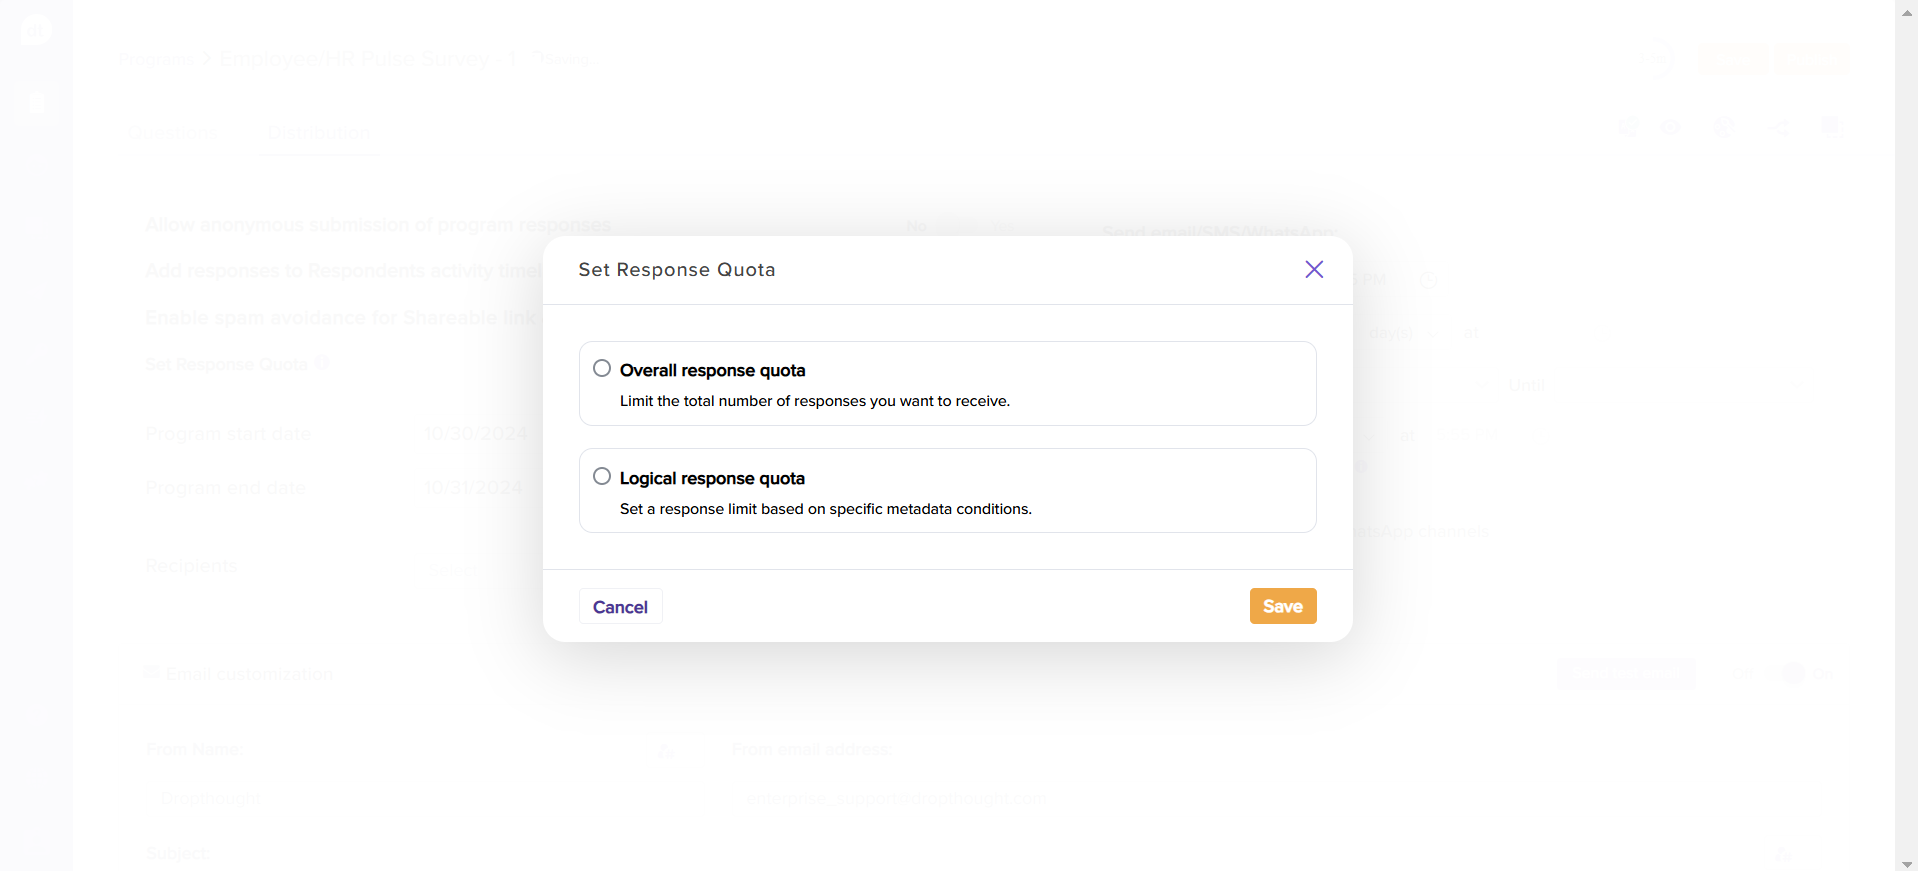
Types of Response Quotas
Overall response quota: The Overall Response Quota limits the number of responses your survey can receive, regardless of demographic or other criteria.
Logical response quota: The Logical Response Quota limits responses based on specific metadata conditions (location, age group, department).
Scenario
Overall response quota: HR sends surveys to gather general employee feedback across all company locations. An overall response quota of 500 responses is set to prevent data overload. Once 500 responses are collected, the survey stops accepting new responses.
Logical response quota: In a Customer Experience (CX) survey targeting customers from different regions (metadata), you could set a logical response quota to collect:
100 responses from Chennai
50 responses from Bangalore
30 responses from Hyderabad
Each location has a specific limit in this setup, ensuring balanced representation and insights across multiple regions. When each location reaches its set quota, the survey stops collecting responses from that location but continues to gather responses from others until their quotas are met.
Locate the Response Quota
Go to the Survey Distribution page.
Look for the toggle labeled Set Response Quota.
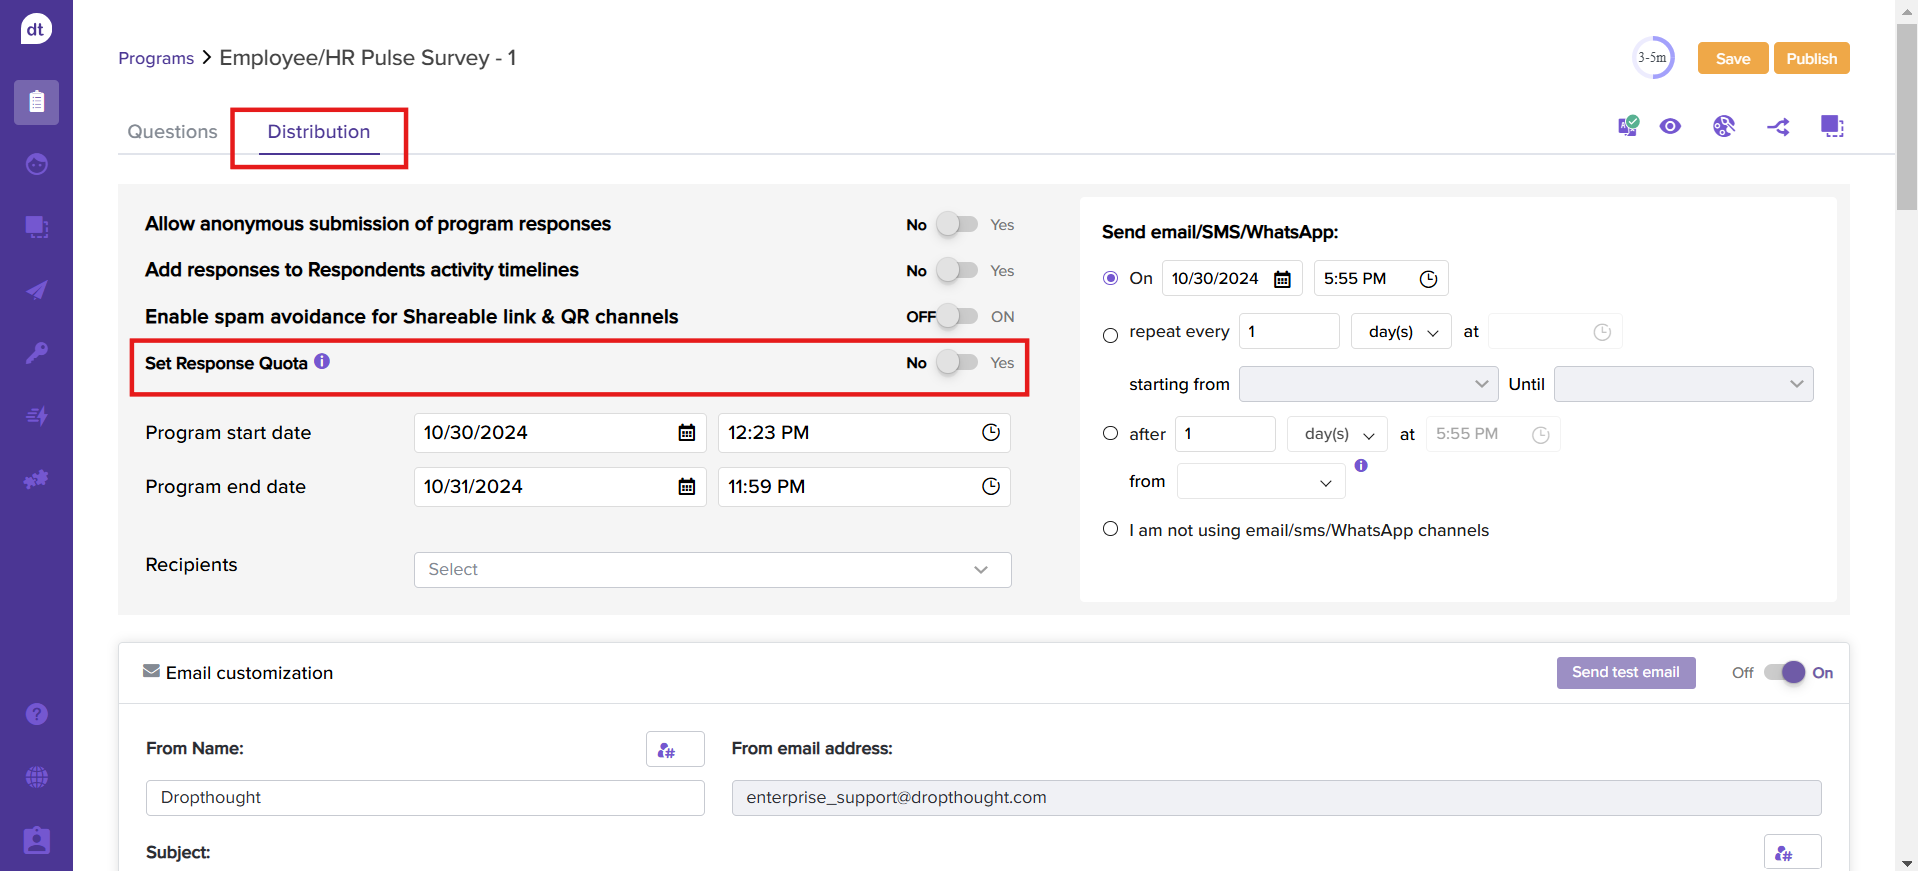
Set Up Response Quota
Enable the Set Response Quota toggle on the survey distribution page.
From the following pop-up, choose the response quota type.
Overall Response Quota
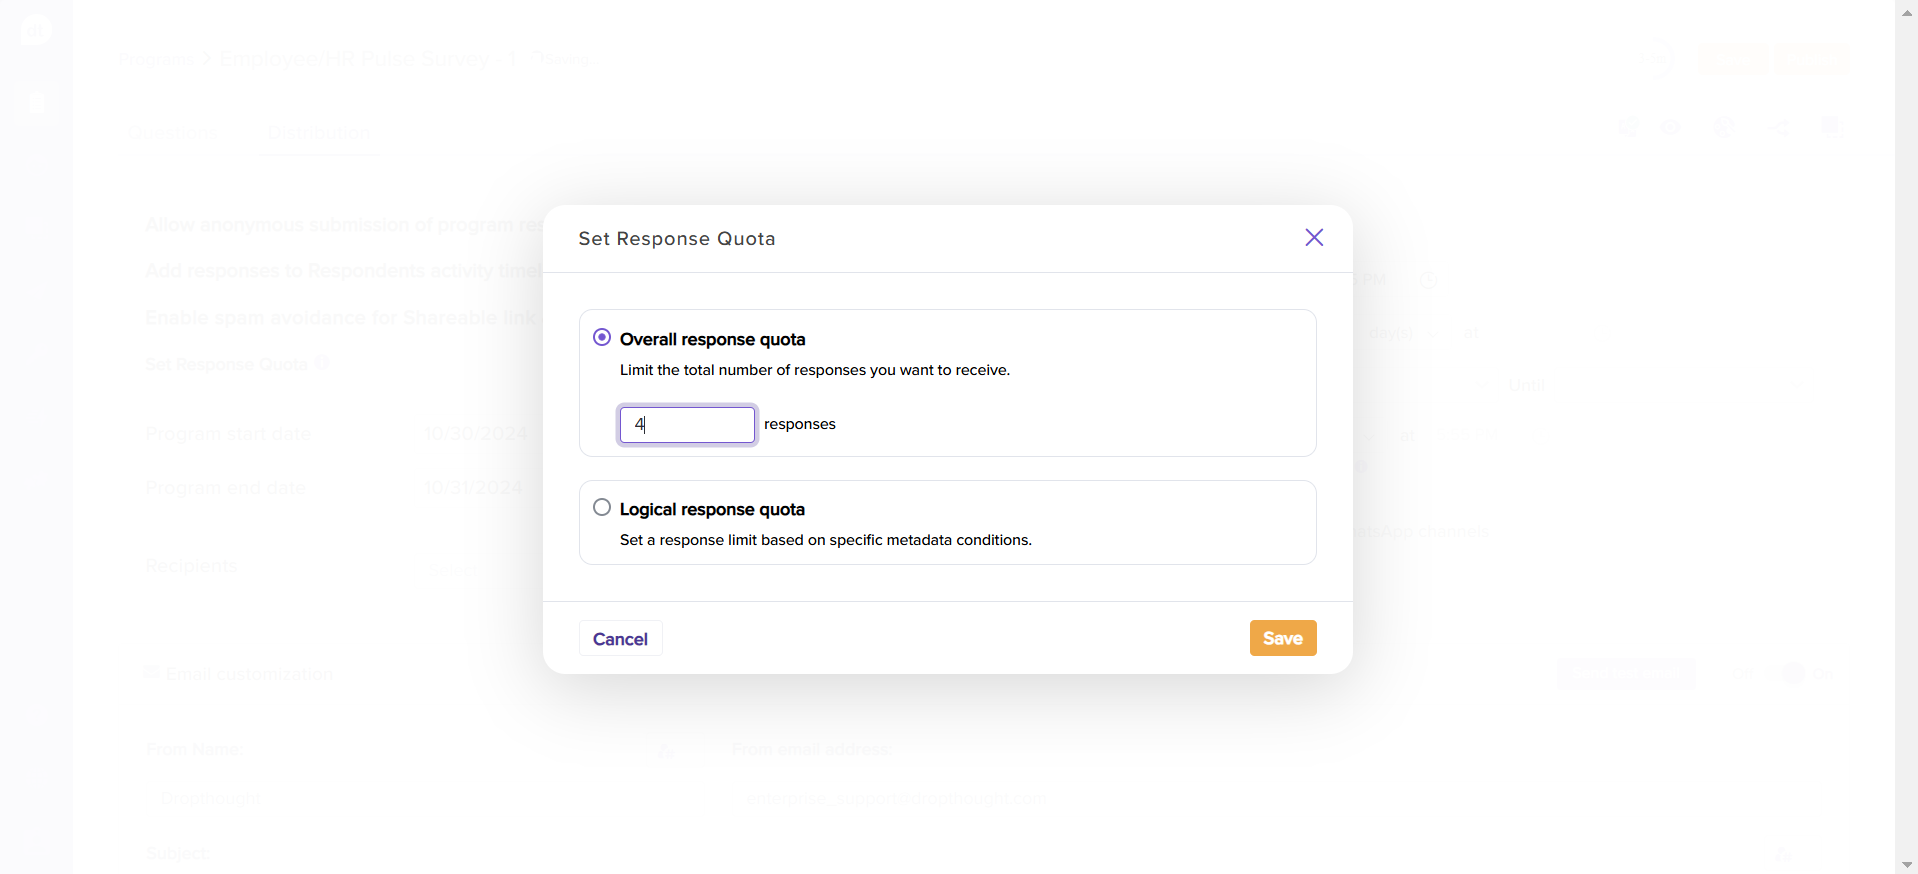
Select the overall response quota.
Enter the maximum number of responses you want to collect.
Click Save to confirm.
Logical Response Quota
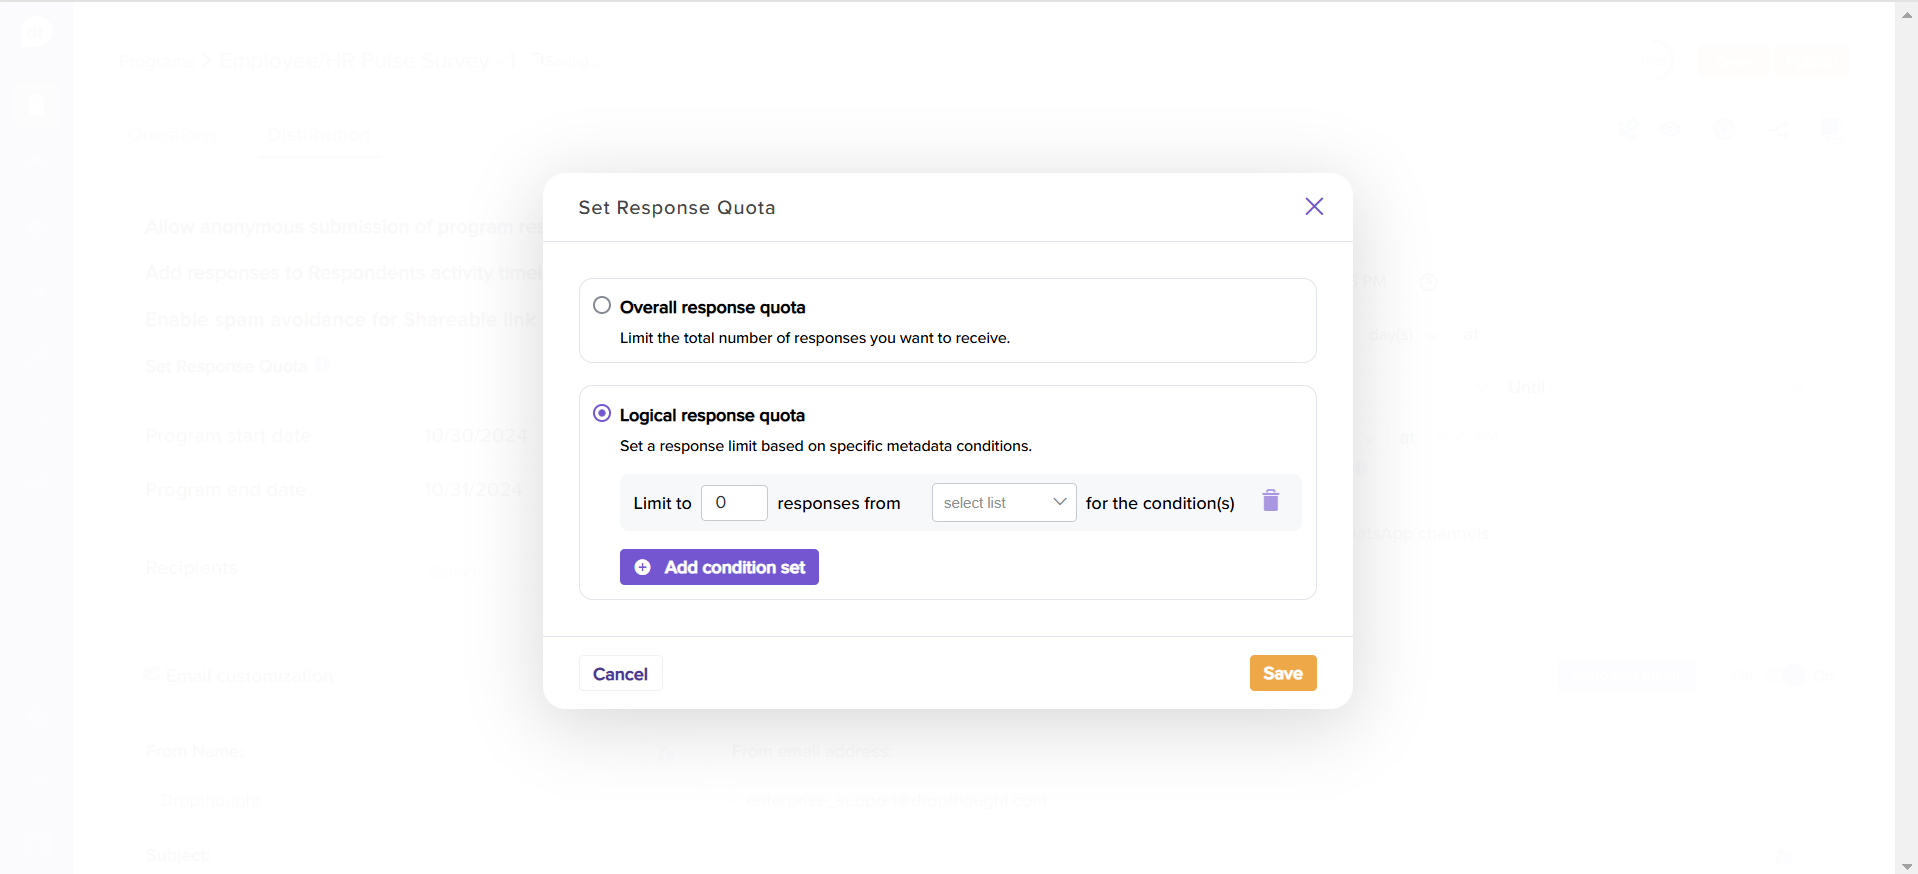
Select Logical response quota.
Enter the maximum count.
Select contact list/sublink/dynamic collector from the dropdown menu.
All the metadata headers within the selected list/sublink/dynamic collector will be listed. Select one.
Combine it with an operator.
Select the values at last.
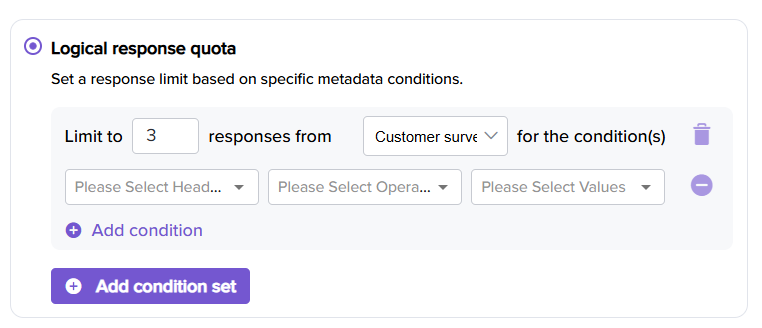
Add conditions by combining other metadata values.
Click Add Condition Set to add similar conditions based on different contact lists/sublink lists/dynamic collectors.
Click Save to save the quota.
Click on Publish to apply the quota to the program.
Note
You can only set one quota type—either Overall or Logical.
Once a quota is met, any further responses will trigger a message indicating the survey is no longer collecting responses.
Learn more: Recurring Program | Email | SMS | WhatsApp | QR Code | Shareable link | Kiosk
.png?inst-v=03d3d293-bd62-4aaf-8fc5-0f74d934cc6a)