Dropthought Kiosk
|
|
|


A Kiosk allows you to gather feedback by installing a physical device at the desired location. This comes in handy when gathering feedback from an undefined set of respondents.
For instance, you can use a kiosk to gather feedback from stadiums, shopping malls, cinema halls, etc.
Dropthought’s Kiosk feature allows you to create a program on the Dropthought web app and enable it on the desired kiosk. Like Shareable Links and QR codes, you can generate single or multiple kiosk links for the same program link.
This article will help you understand:
How do you enable the kiosk as a distribution channel for your Dropthought program?
How do you generate single and multiple links for kiosks from the Dropthought web application?
How do you enable and disable kiosk links?
How do you avoid spam feedback?
How do you view a published program on Kiosk?
Pre-requisite: Link the Kiosk App to your organization’s Dropthought Enterprise App.
Types of Kiosk Links
Single Link or QR Code: A single link or QR code is generated once and can be used for any purpose.
Multiple Links or QR Codes: Multiple links or QR codes are created from a list, with a unique link for each item. This lets you assign different links or QR codes to various locations, devices, or stores.
Note
You cannot connect the Kiosk from a web app.
You can only enable the Kiosk channel for the programs created on the web app.
If you haven’t created a program yet, get started now!
Learn more: Create a Program.
Generate Single Kiosk Link
Follow the below steps to enable a kiosk for a program from the distribution page:
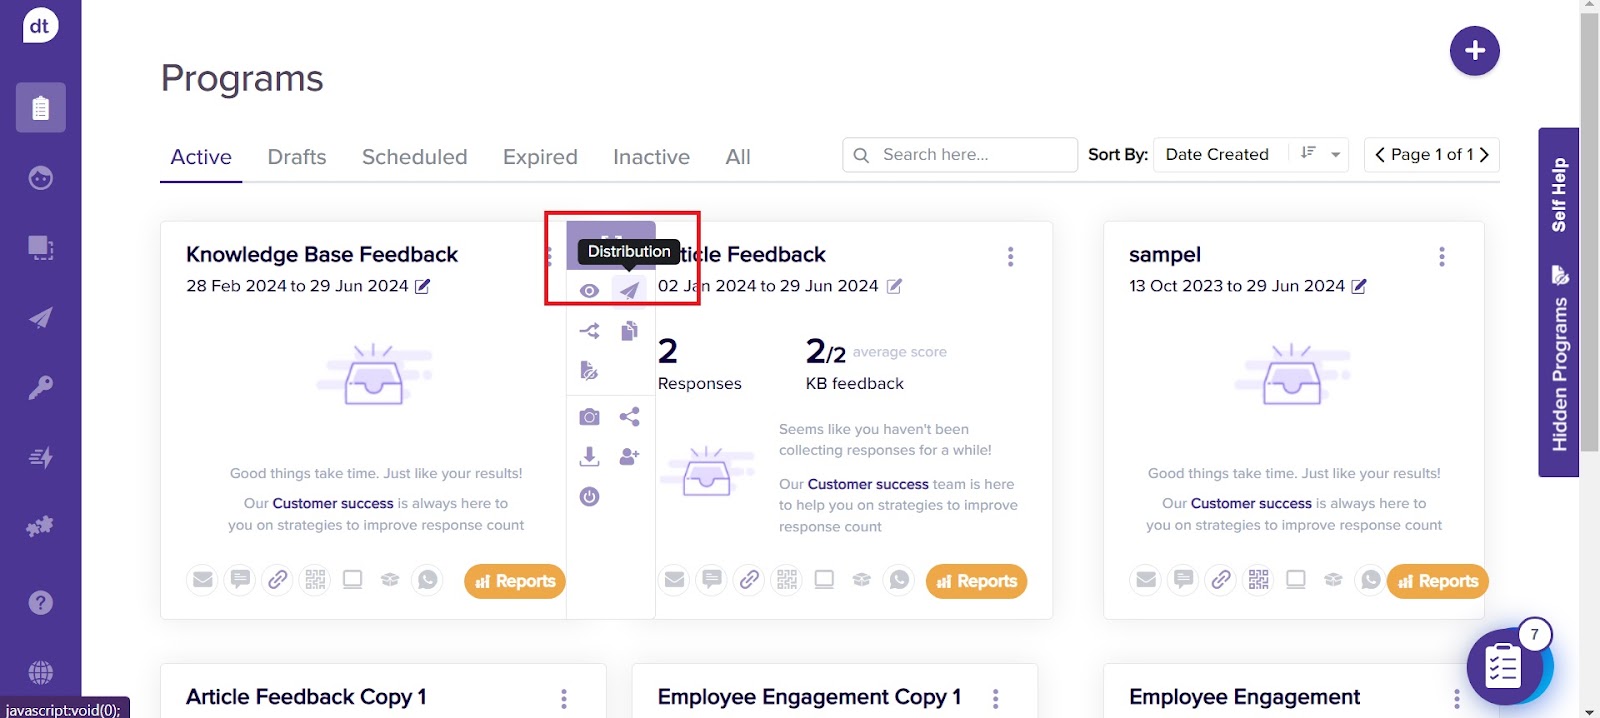
Navigate to the required program’s Distribution tab.
Set up the program activation time and date. Follow steps 1 to 8 with the Distribution tab article.
Toggle the Kiosk button ON by finding and switching on the Kiosk mode button to enable additional settings.
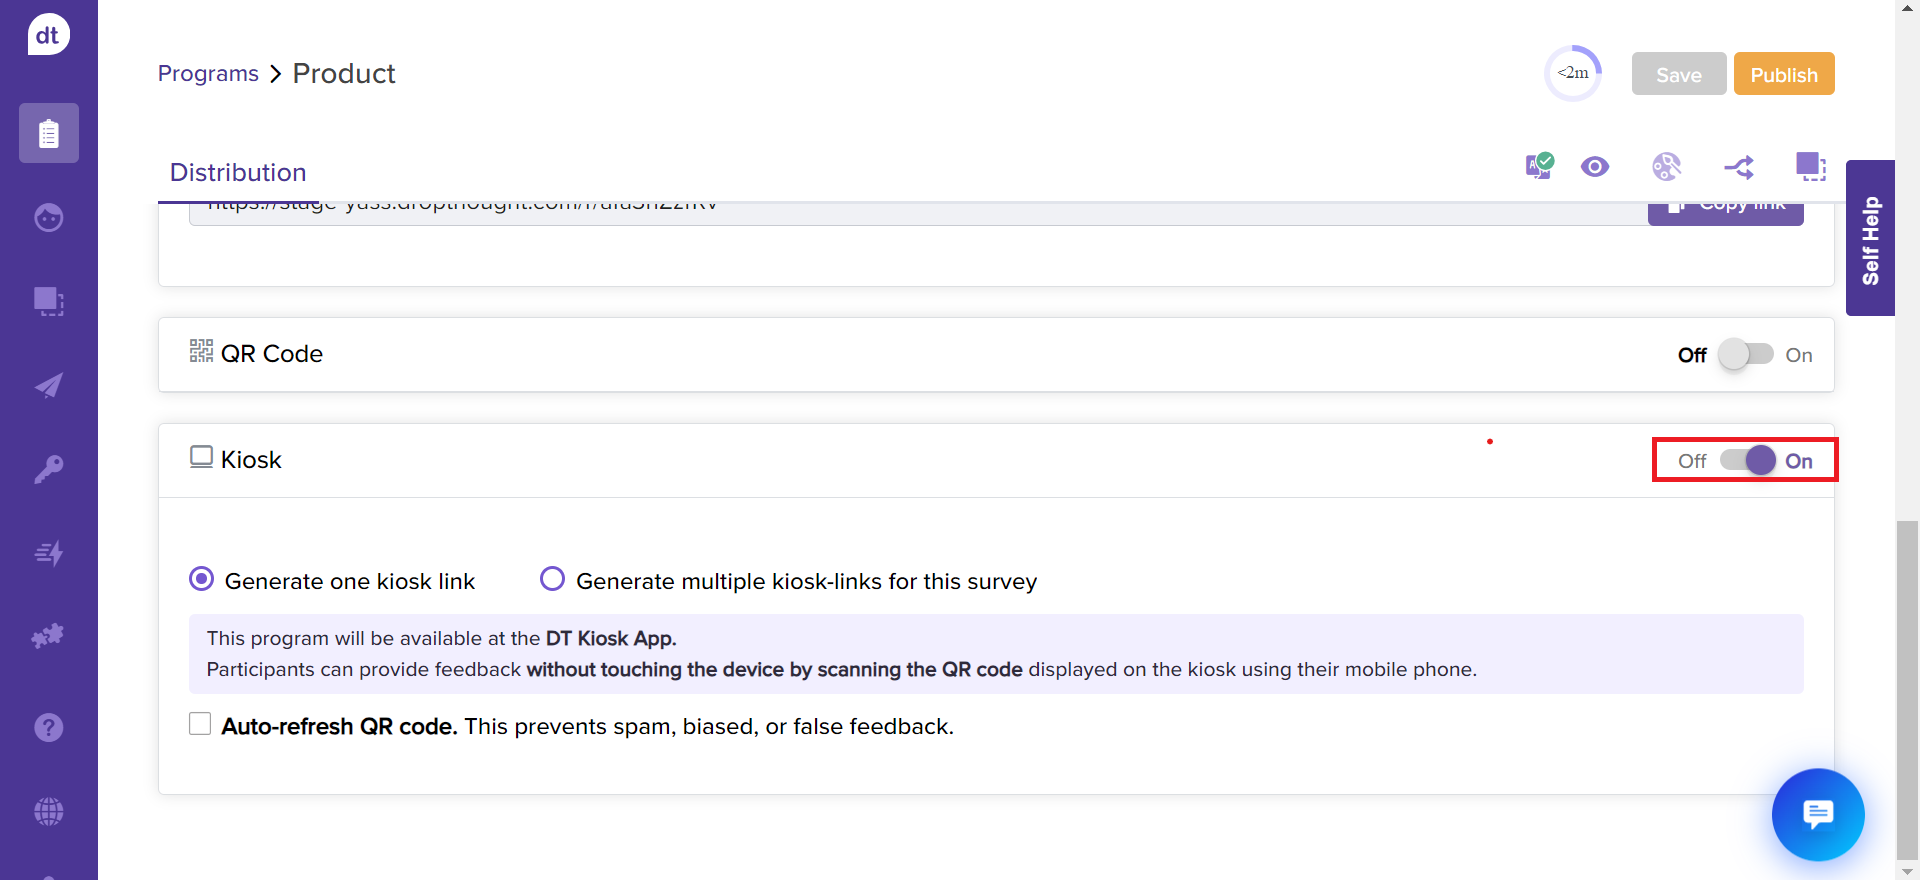
Once Kiosk mode is enabled, you will get options for one and multiple kiosk links.
Click on Generate one kiosk link. The survey will be available on the connected Kiosk device upon publishing.
If you cannot find the option to auto-refresh. Please get in touch with the CS team.
To avoid spam feedback, you can set the QR code to refresh at a certain time interval.
Check the box for Auto-refresh QR code.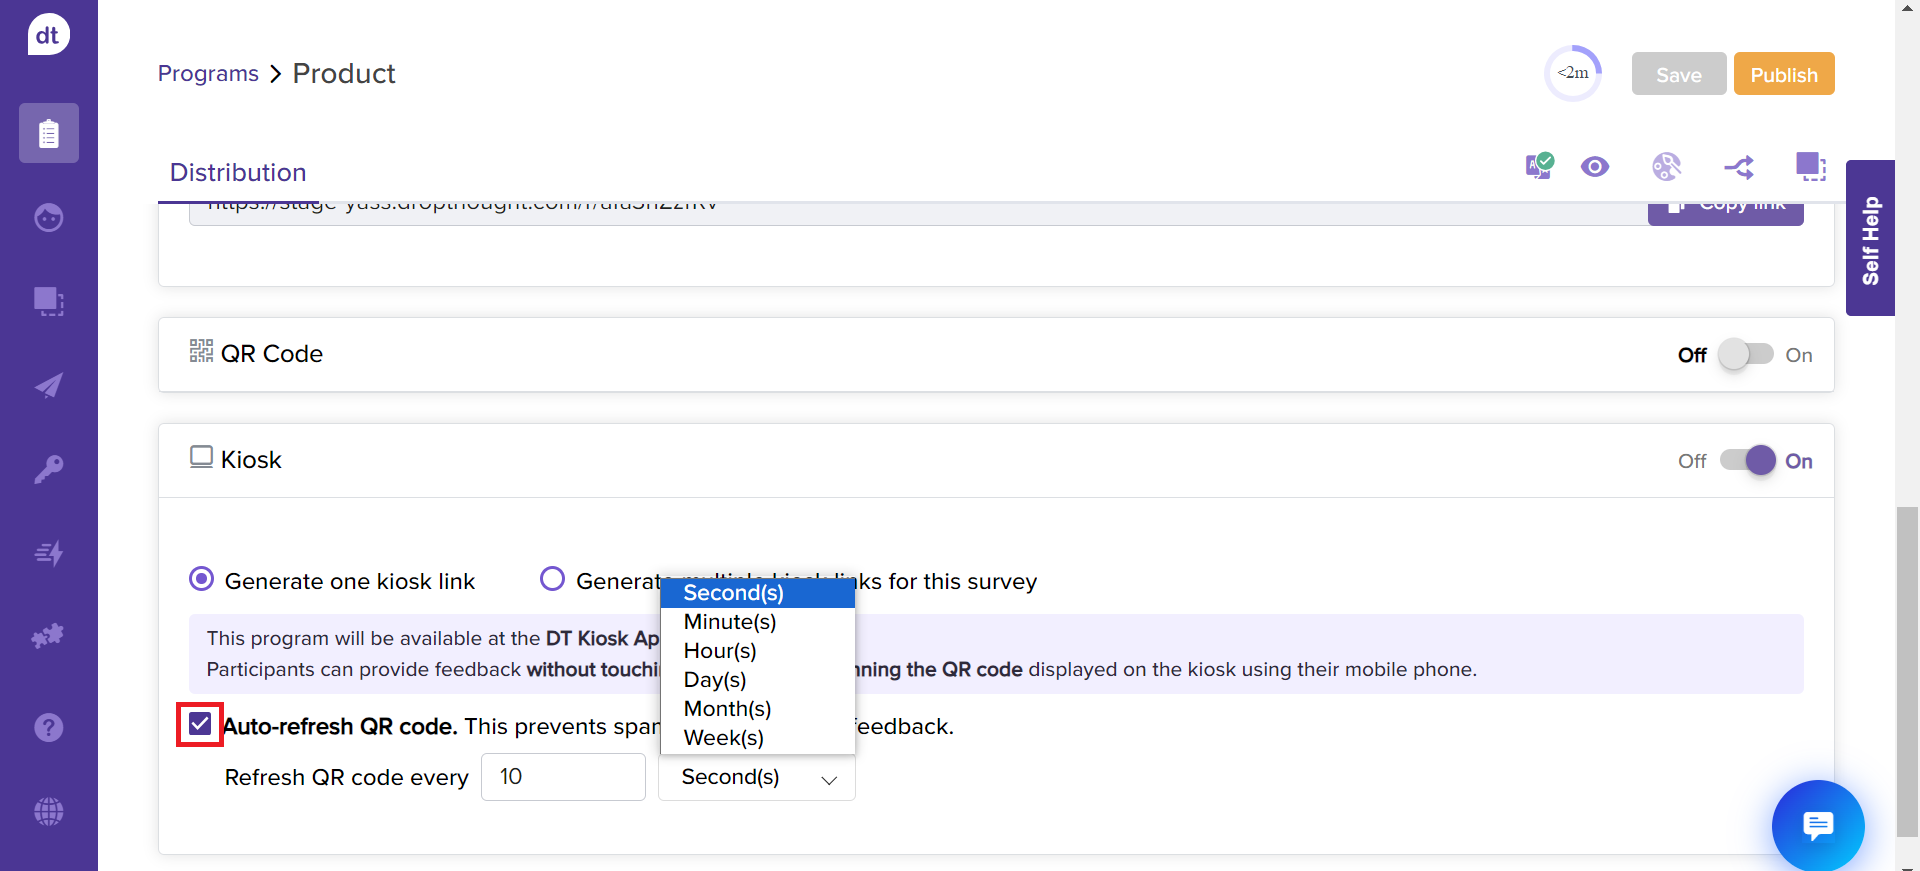
From the drop-down menu, choose the refresh interval, such as in seconds, minutes, hours, days, months, or weeks.
Generate Multiple Kiosk Links
Follow the above steps 1 to 4 and further:
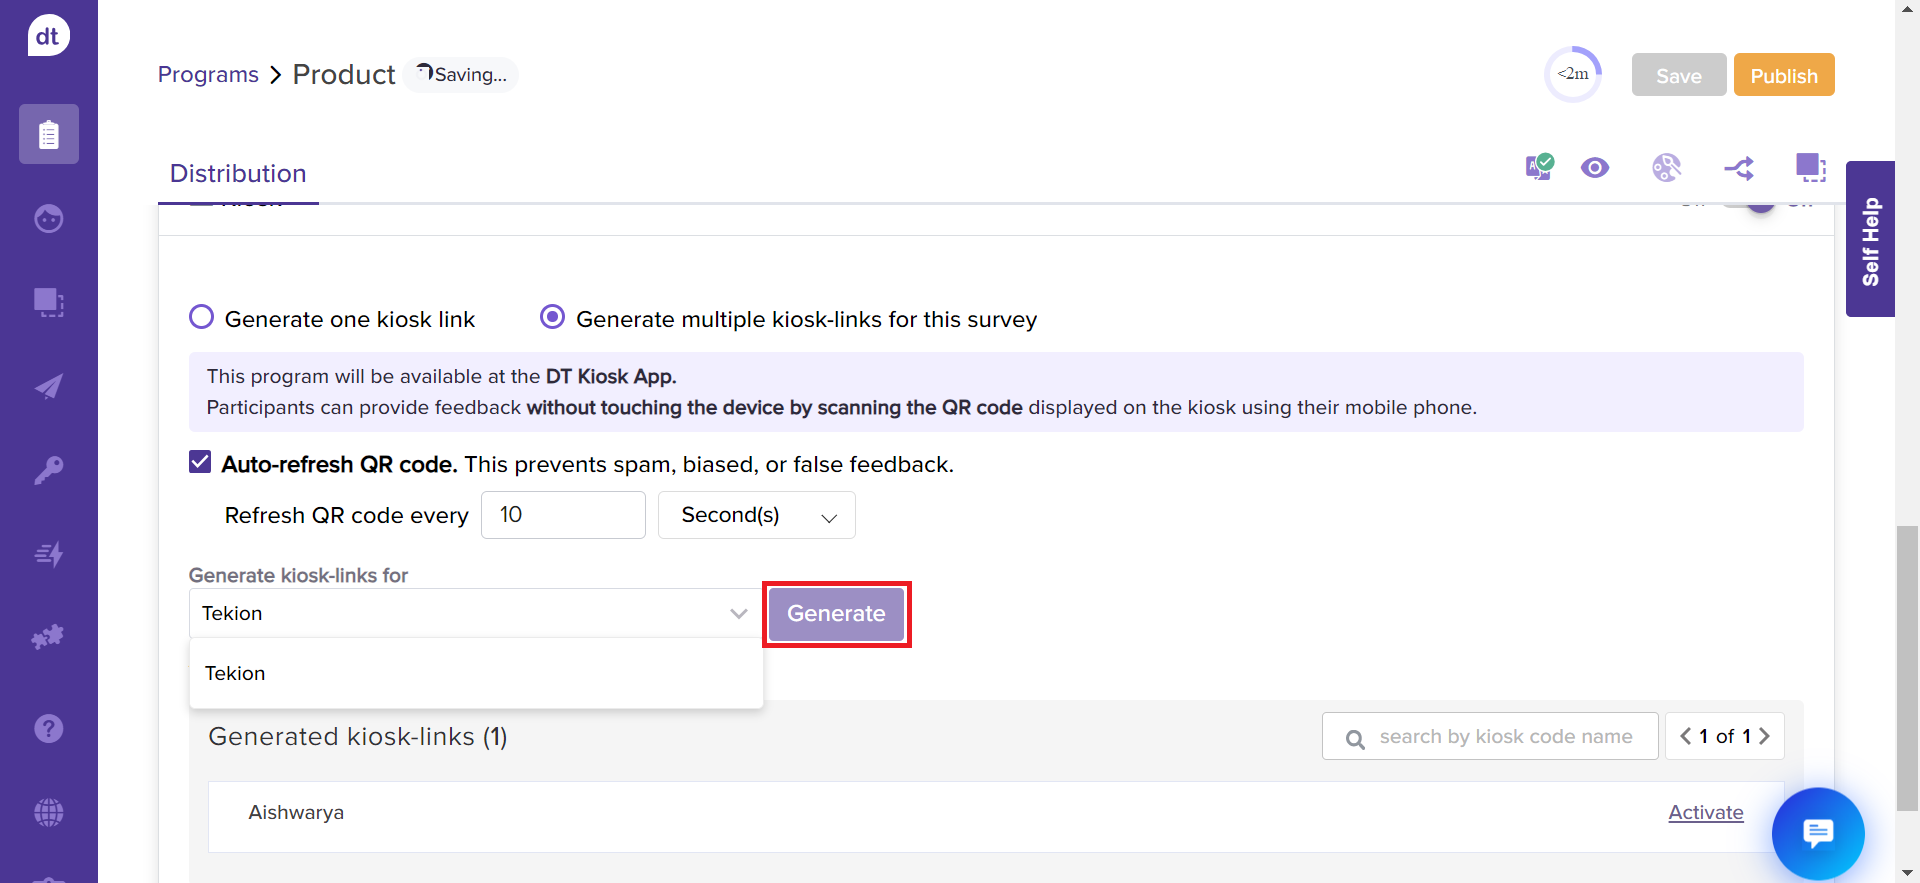
Click on Generate multiple kiosk-links for this survey.
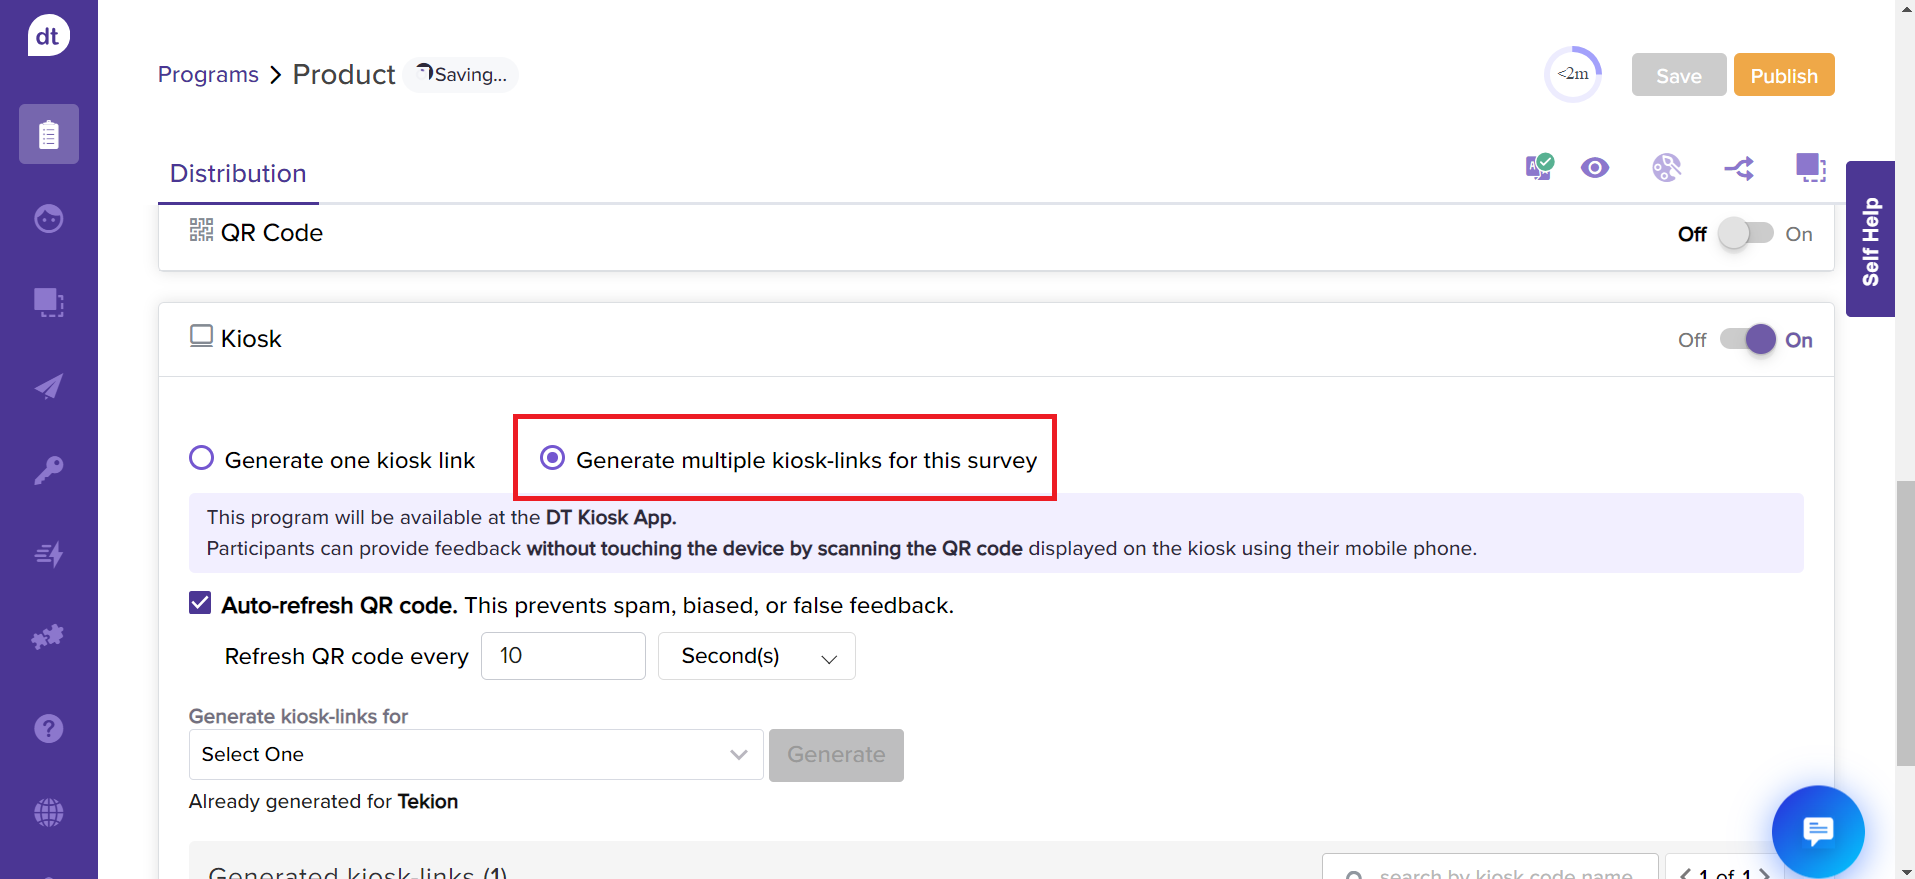
Further, select a sub-link list from the dropdown menu.
This will create kiosk links for all the sub-link records from the selected list.Click on Generate to create them.
To avoid spam feedback, you can set the QR code to refresh at a certain time interval. Check the box for Auto-refresh QR code.
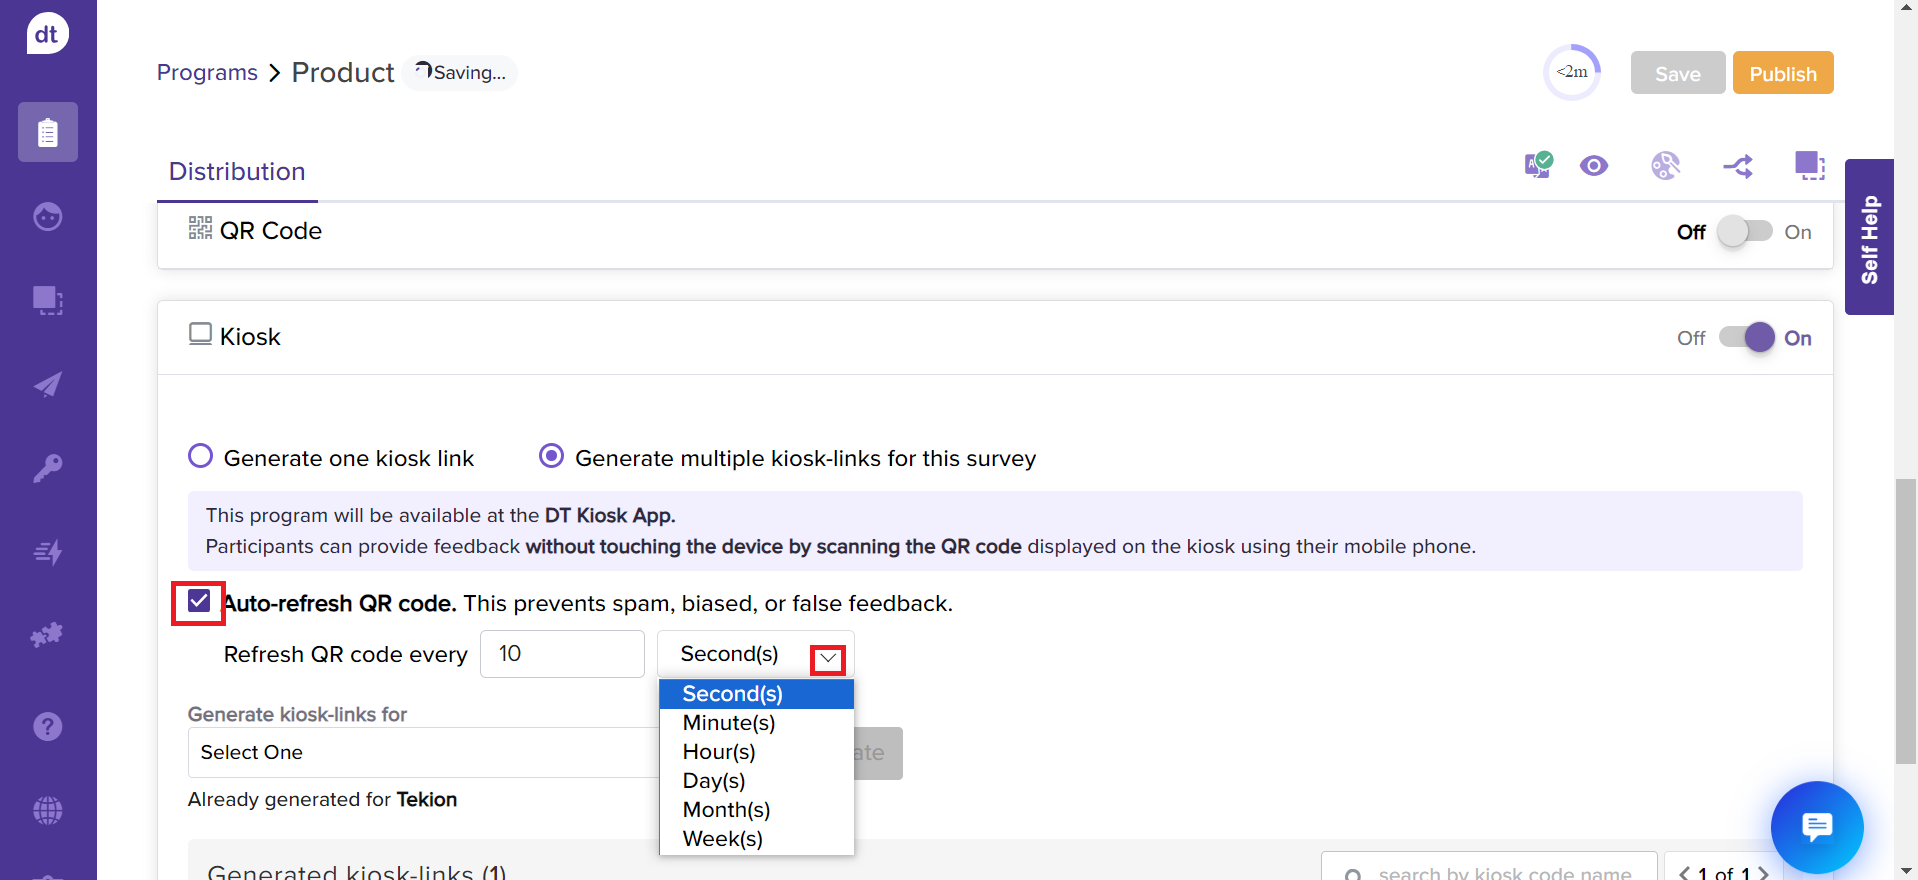
From the drop-down menu, choose the refresh interval, such as in seconds, minutes, hours, days, months, or weeks.
Pre-requisite: If you cannot find the option to auto-refresh. Please get in touch with the CS team.
Activate & Deactivate Multiple Kiosk Links
You can activate or deactivate kiosk links anytime. Follow the below steps to activate and deactivate multiple kiosk links:
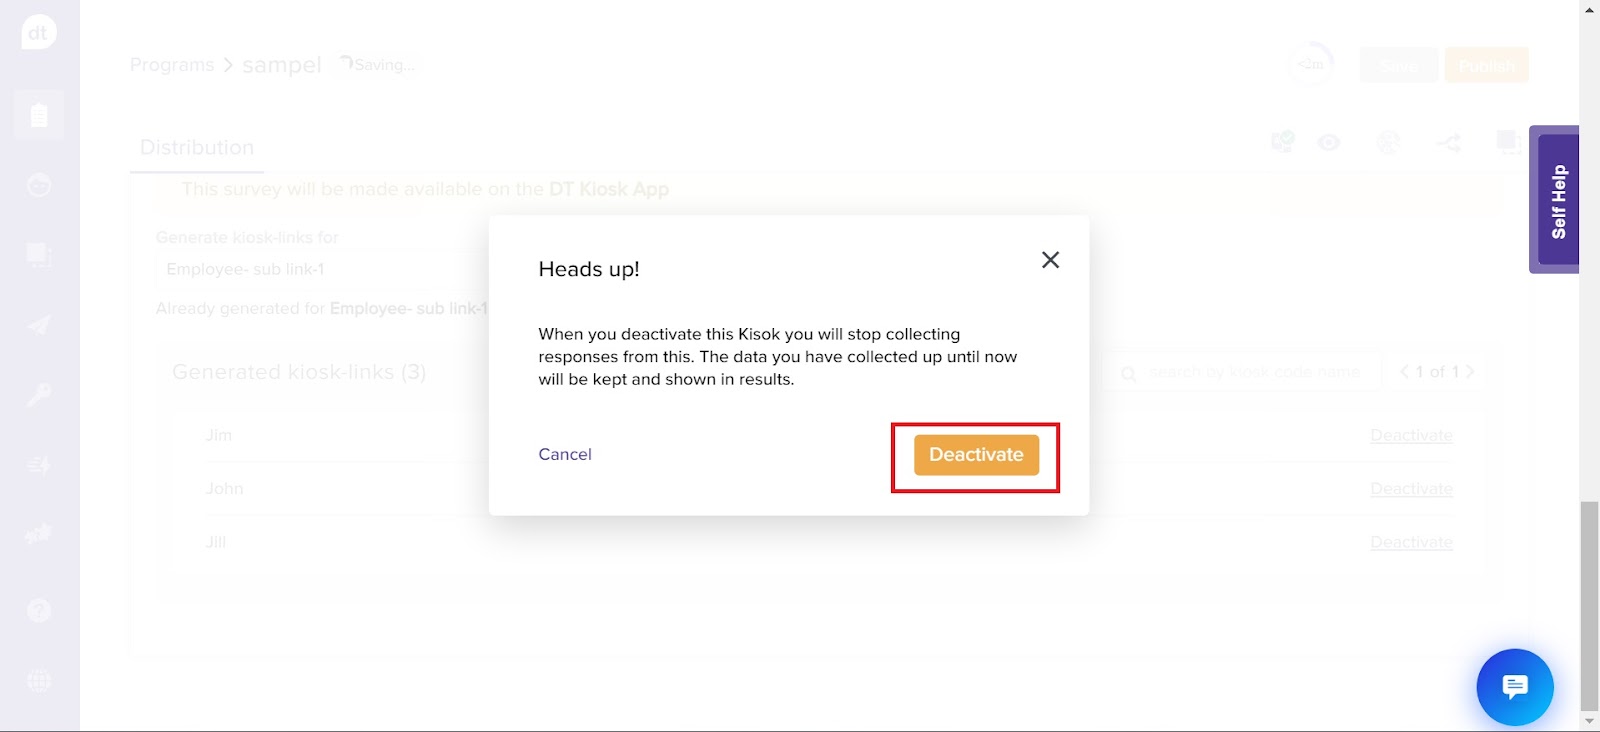
Click on Deactivate provided against the sub-link name to deactivate.
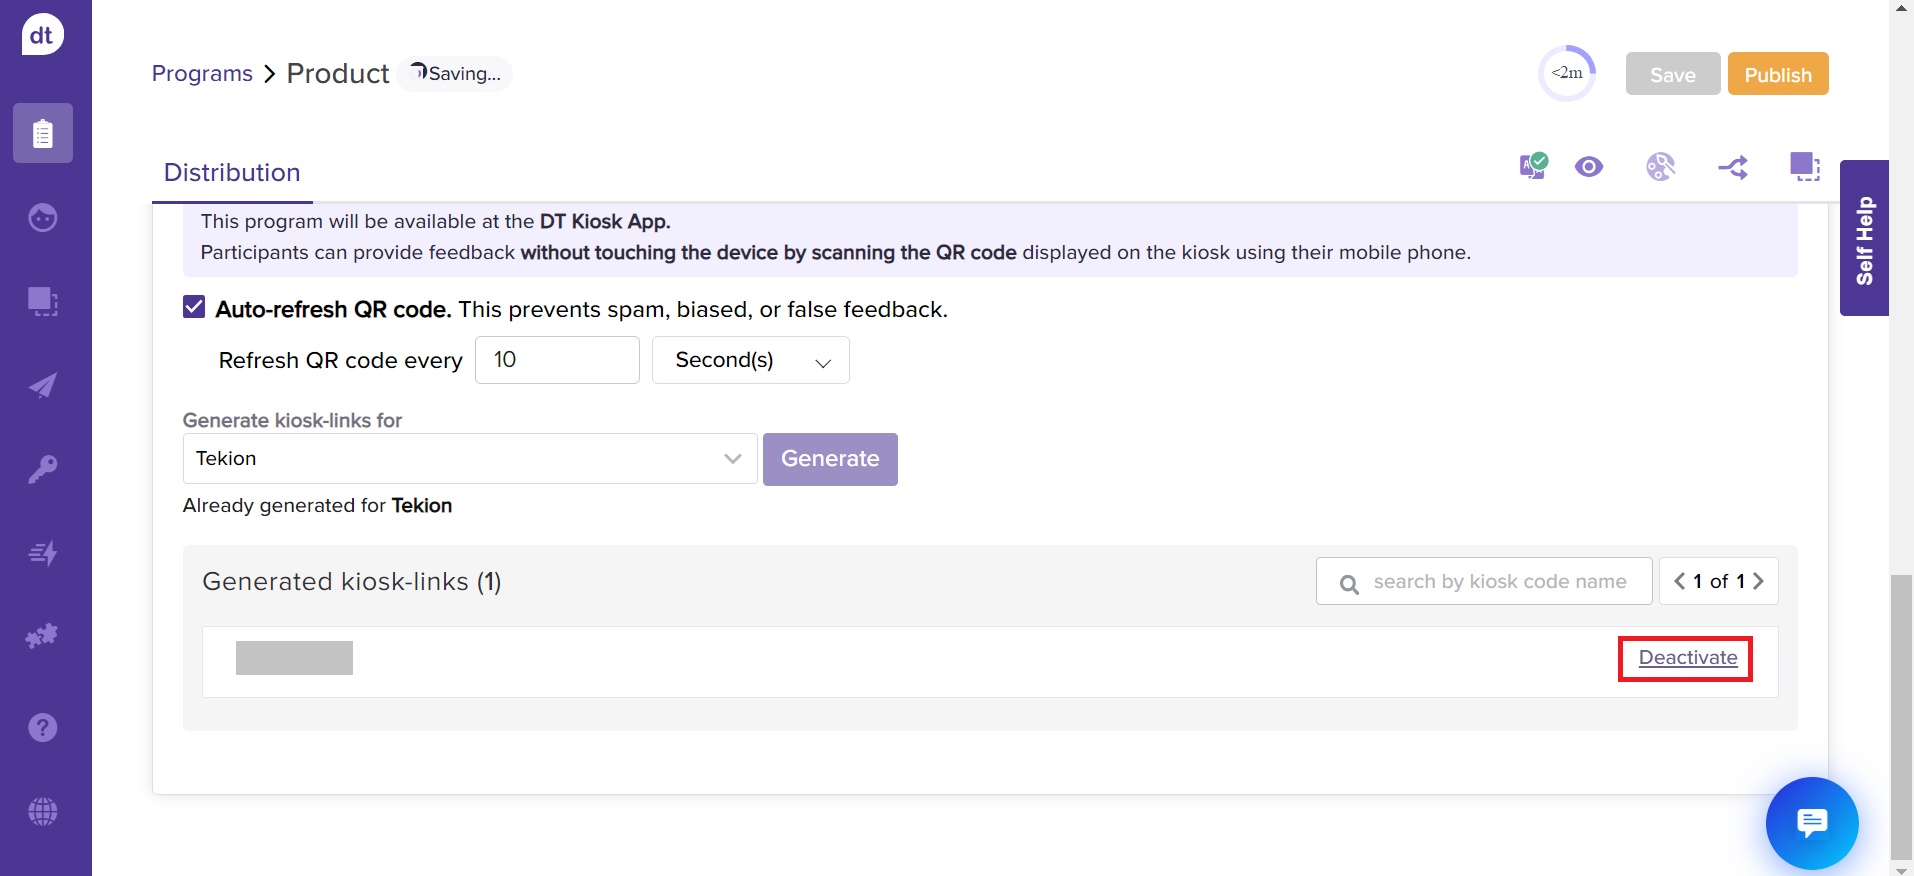
From the following pop-up, click on Deactivate.
Please note that this will stop collecting responses but keep previous data.The Deactivate link will be replaced with Activate.
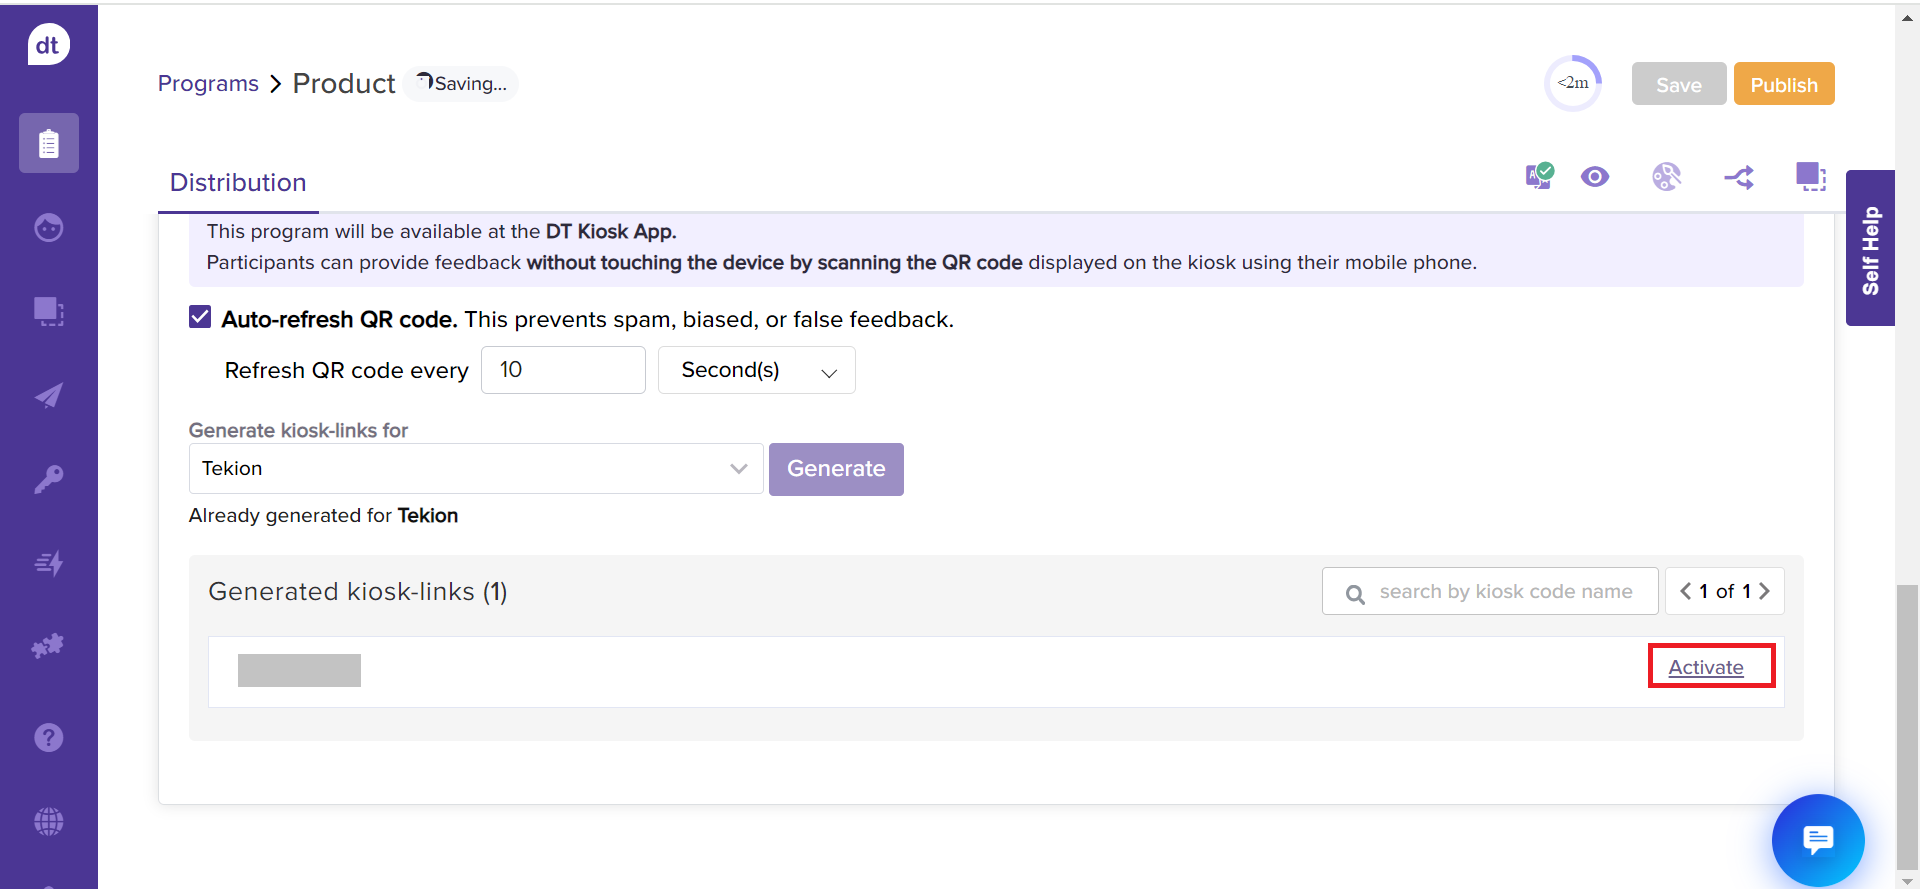
Click on Activate to resume collecting responses for the sub-link.
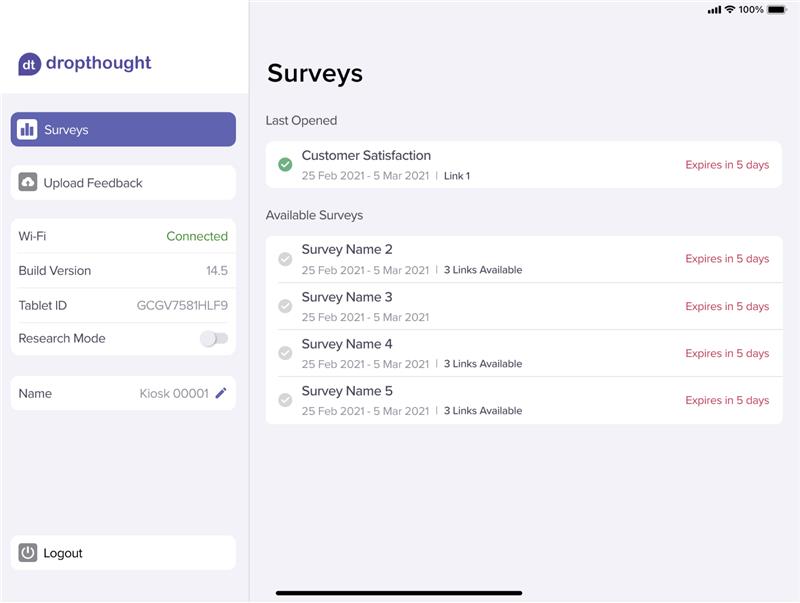
View Published Program on Kiosk
To view the published program on the linked Kiosk, open the Dropthought Kiosk App and visit the Surveys tab.
.png?inst-v=03d3d293-bd62-4aaf-8fc5-0f74d934cc6a)