Contact List
|
|
|


Contact lists can hold names, emails, and other properties of people (e.g. customers, employees, students) you want to send surveys and collect feedback from. Once created, you can use them directly for sending out programs via email or SMS or WhatsApp channels.
This article will help you understand:
How do you create a new contact list?
What are the various methods of adding new contacts to a contact list?
What are the details that can be included in a contact list?
Create a new contact list
A contact list is like a folder that contains the contact details of one or more recipients. We recommend you group contacts based on how you would like to send out programs.
You are an HR Head using Dropthought to send quarterly employee experience surveys. Each geography employee has a different set of questions to answer; hence, you have created separate surveys.
Using Dropthought’s Lists feature, you can group the employees of one geography within one Contact List and name the list accordingly.
As the icing on the cake, if you have the contact list already created on a spreadsheet, you can import it directly.
Follow the below steps to create a new contact list:
Navigate to the Lists on the left side panel.
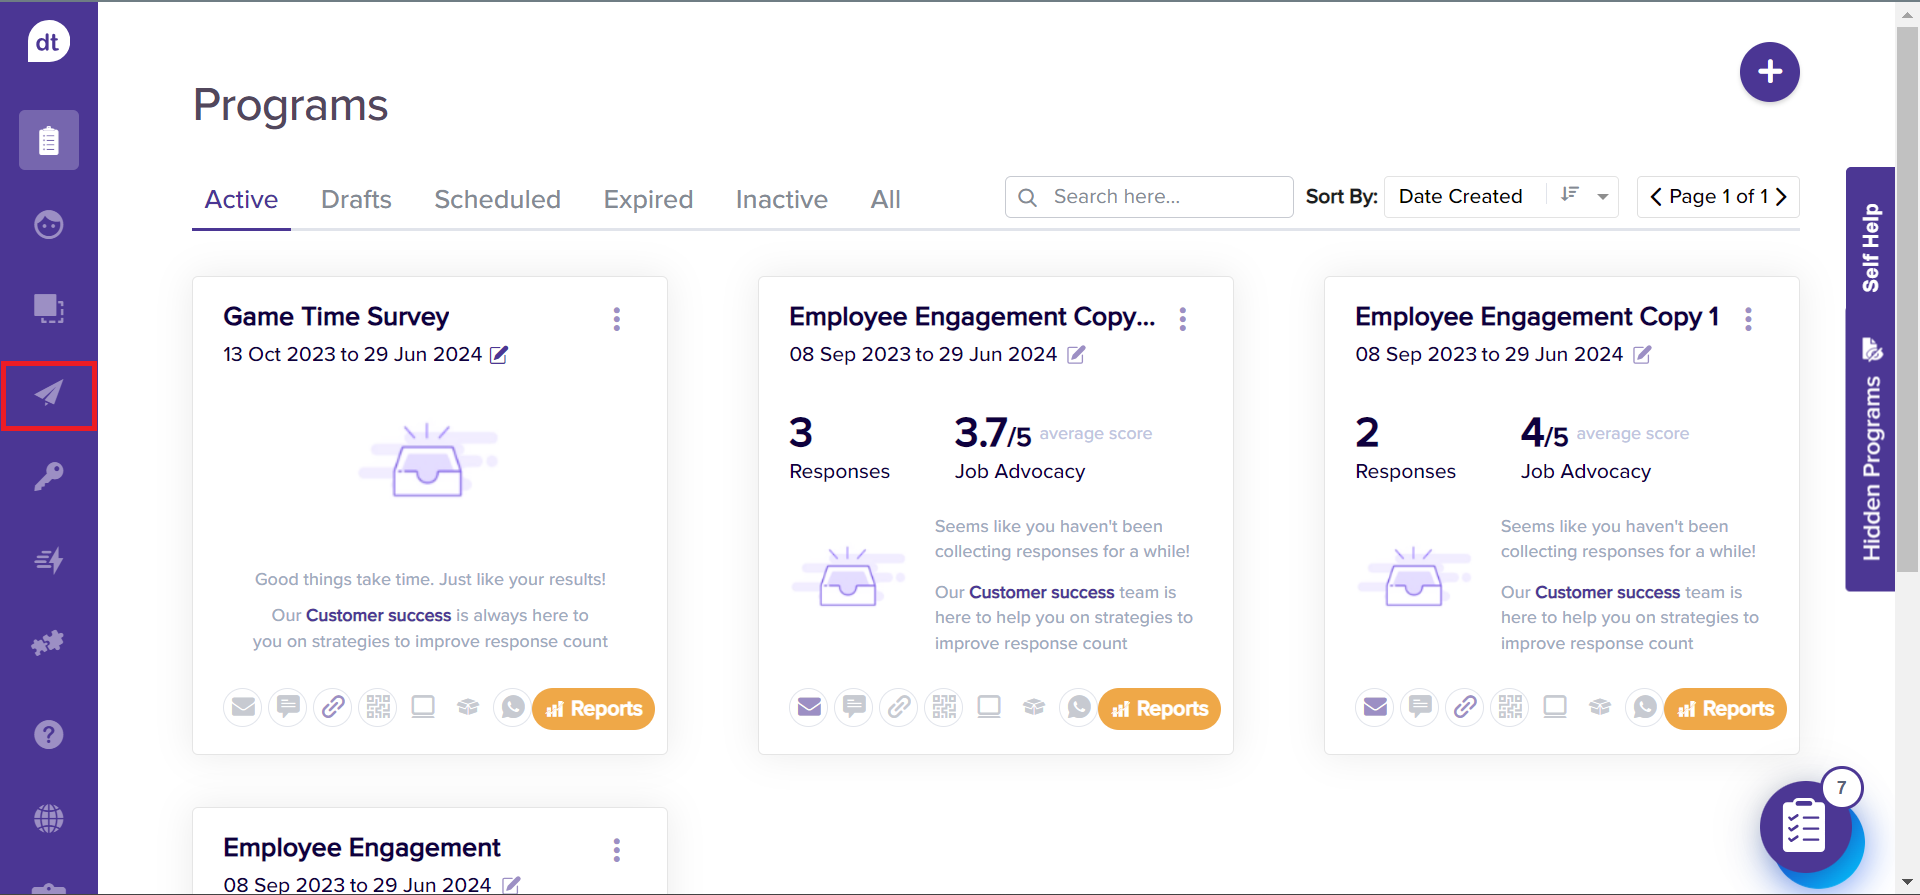
Select Lists from the menu.
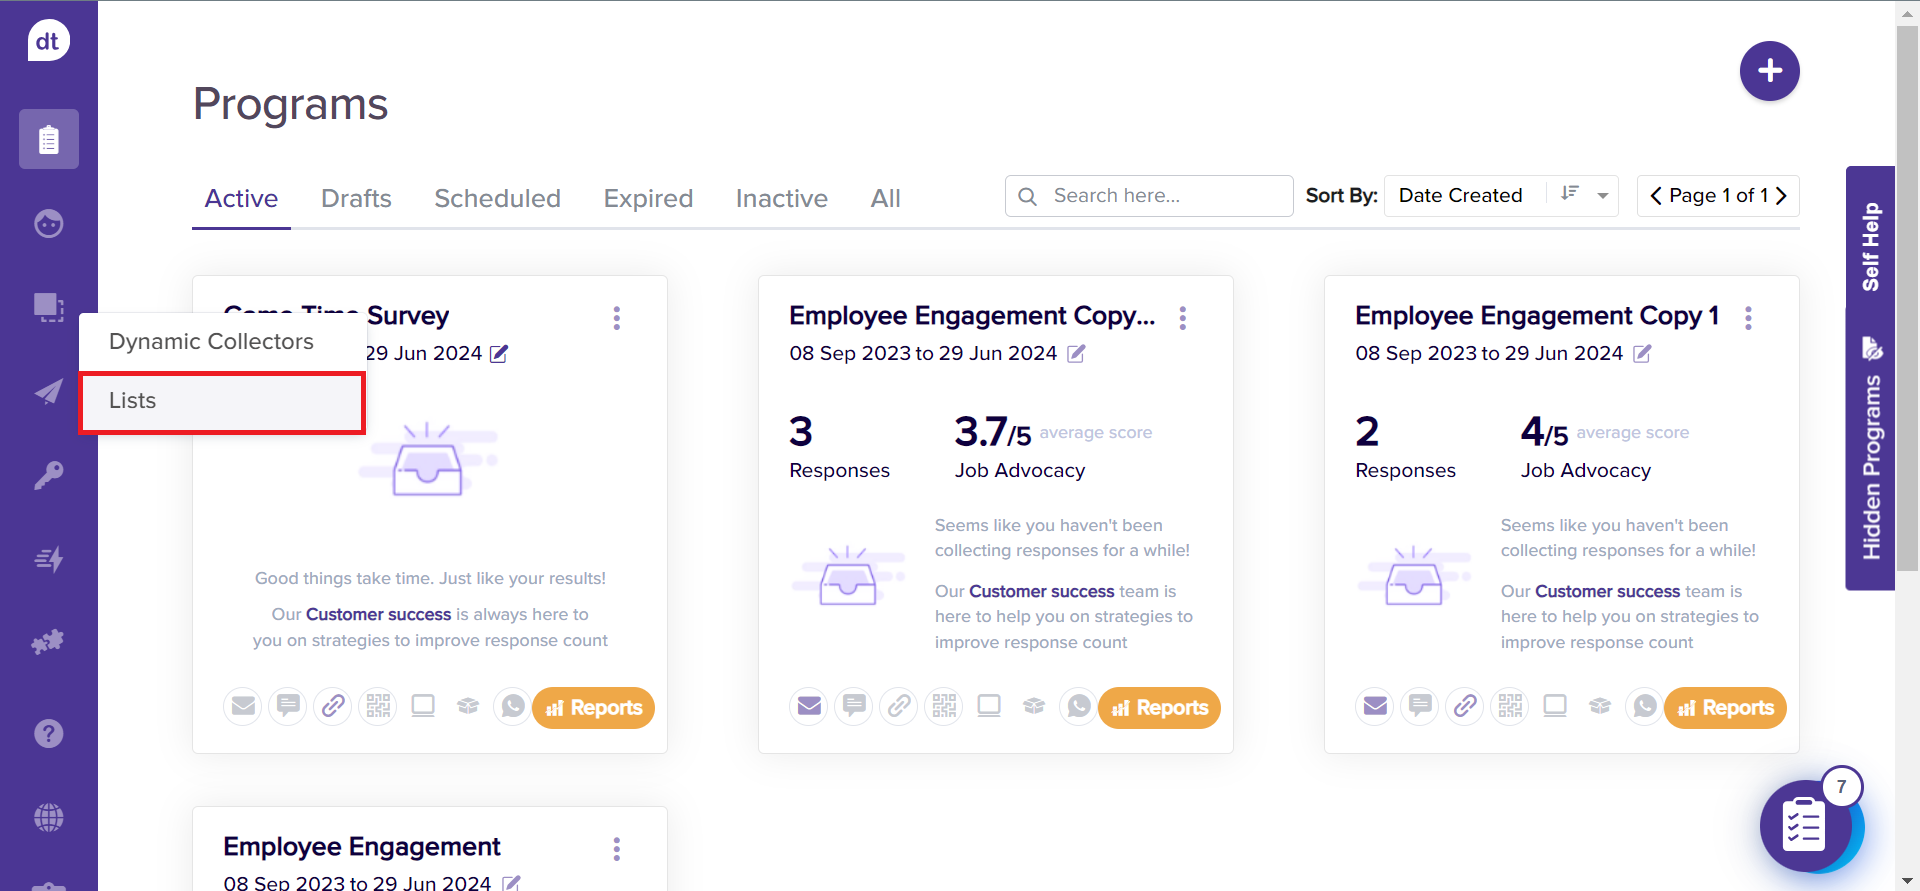
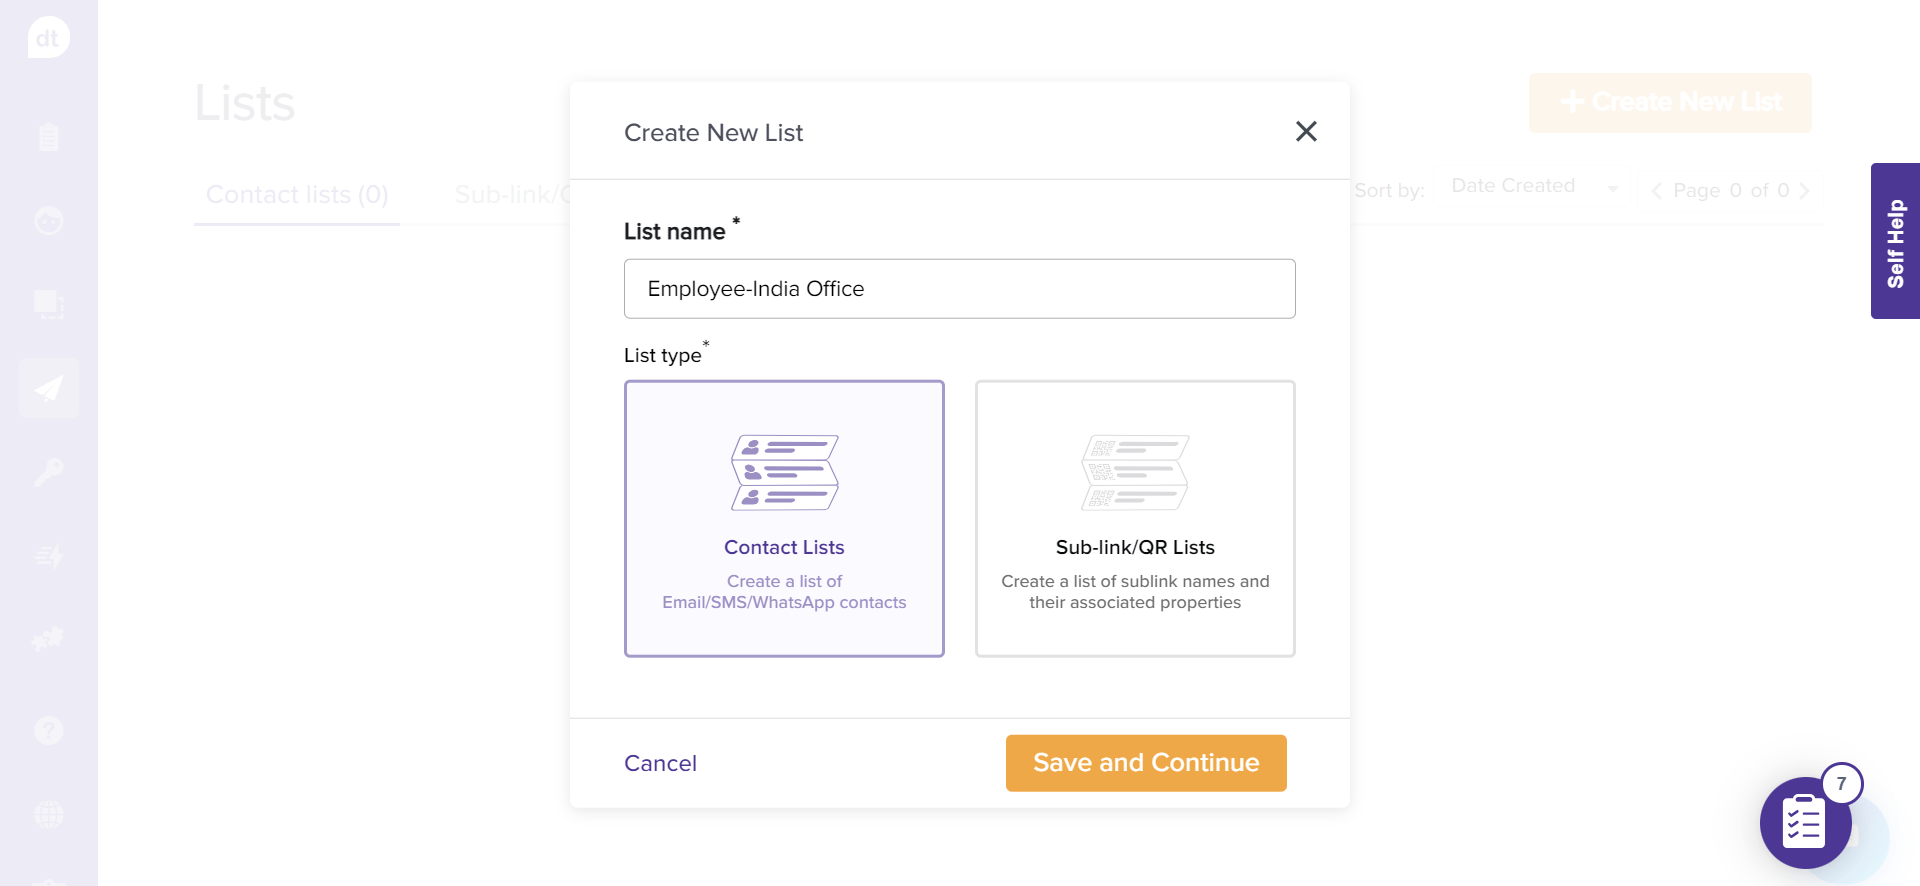
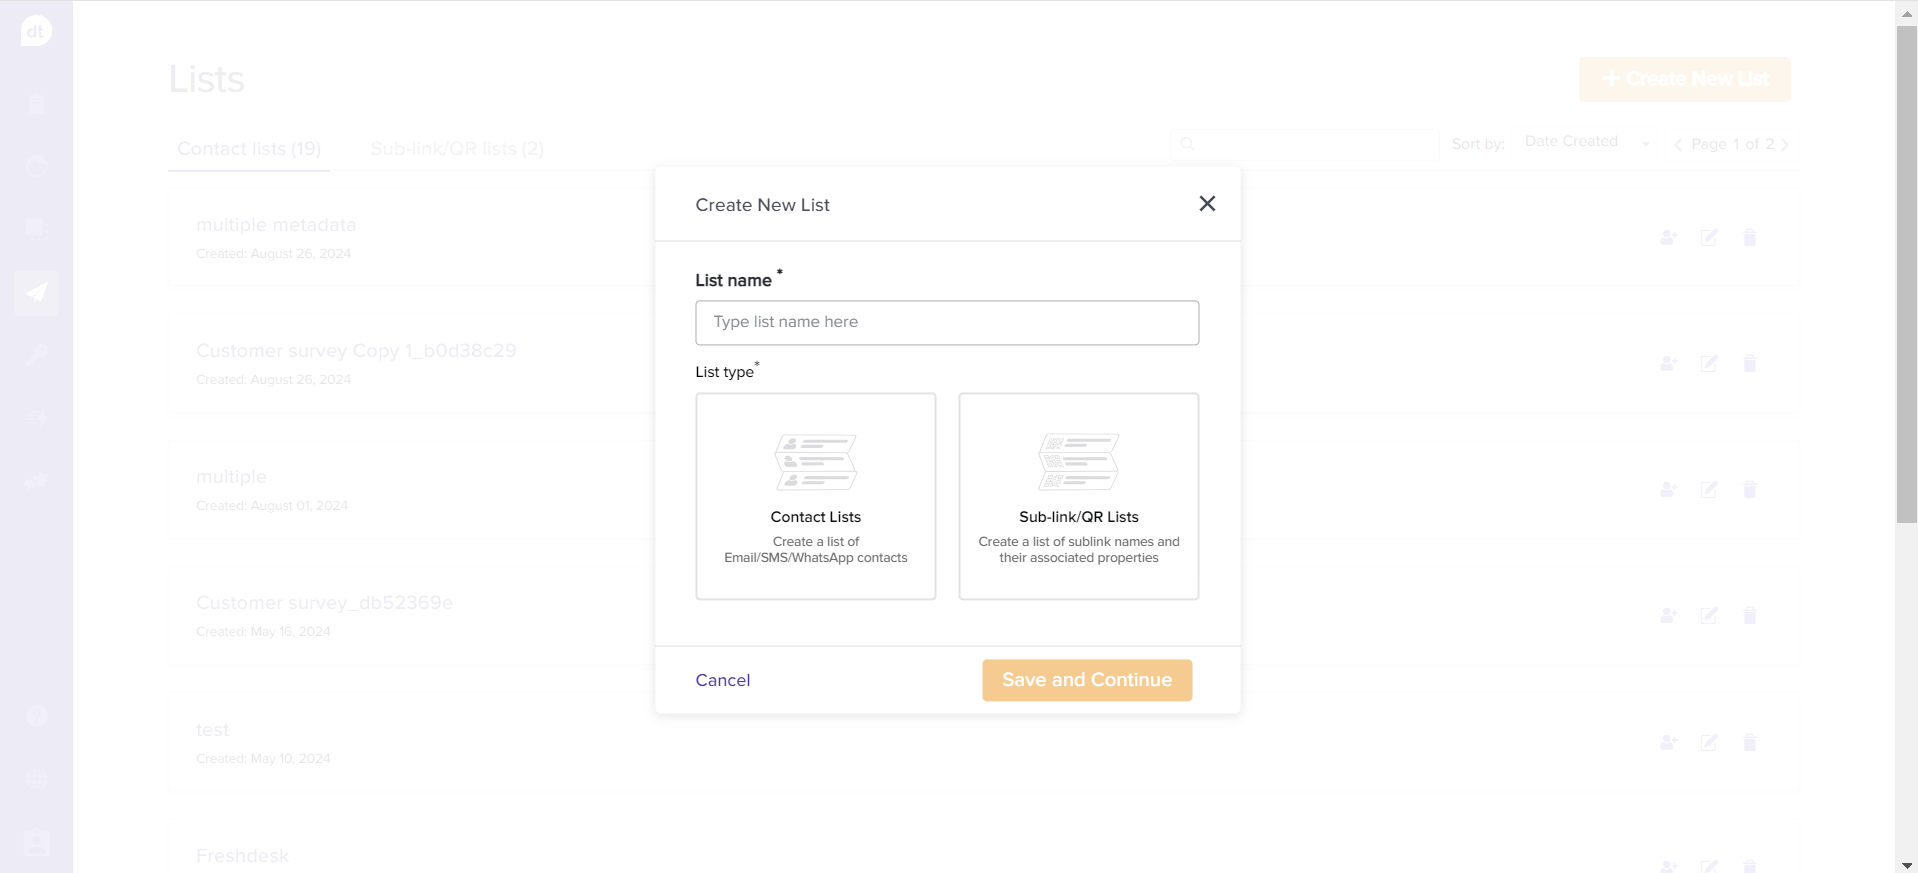
Click +Create New List to create a folder for adding your recipient contacts.
Enter a Contact List Name and select the Contact List option from the following pop-up.
Click on Save and Continue. You have successfully created a Contact List!
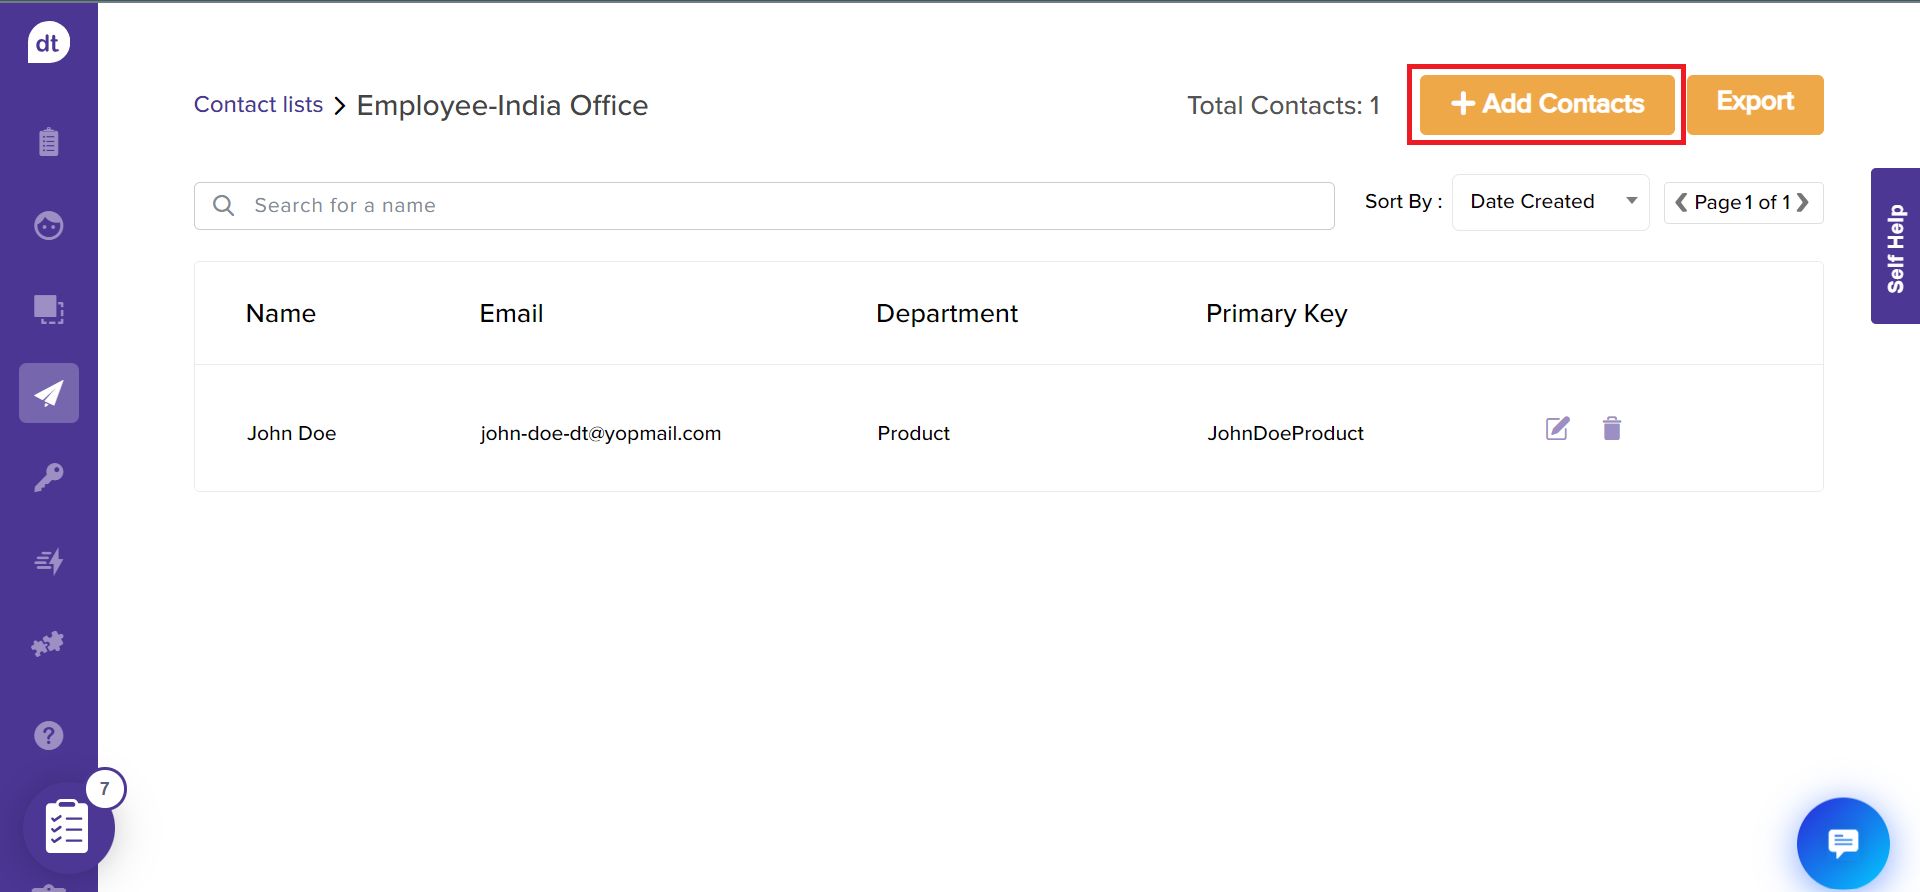
Click on + Add Contacts from the following screen to add contacts to the contact list.
Create a new list from distribution tab
Dropthought allows you to create a new list while setting up your survey’s distribution channels, too!
Look up Recipients on the distribution tab within a program.
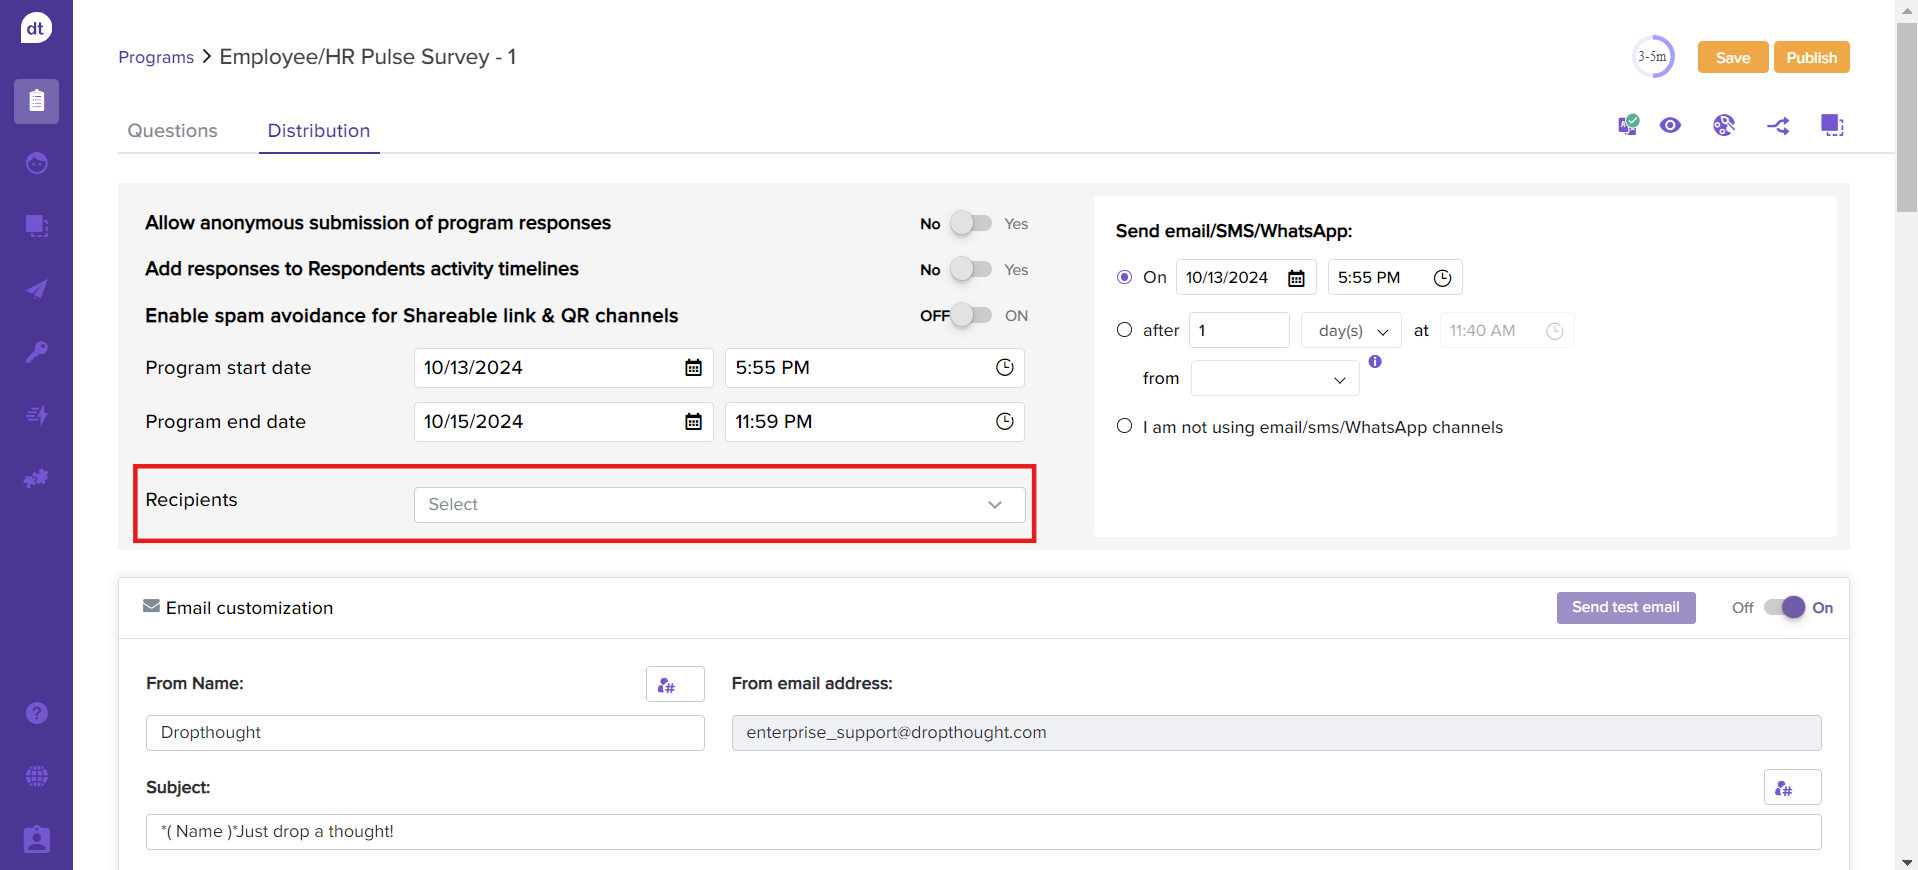
Click on the drop-down menu.
.You will find an option to +Create new list.

It will open a list creation pop-up for you: Lists or Sub-Links.
Methods to Add Contacts to the Contact List
Now that you have created a contact list, it's time to add contacts/recipient details. There are various ways in which you can do the same.
Click on the required method to learn more about how to add contacts to the contact list.
Add Contact to a Contact List
To add a new contact to an existing contact list. Follow the below steps:
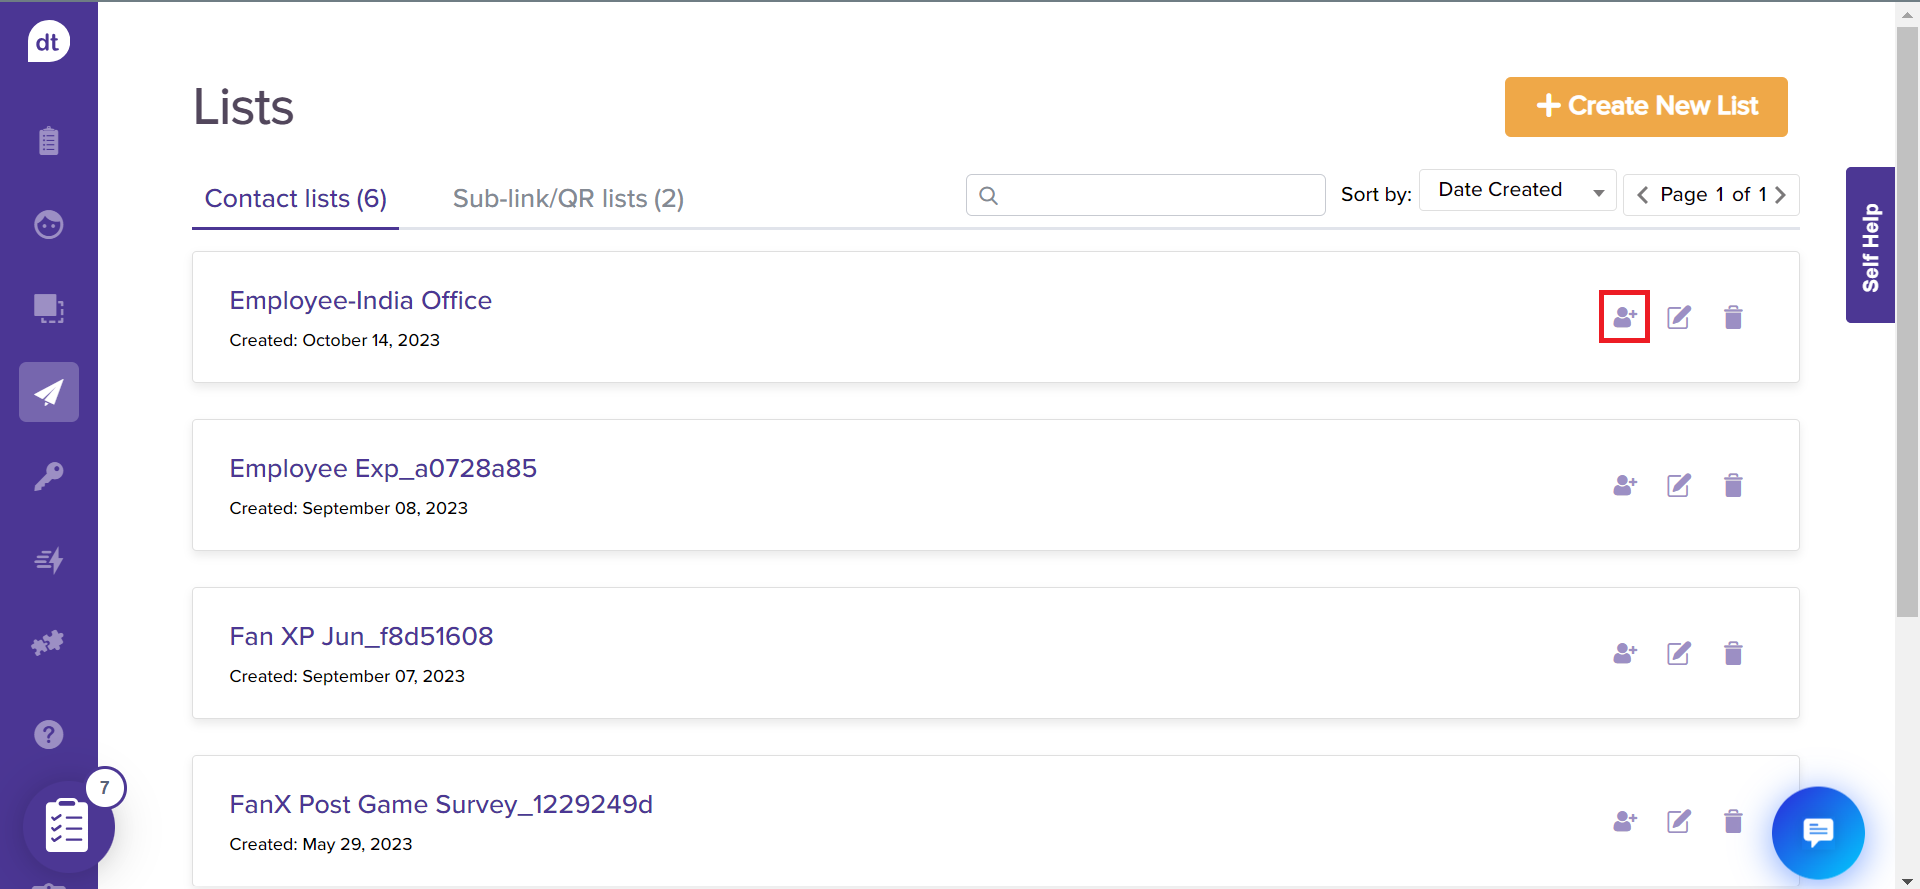
Navigate to Lists > Contact Lists.
Click on the Add New contact icon beside the Contact List.
You will be redirected to the add contact list details page. Click on +Add Contacts.

Follow the steps based on the required method. Refer to the previous section for methods.
Edit a Contact List Name
Upon creating a list, you can rename them as and when required. Follow the steps below:
Navigate to Lists > Contact Lists.
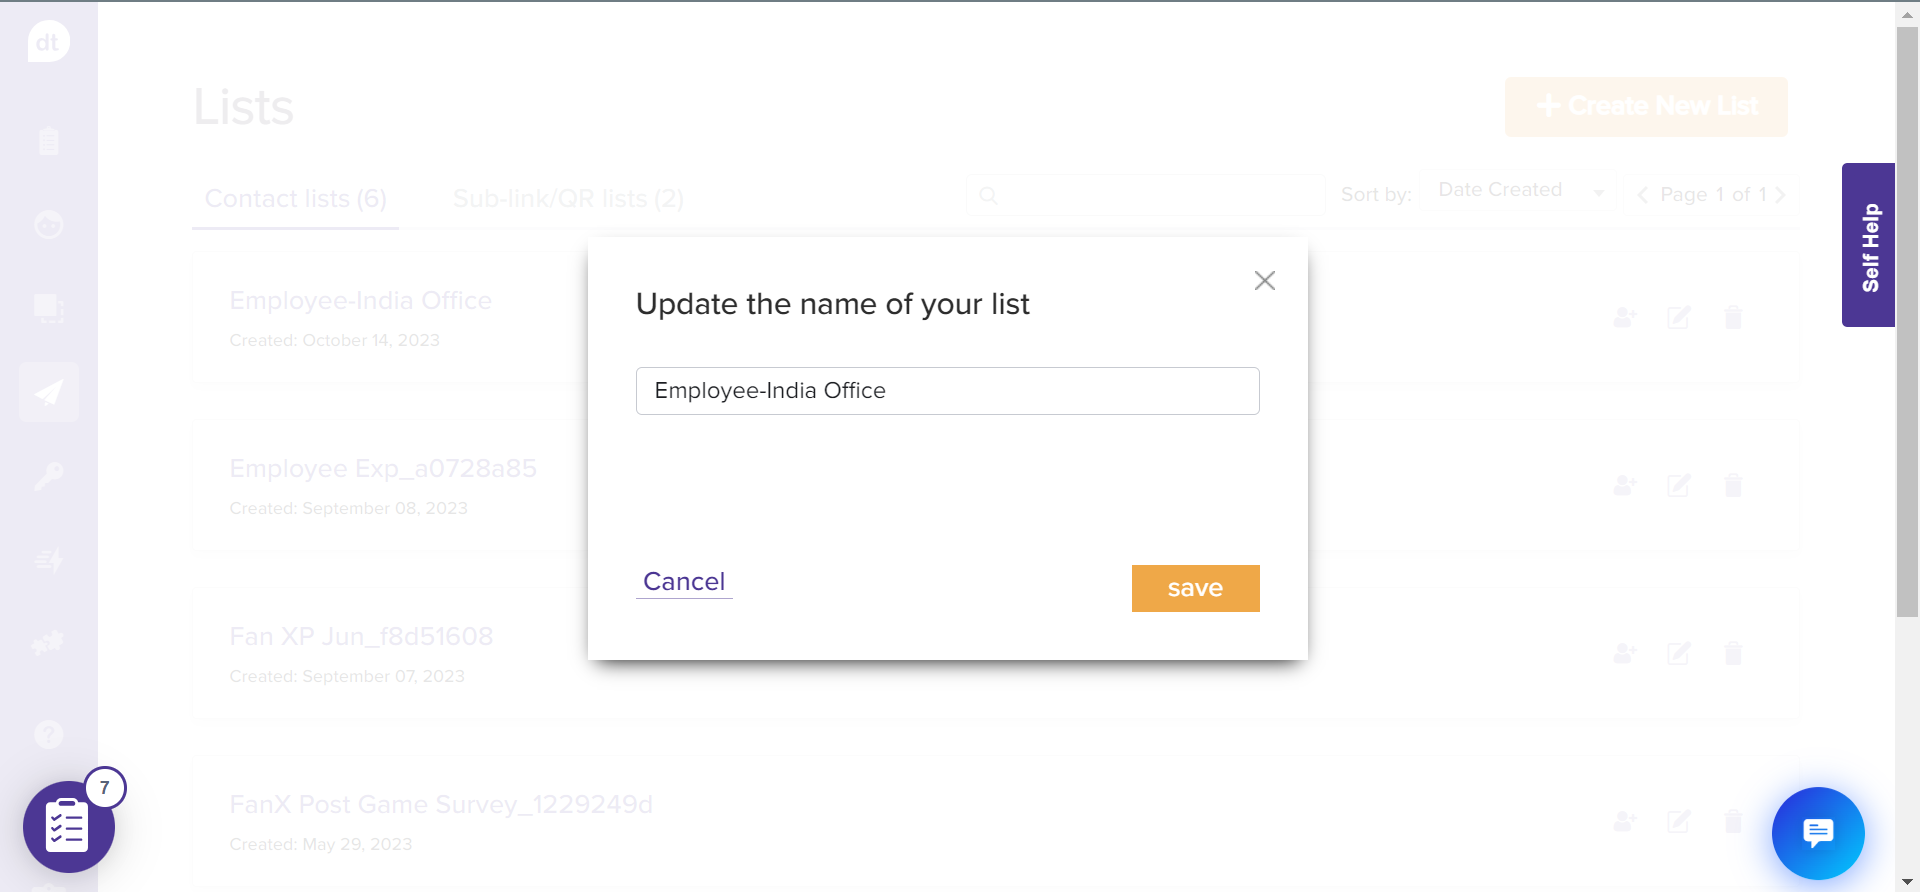
Click on the Edit icon beside the Contact List.

Rename the contact list in the following pop-up. Click on Save.
Delete a Contact List
You can delete a contact list. This will remove all the contacts within. Follow the steps below:
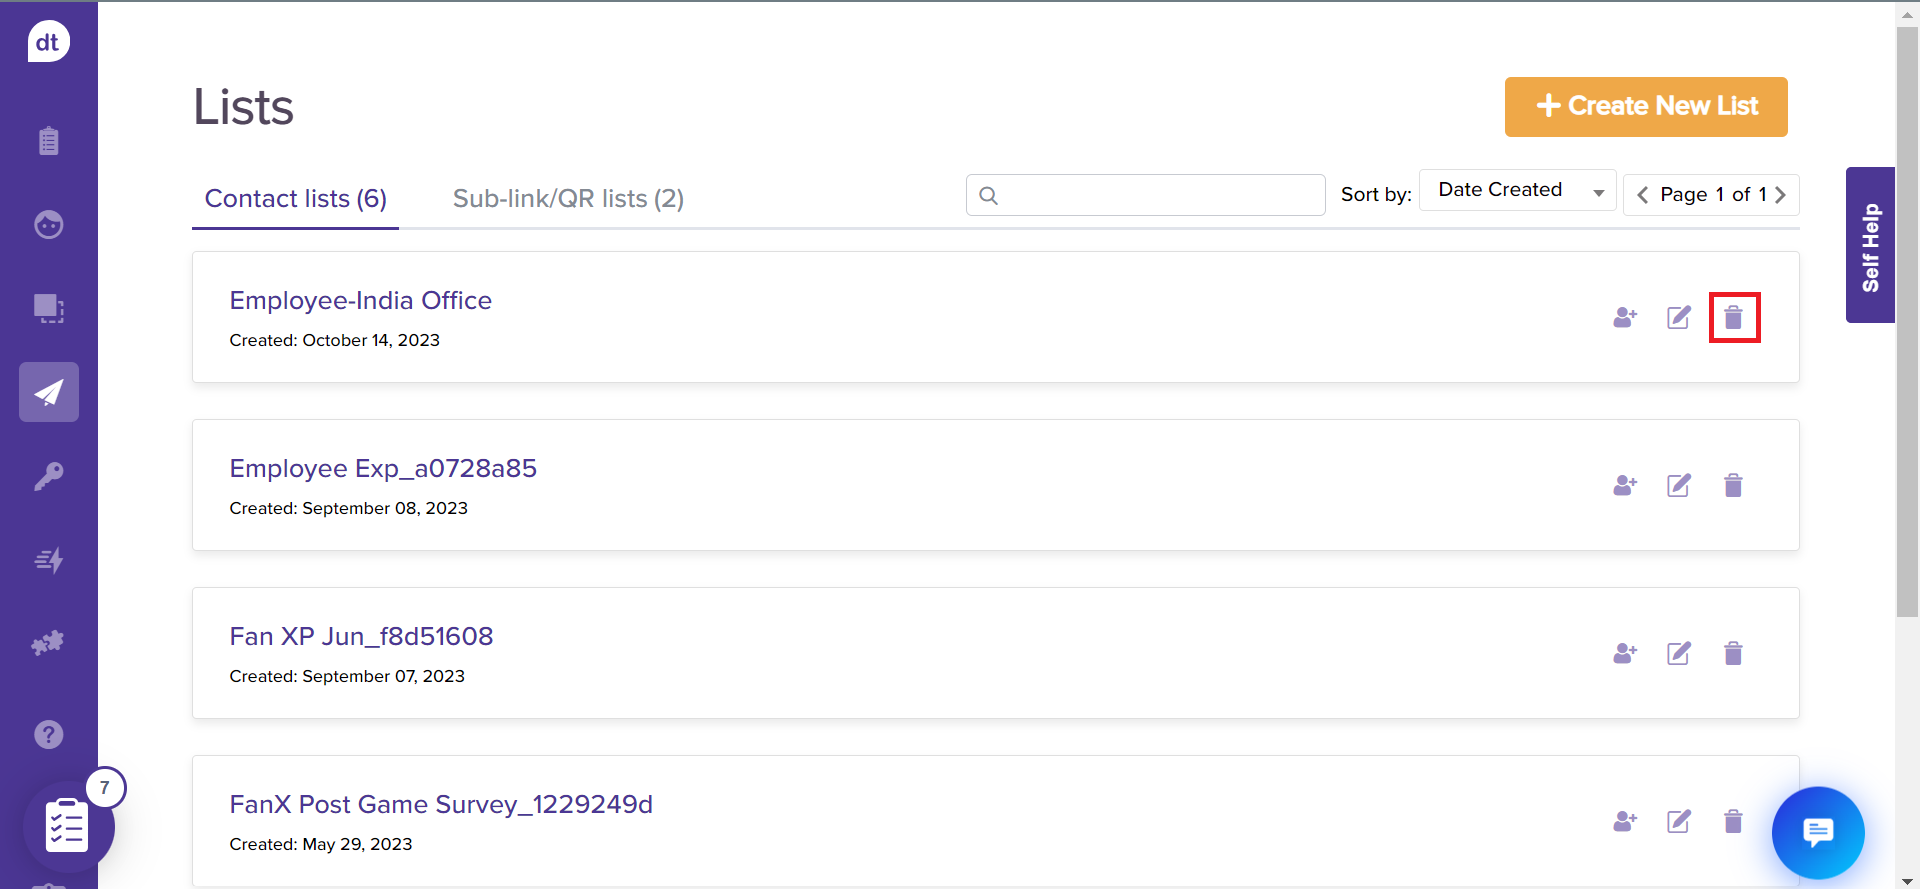
Navigate to Lists > Contact Lists.
Click on the Delete icon beside the Contact List.
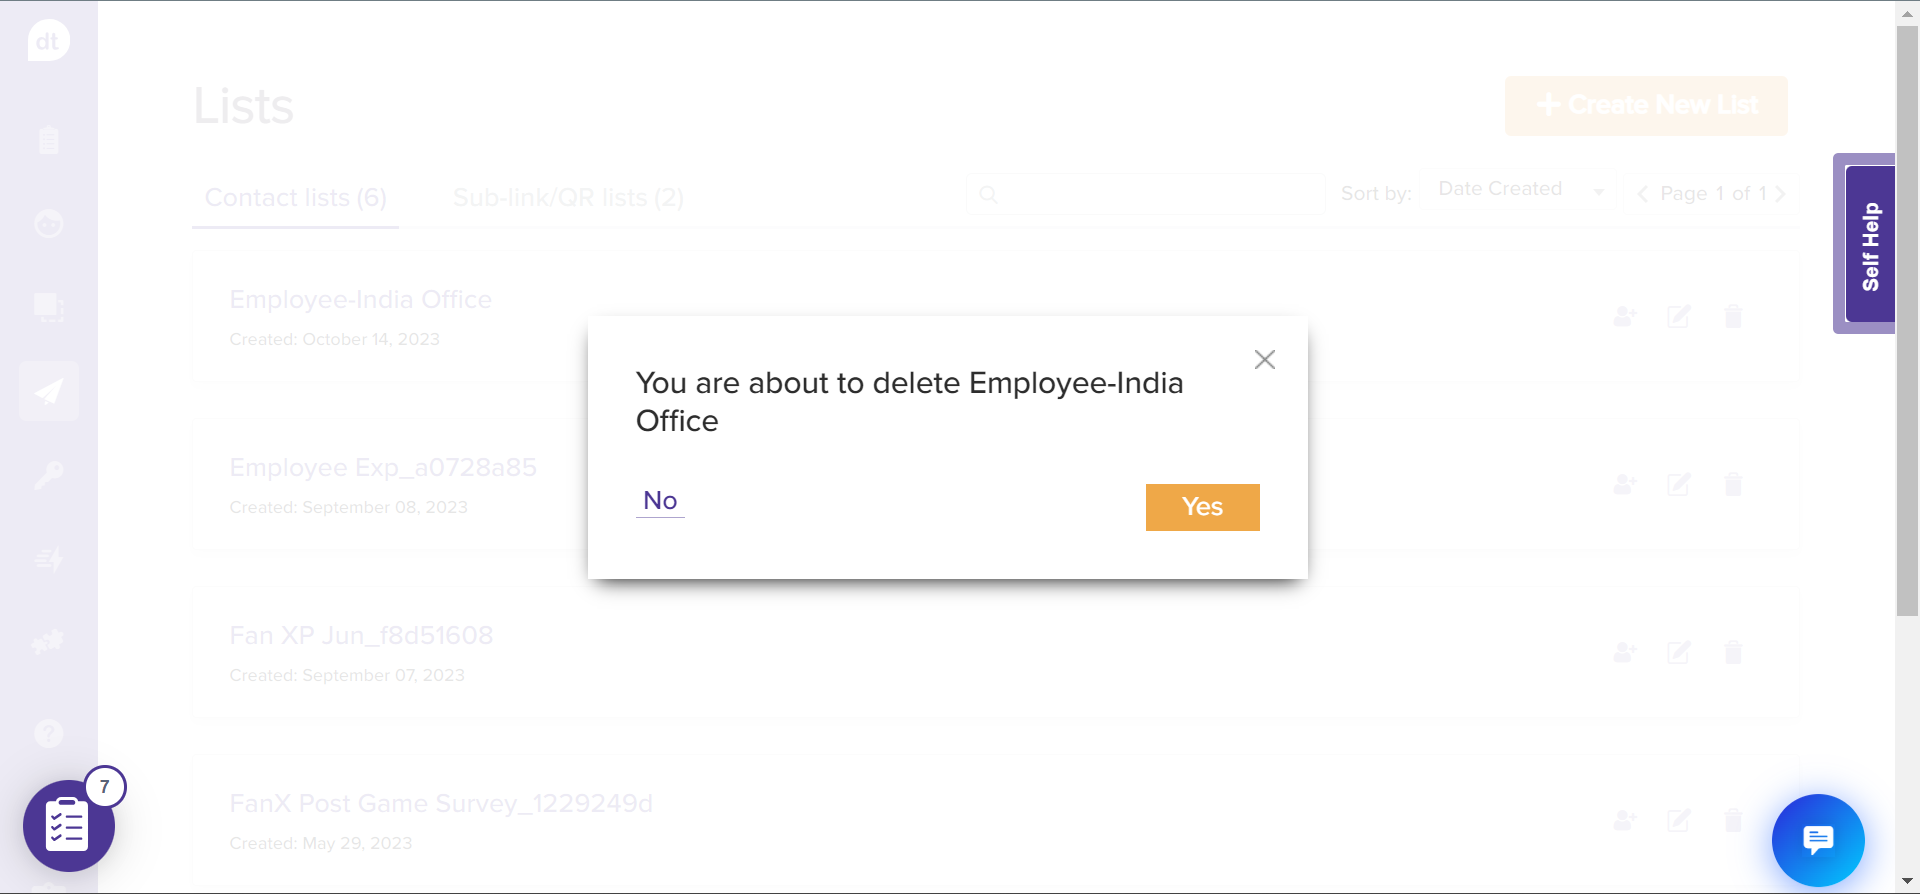
You will be prompted to confirm the action. Click on Yes.
Note: This field is optional and works only if your survey has been translated into multiple languages.
Using Preferred Survey Language Datatype
You can use Preferred Survey Language datatype for metadata when creating your contact list to deliver surveys in a respondent's preferred language automatically.
This can be done:
When adding contacts manually:
Add a metadata to enter the appropriate language (e.g., English, Spanish, French) for each contact. While mapping it with a datatype, use “Preferred Survey Language”.When uploading a spreadsheet:
Include a column with preferred survey language in your CSV file for each contact. While mapping with appropriate datatype, use “Preferred Survey Language”.
Later, when you use the list with “preferred survey language”, the survey will be open in the specified language if it is available in your survey’s available language(s).
If the language is missing or invalid, the survey will open in the default language.