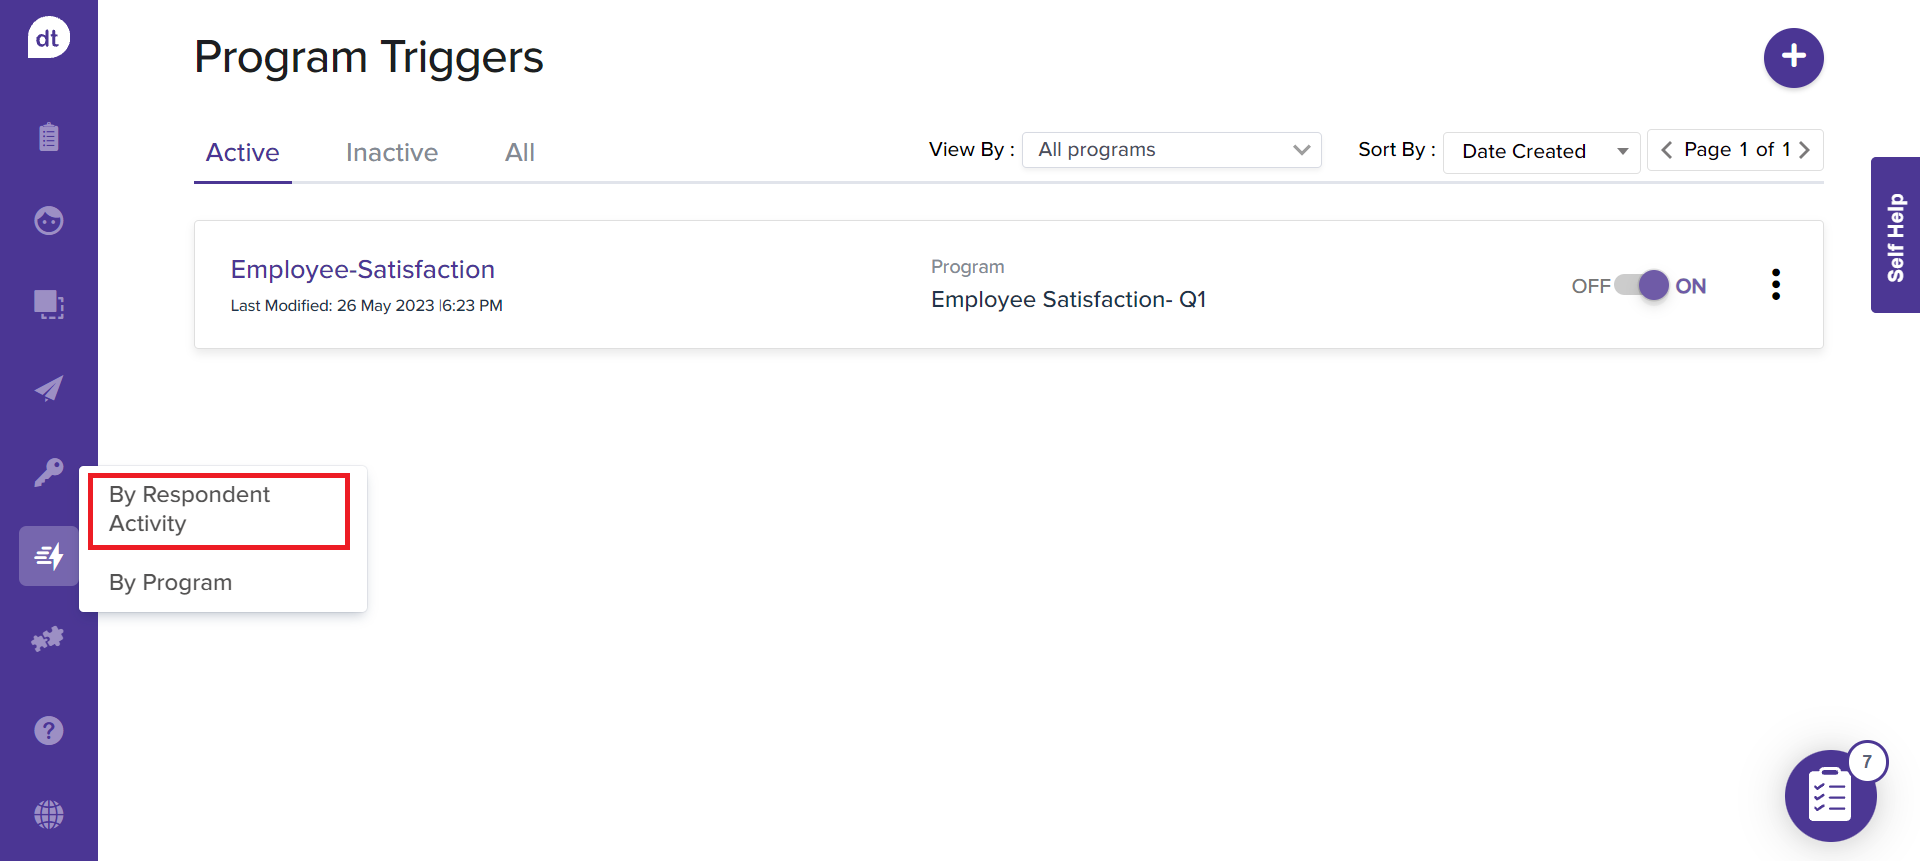
By Respondent Activity
|
|
|


The feature saves time and effort by sending an automated email to the Respondent or adding a webhook. One of the benefits of using this Trigger type is that it can be applied to all the programs you have access to.
Pre-requisite
You can set up triggers only for scheduled or published programs only.
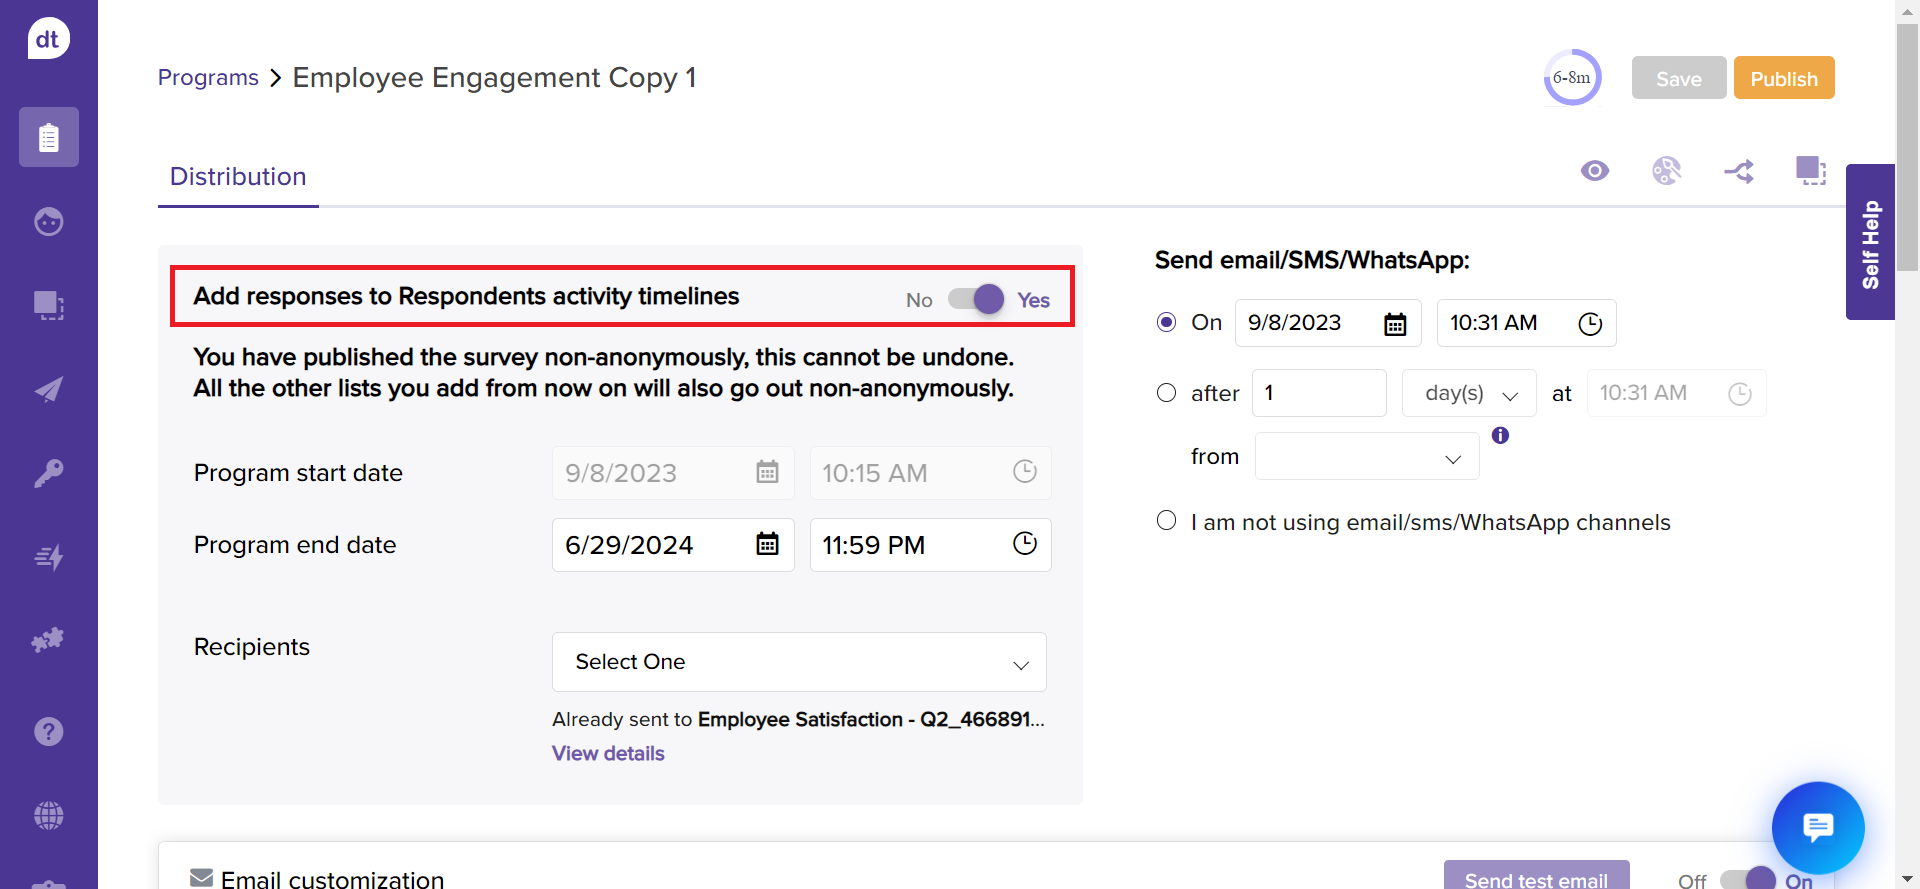
You can set up a trigger only if the toggle for Add responses to Respondents activity timelines on programs are enabled. (Go to a Program > Distribution tab)
This article will help you understand:
How to create a trigger of type: By Respondent Activity?
What are various conditions available?
How to enable a trigger?
Creating a Trigger
Follow the below steps to get started with creating a trigger by respondent activity:
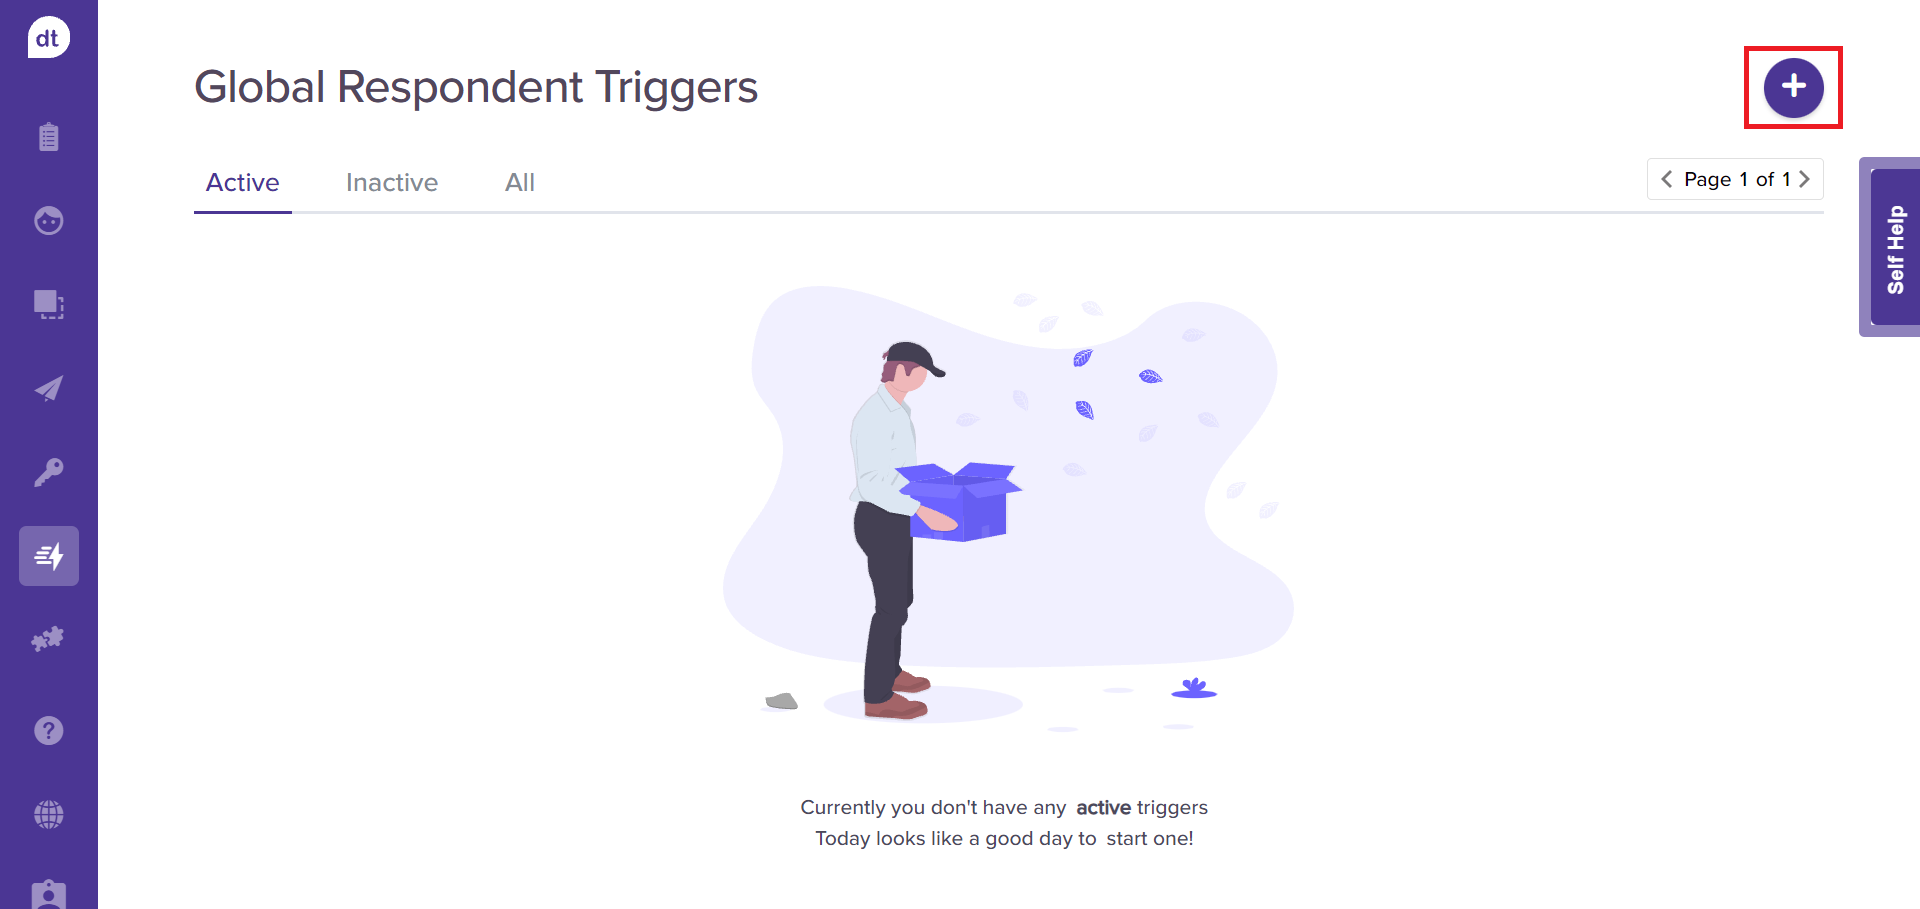
Navigate to the Dropthought’s Triggers page.
Select By Respondent Activity.
Click on the + icon on the top right corner of the screen.
Enter a trigger name on the following pop-up. You will find the Trigger Option selected as By Respondent Activity automatically.
You can switch between the types from this step.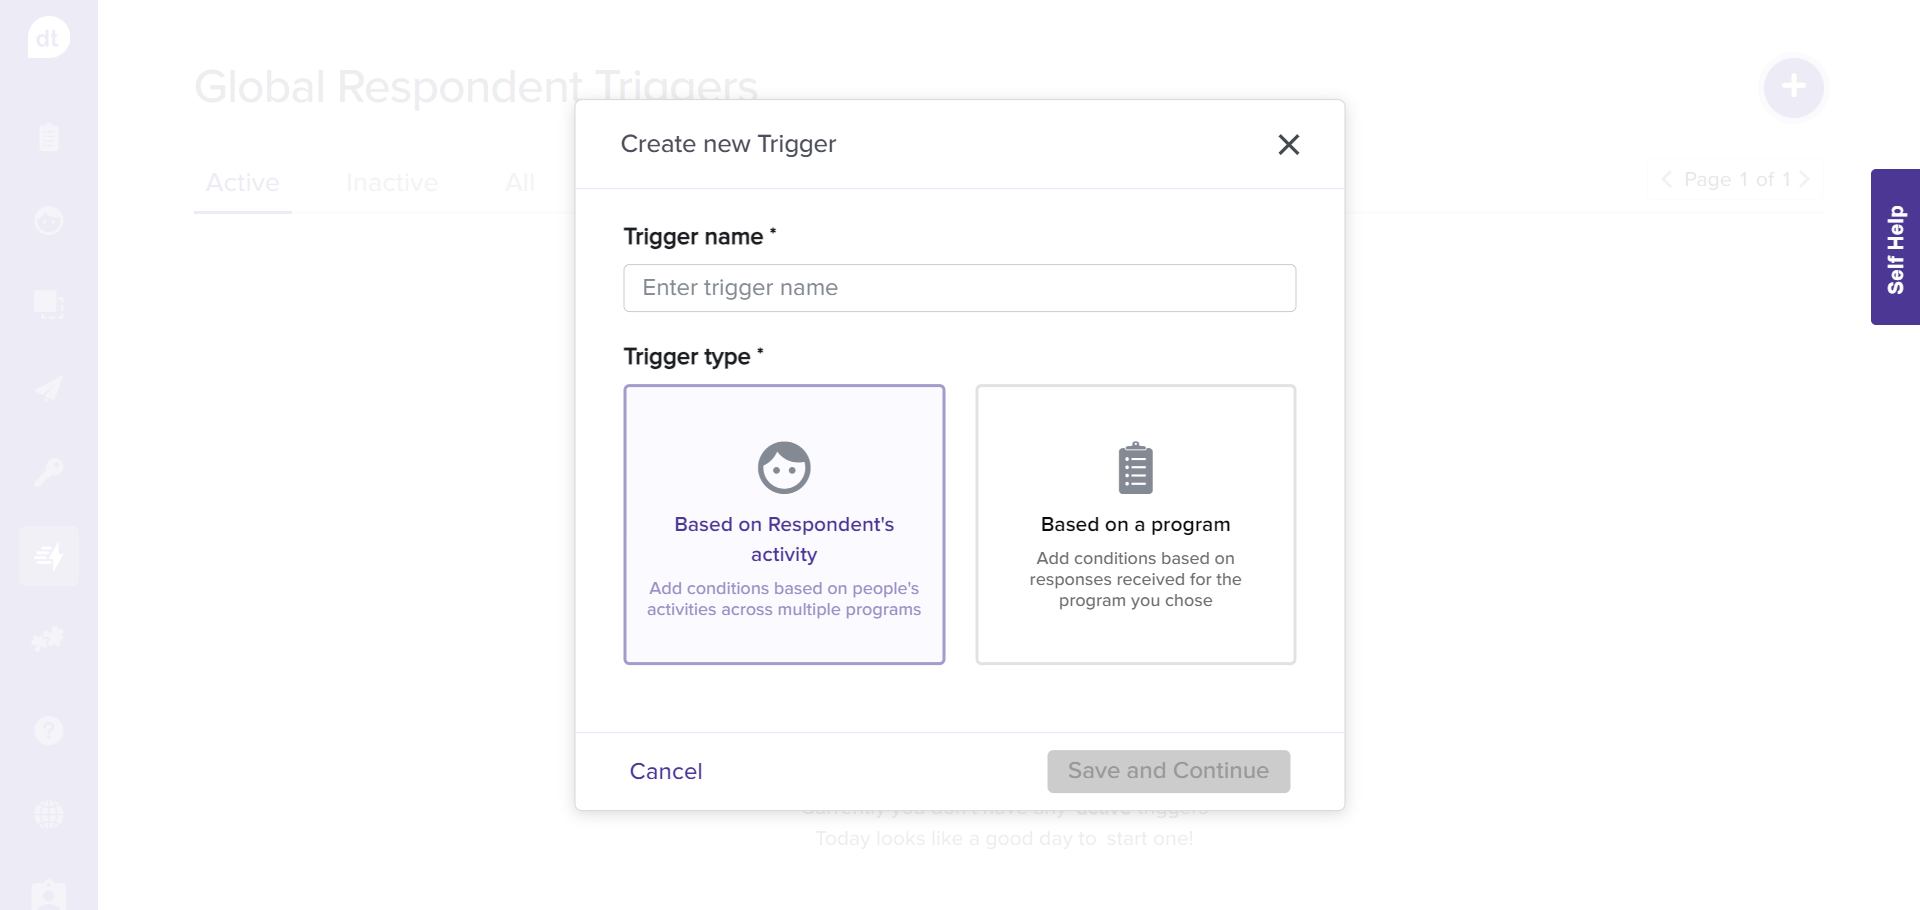
Click on Save and Continue.
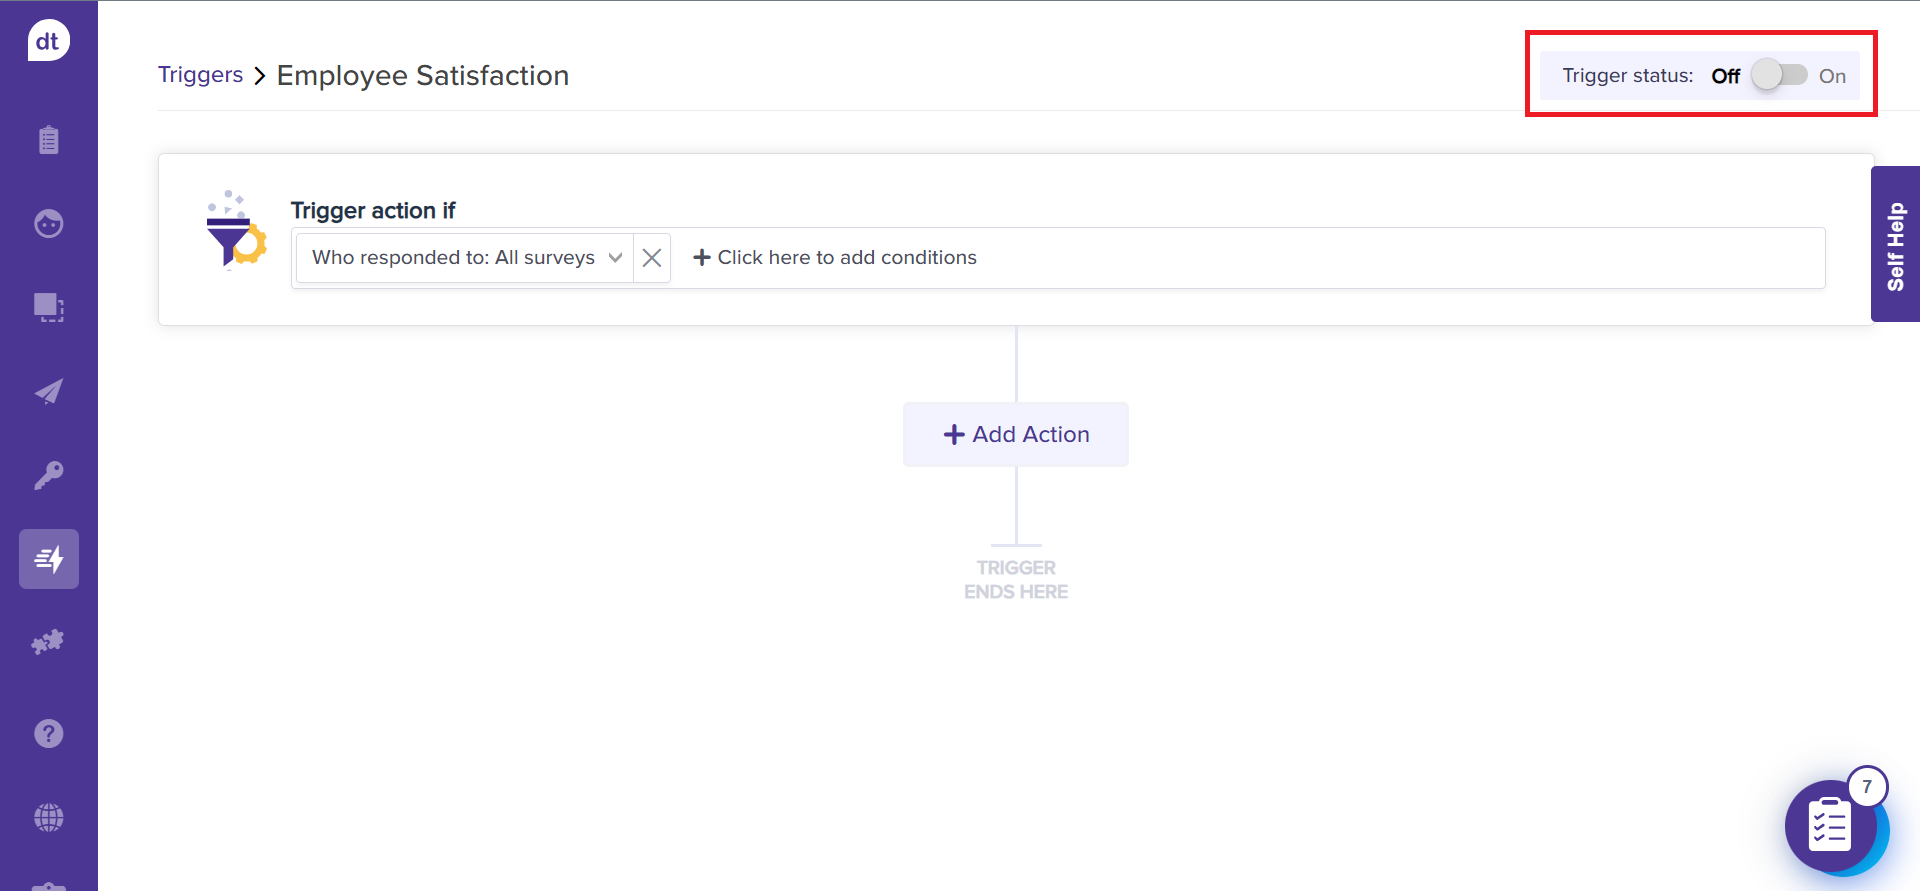
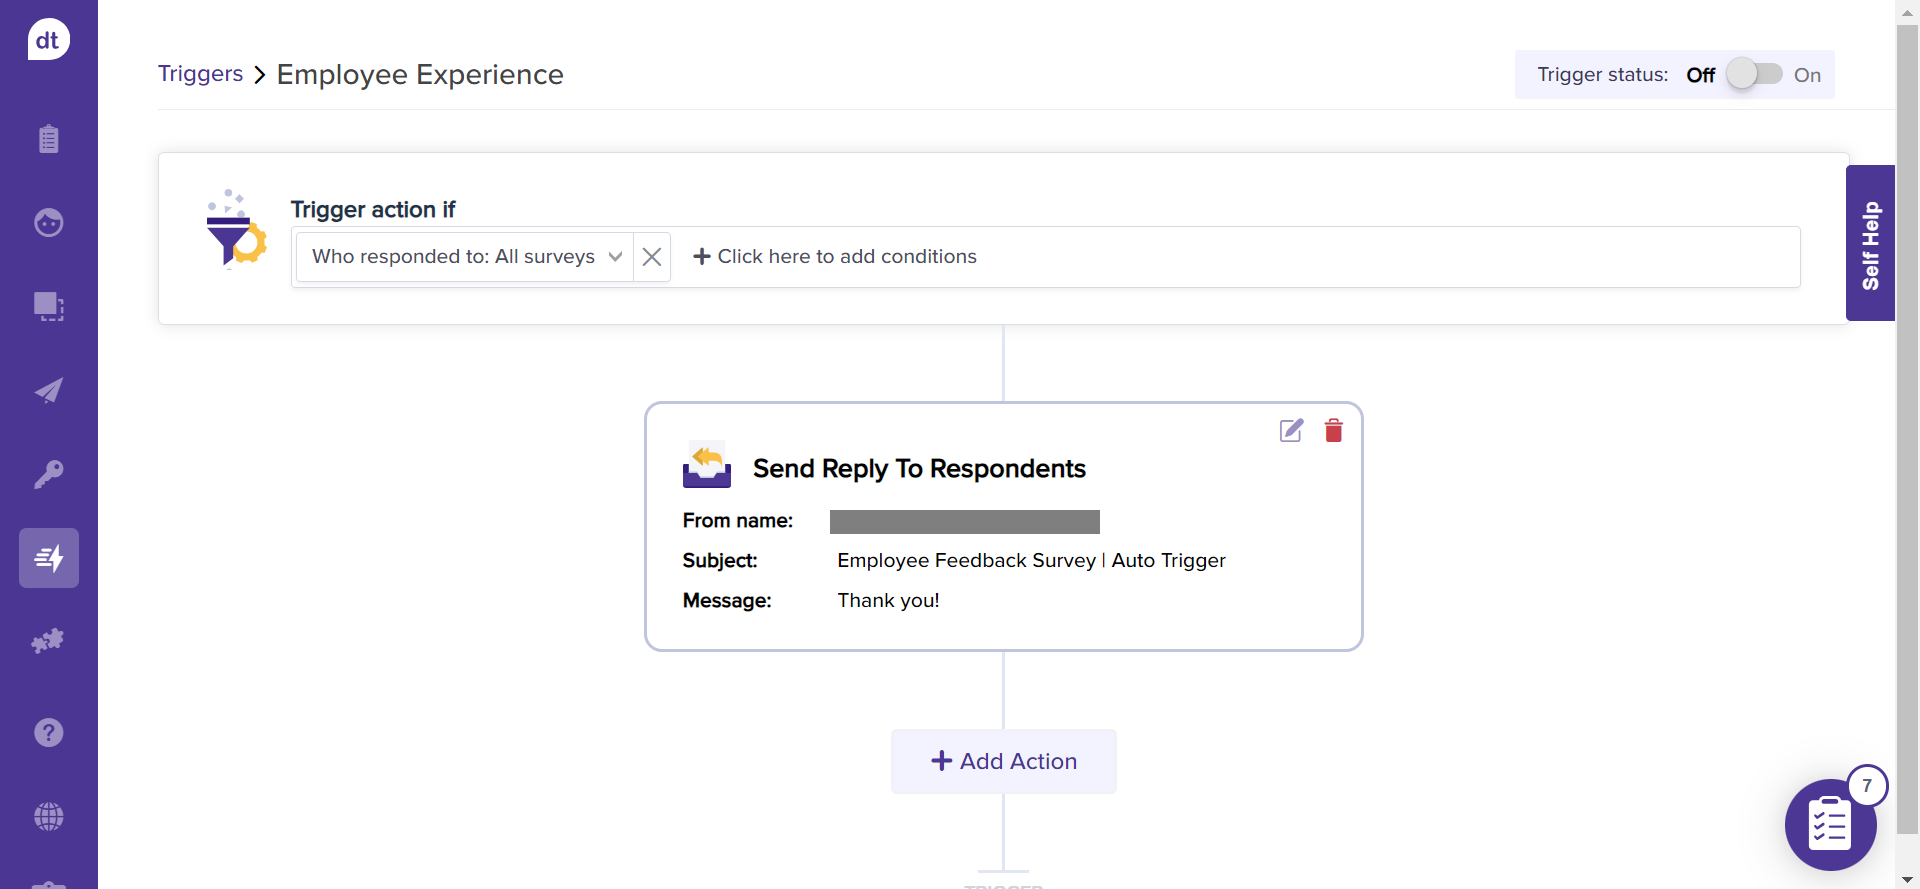
You can add conditions and actions to trigger the alerts on the following screen to complete setting up the trigger based on the Respondent’s activity.
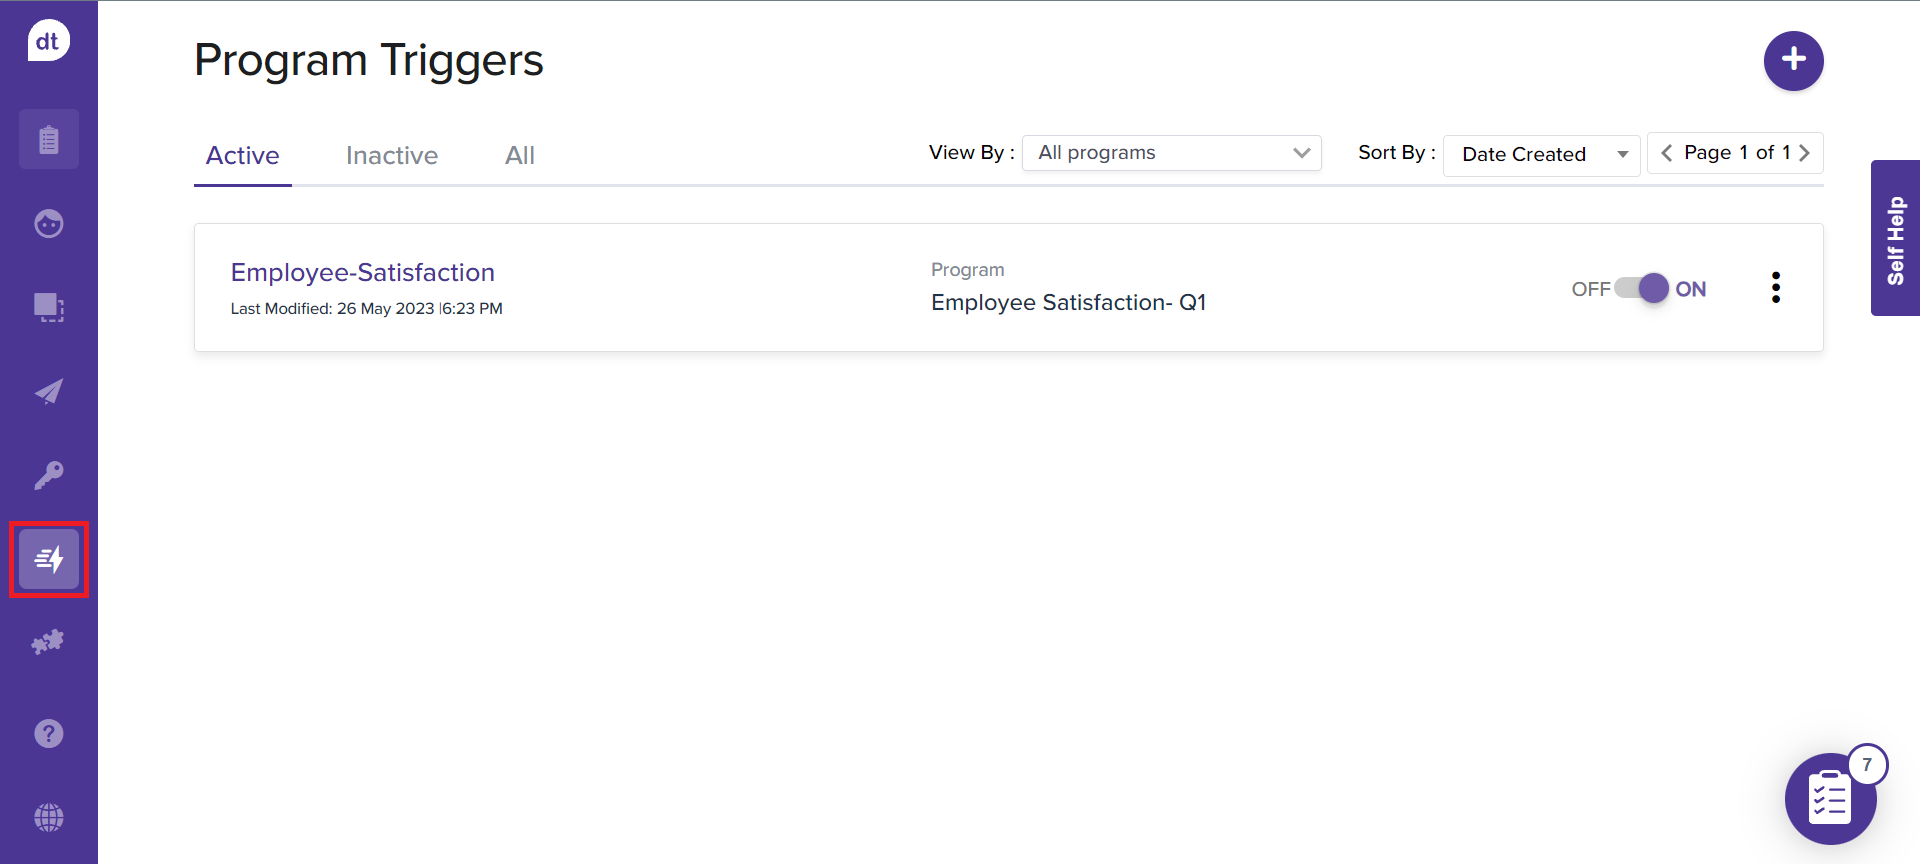
All the triggers will be available within the All tab.
By default, a new trigger will be available within the Inactive tab.
All active triggers will be available within the Active tab.
Enable a Trigger
Once you have created a trigger, it will be toggle OFF by default. To start using the trigger, toggle the button ON.
Navigate to Triggers from the left panel.
Go to By Respondent Activity and to the Inactive tab.
To enable a trigger, toggle the button ON provided beside the trigger name.
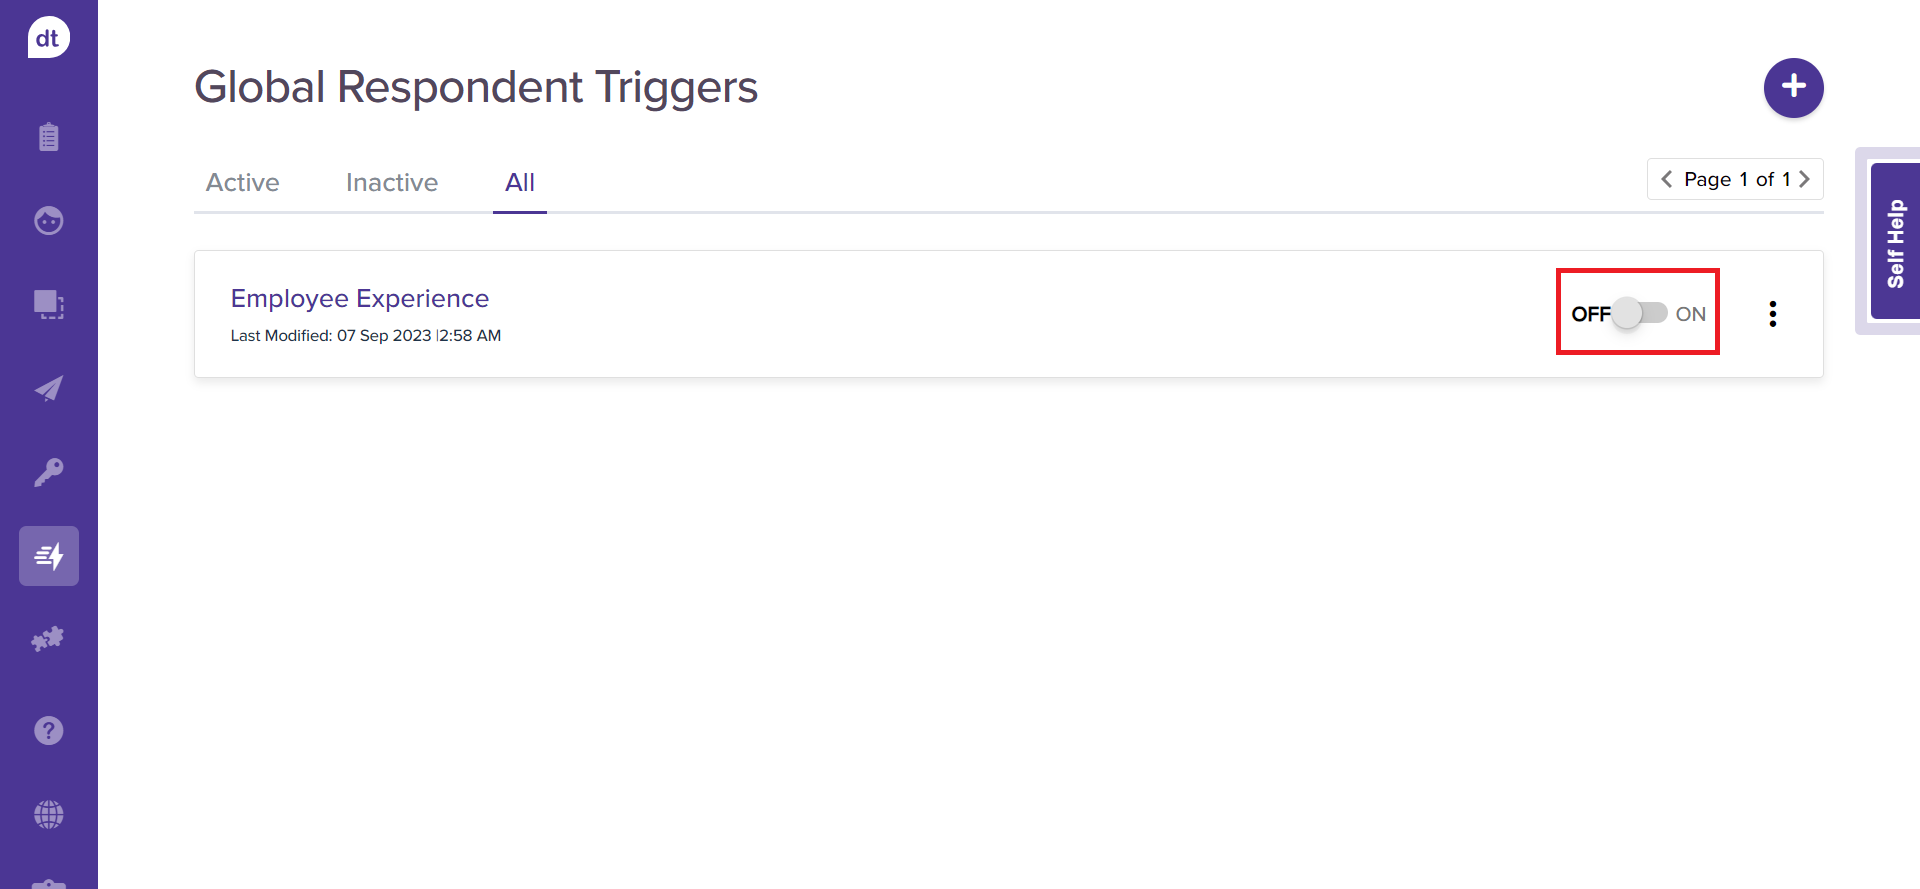
You will be prompted to confirm to proceed. Also, the trigger will be moved from the Inactive tab to the Active tab.
The trigger will be applied to all the programs.
You can also enable it from the respective trigger’s details page.