Actions (Triggers based on Respondent Activity)
|
|
|


Upon setting up the conditions for triggers, it is time to decide on the following actions.
When you use the Triggers of type: By Respondent Activity, you can choose from any of the following two options:
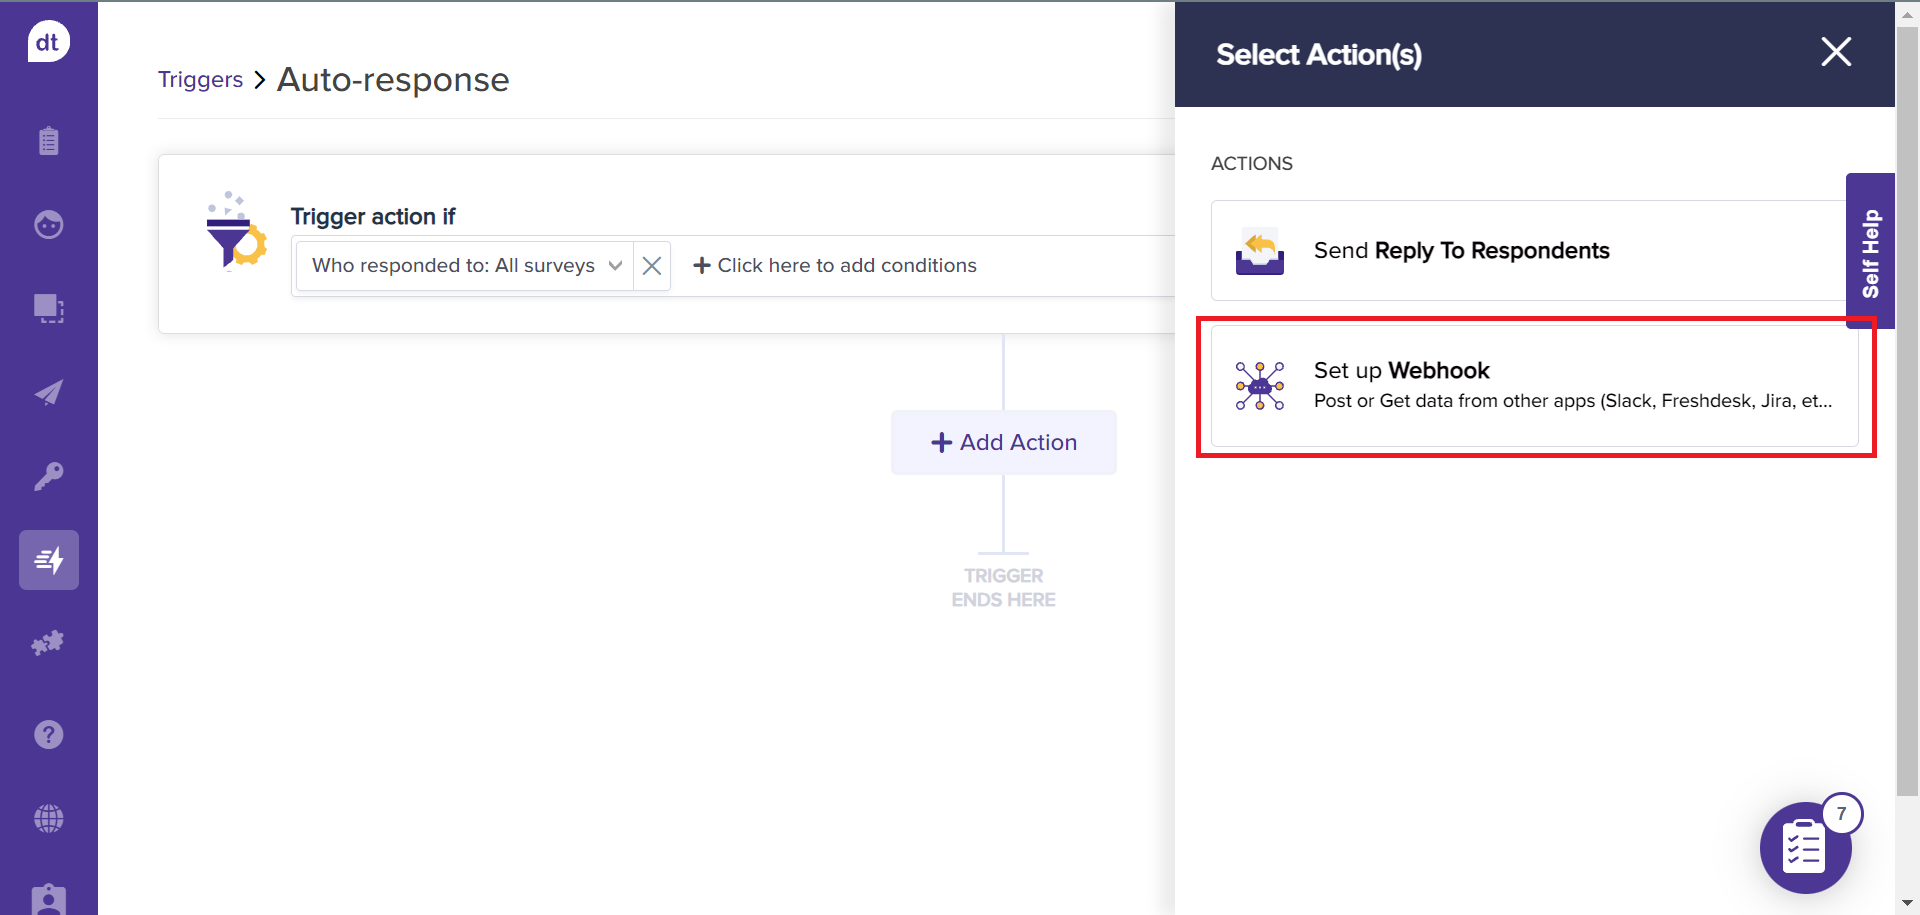
Send Reply to Respondents
Set up Webhook
This article will help you understand:
What actions can be set up while using this trigger type?
What happens while choosing each of the actions?
Send Reply to Respondents
You can set up an auto-response based on the respondent’s activity. These can be triggered like no-reply notifications or an indication of what to do next.
These replies can be triggered:
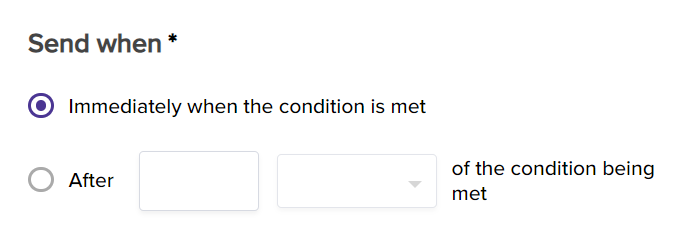
immediately when the condition is met
after a specified amount of time upon satisfying the criteria
Follow the steps to set up an auto-response:
Set up criteria for creating the trigger. Learn more about available conditions.
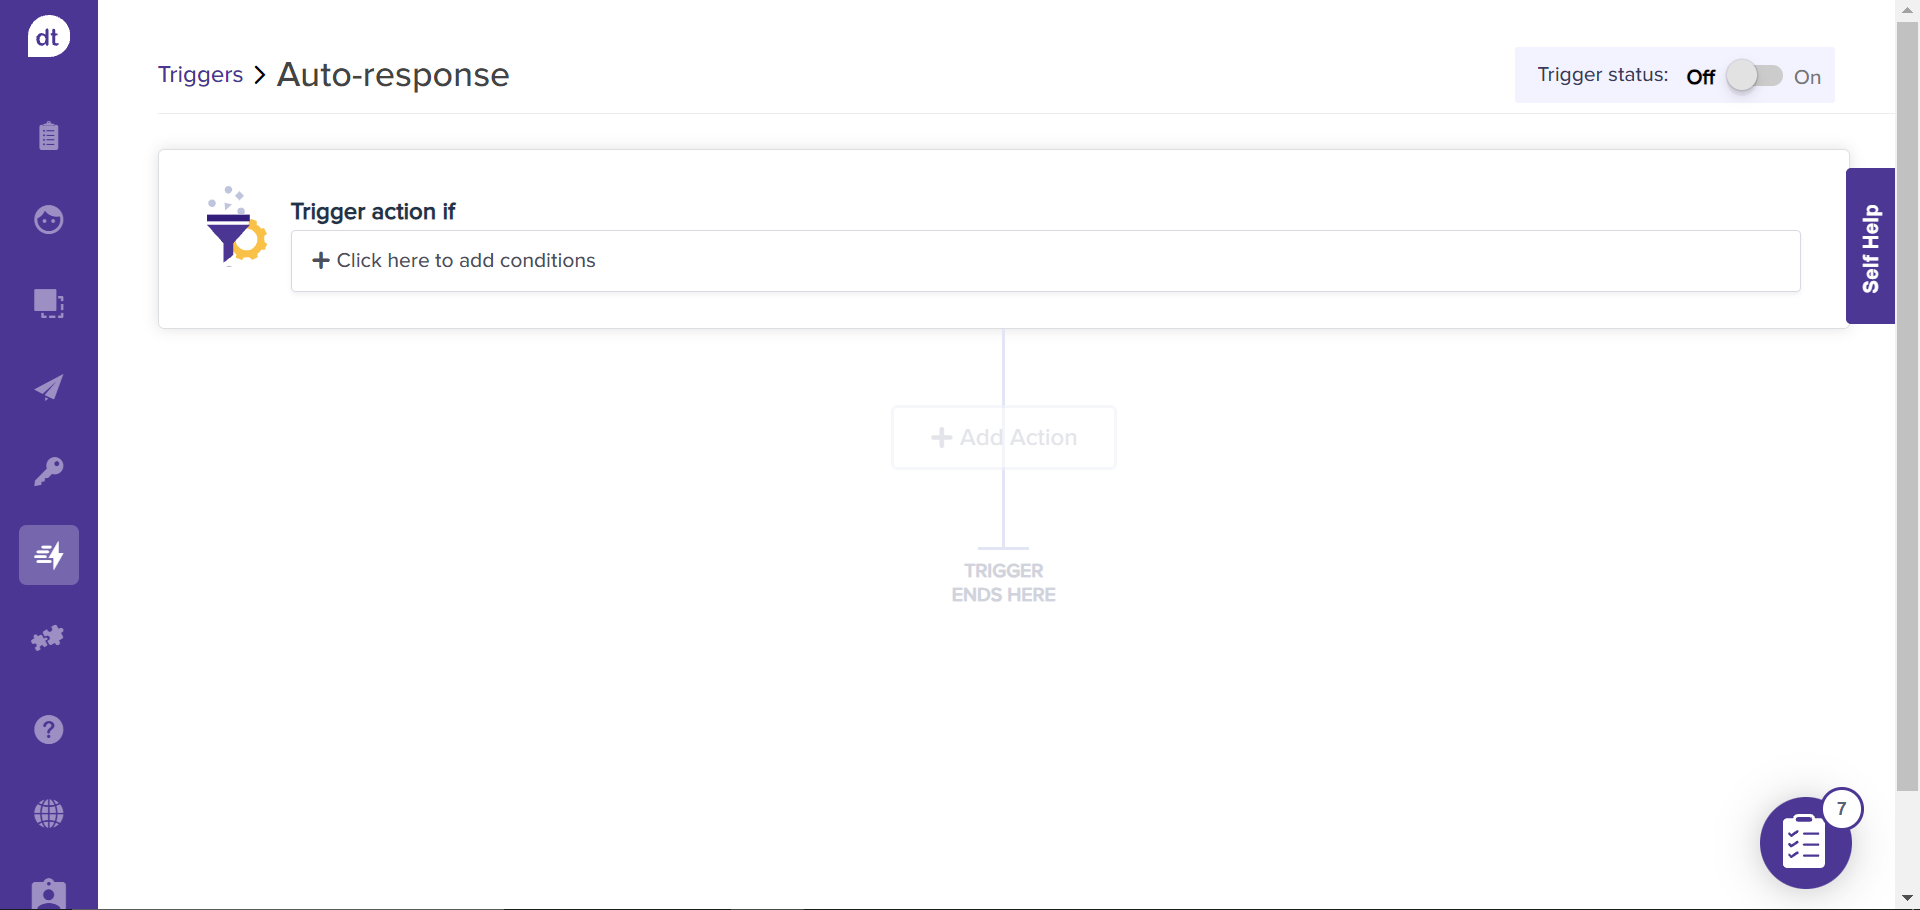
Upon adding conditions, click on +Add Action.
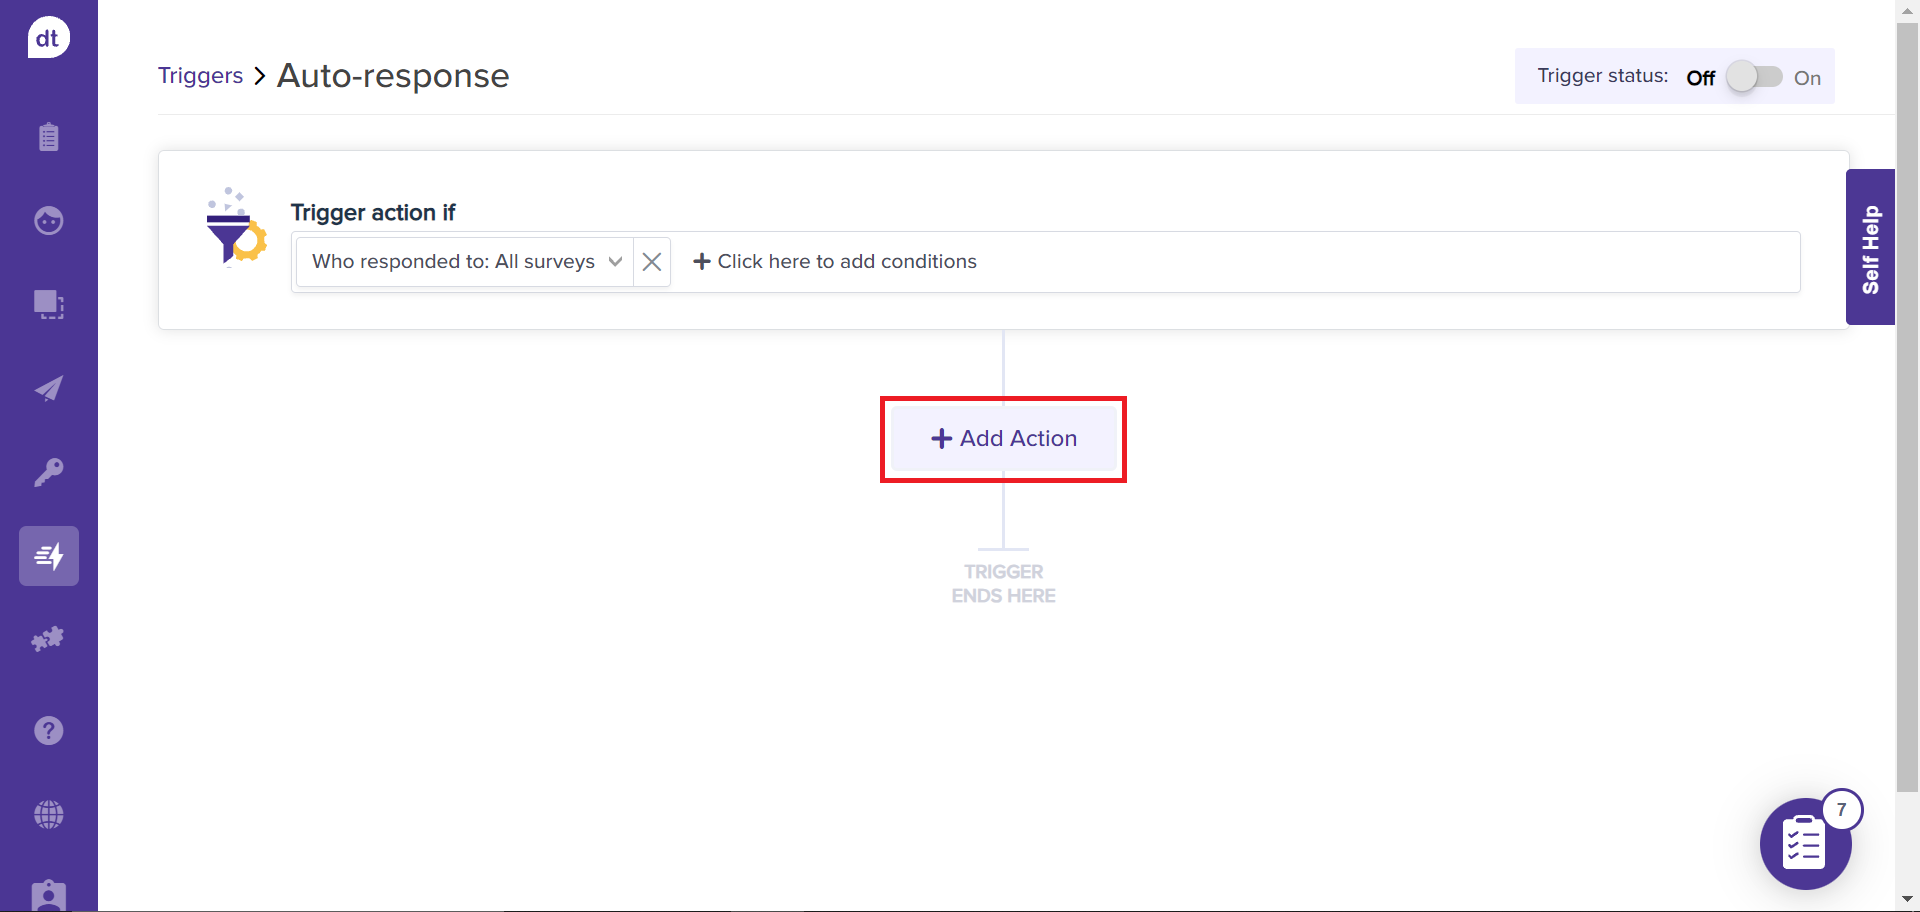
Click on Send Reply to Respondents.
You can set up the email that should be triggered upon satisfying the criteria on the following screen. The “From name” will be auto-filled with your name by default. It will be disabled.
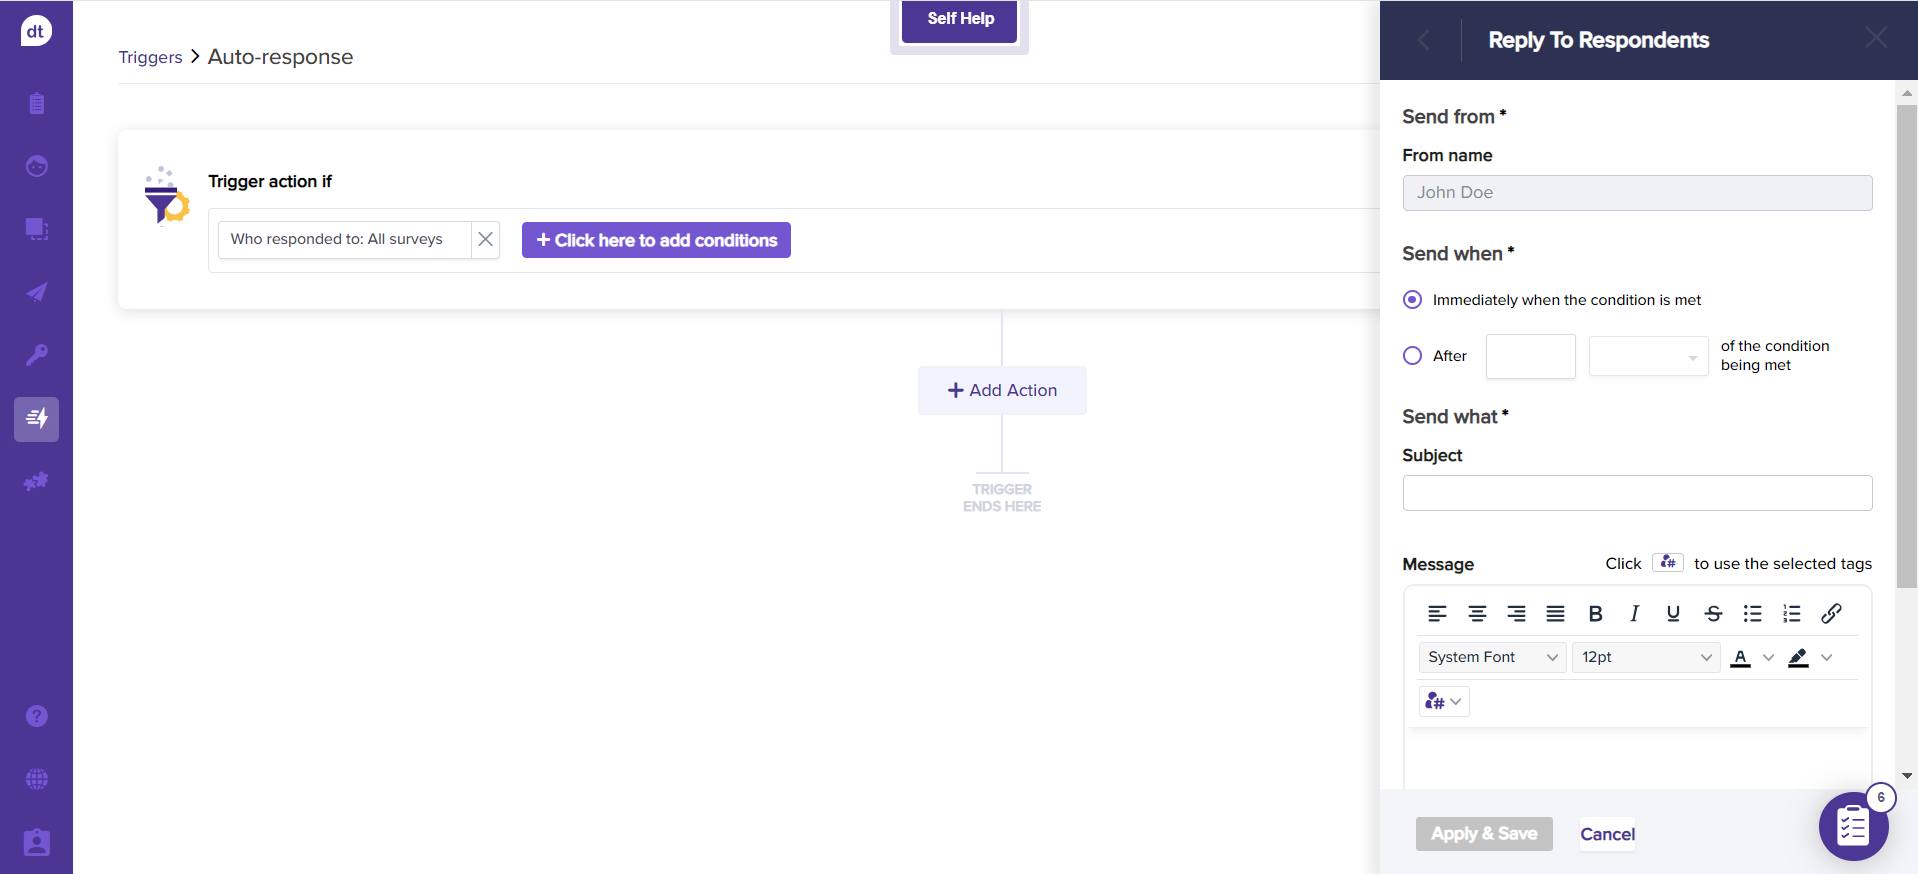
Further, select when to trigger the email. You can choose if you want to trigger as soon as the criteria are met or after a specified time of satisfying the criteria.
Add the email content that should be triggered.
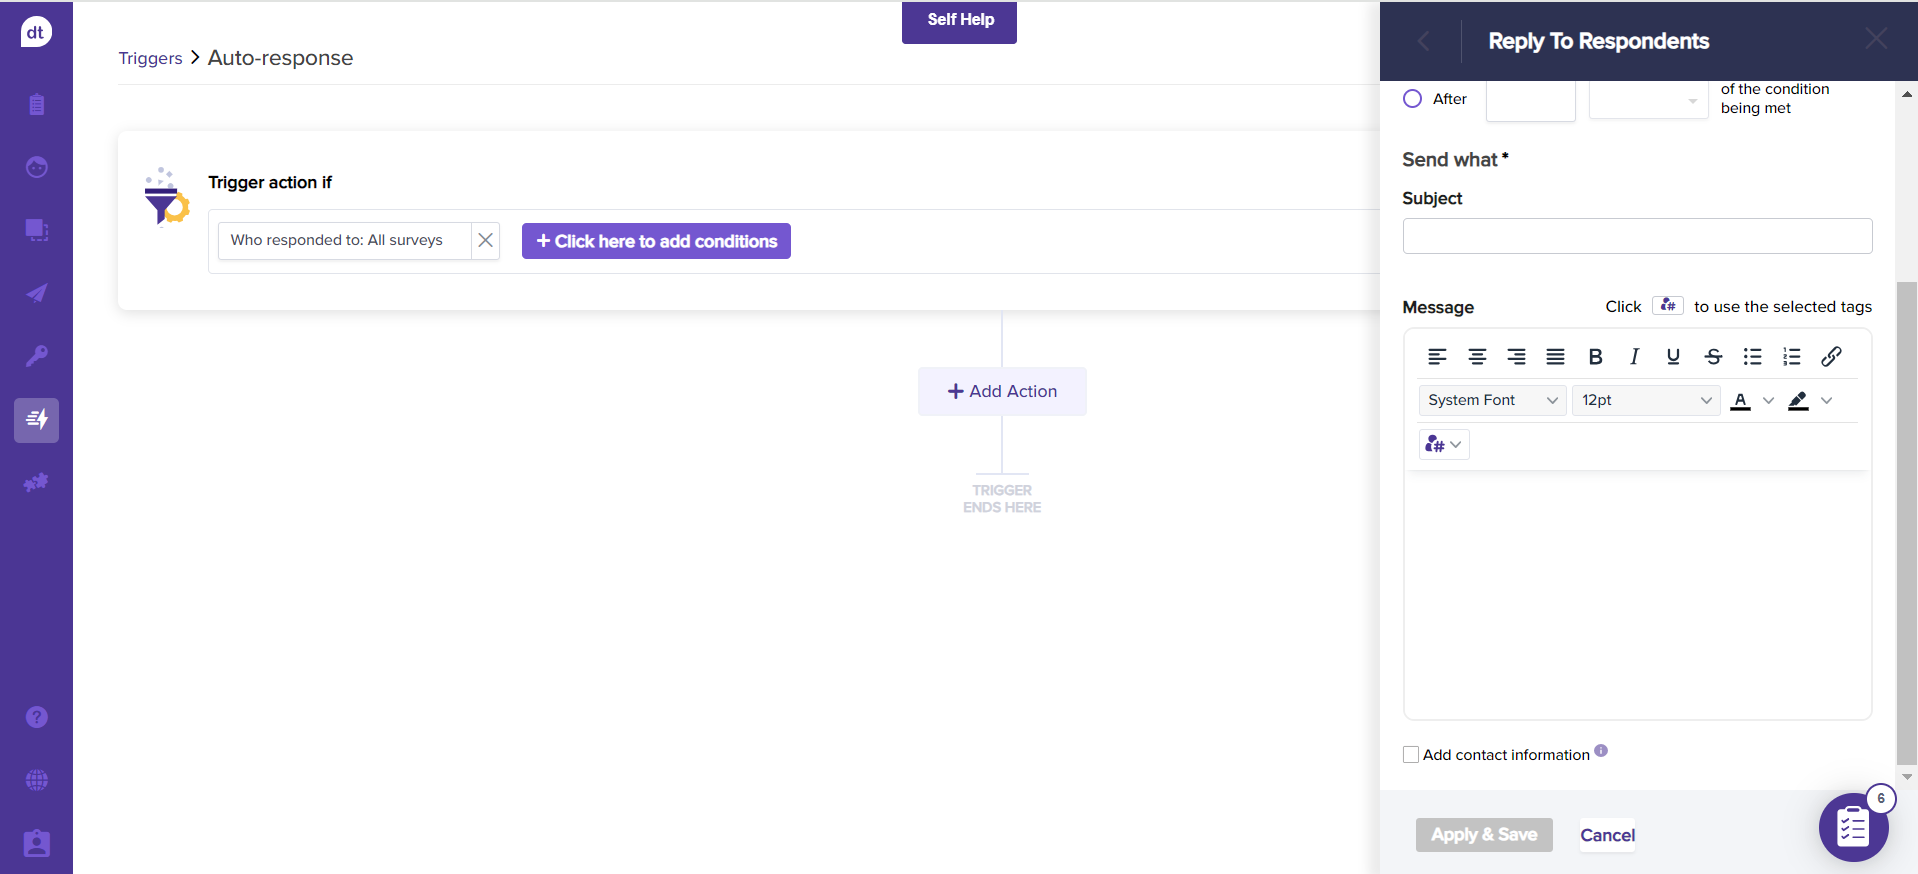
You can check the box for Add contact information to add the contact number/email/address as the footer of the email.
Click on Apply and Save to complete creating the trigger.

Set up webhooks
You can use Webhook to send feedback data/messages that satisfy a specific condition to a third-party system to achieve the desired result. You can also use Webhook to connect with workflows that allow you to execute actions in third-party applications, such as Slack, Jira, and Freshdesk.
For example,
Upon receiving a response on the Dropthought program, trigger a notification to Slack.
Upon receiving a response on the Dropthought program with NPS<7, create a ticket in Freshdesk.
Upon receiving a response on the Dropthought program with NPS<7, create a task in Asana.
This feature is only available to admins.
Follow the steps to set up an auto-response:
Set up criteria for creating the trigger.
Learn more about available conditions.
Upon adding conditions, click on +Add Action.
Click on Send Reply to Respondents.
Choose the Method from the menu.
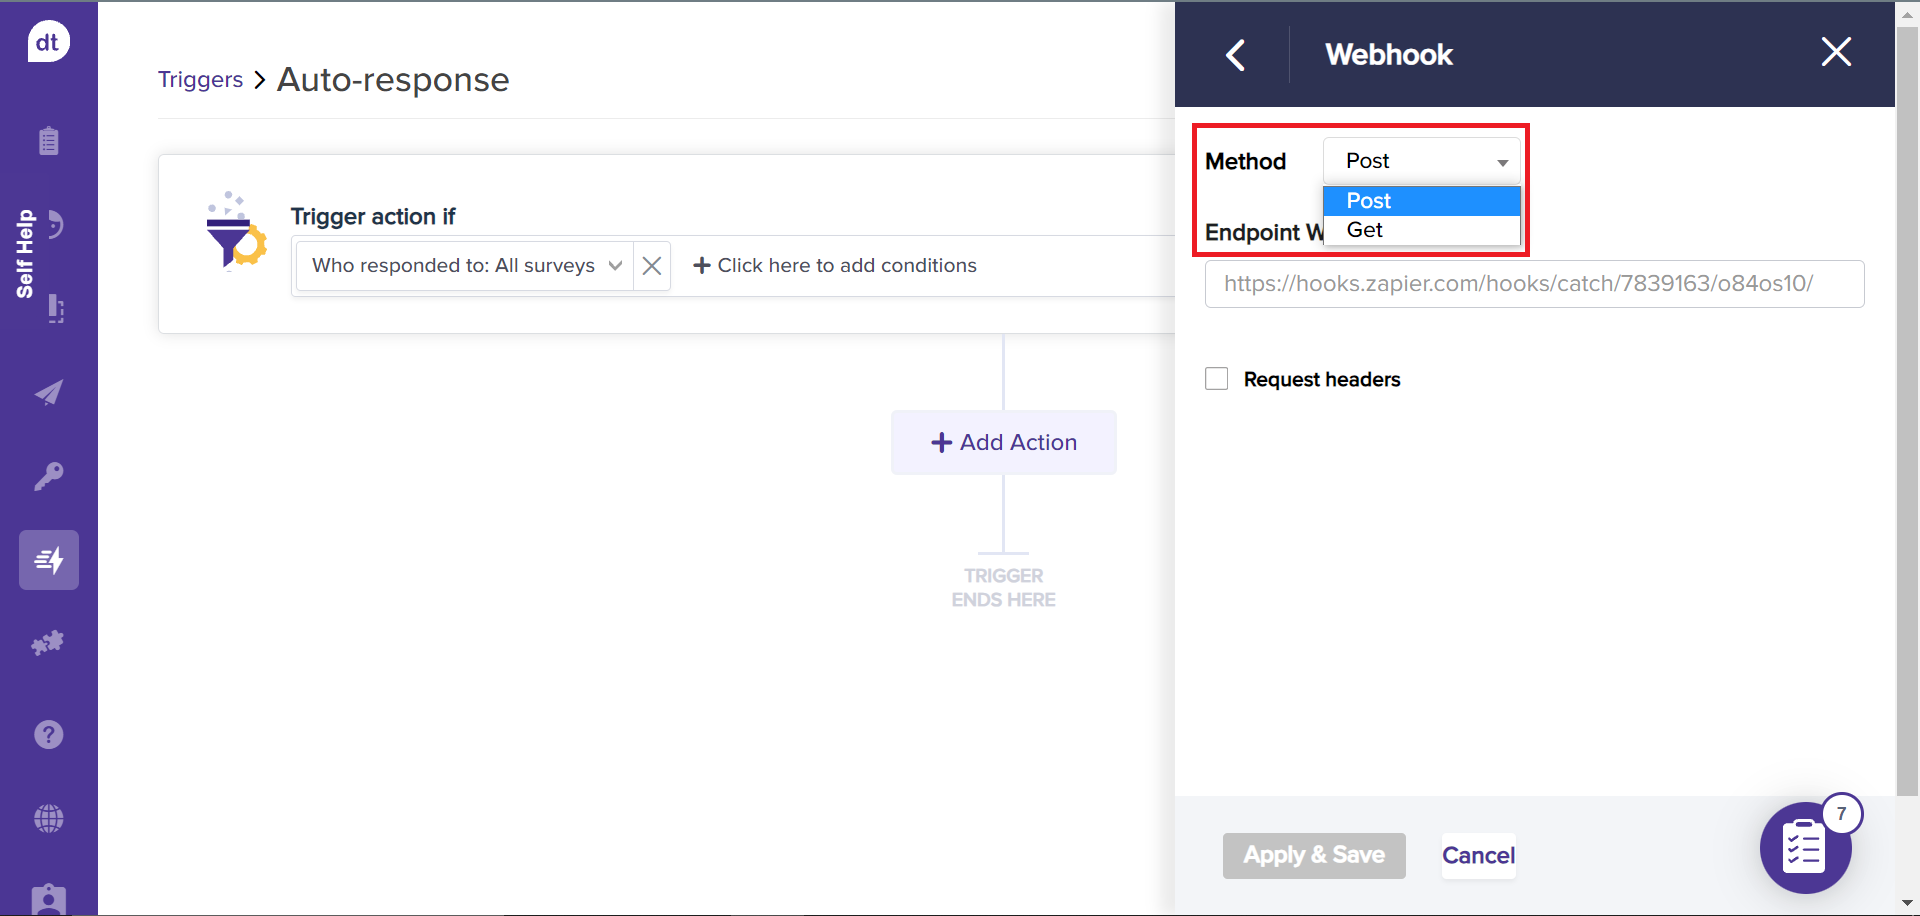
Copy and paste the webhook URL into the URL field.
Click the Request Headers checkbox to set up Key and Value.
Choose Key from the drop-down menu.
Value is required for the key. The +Add another option button will add a new Key and Value field.
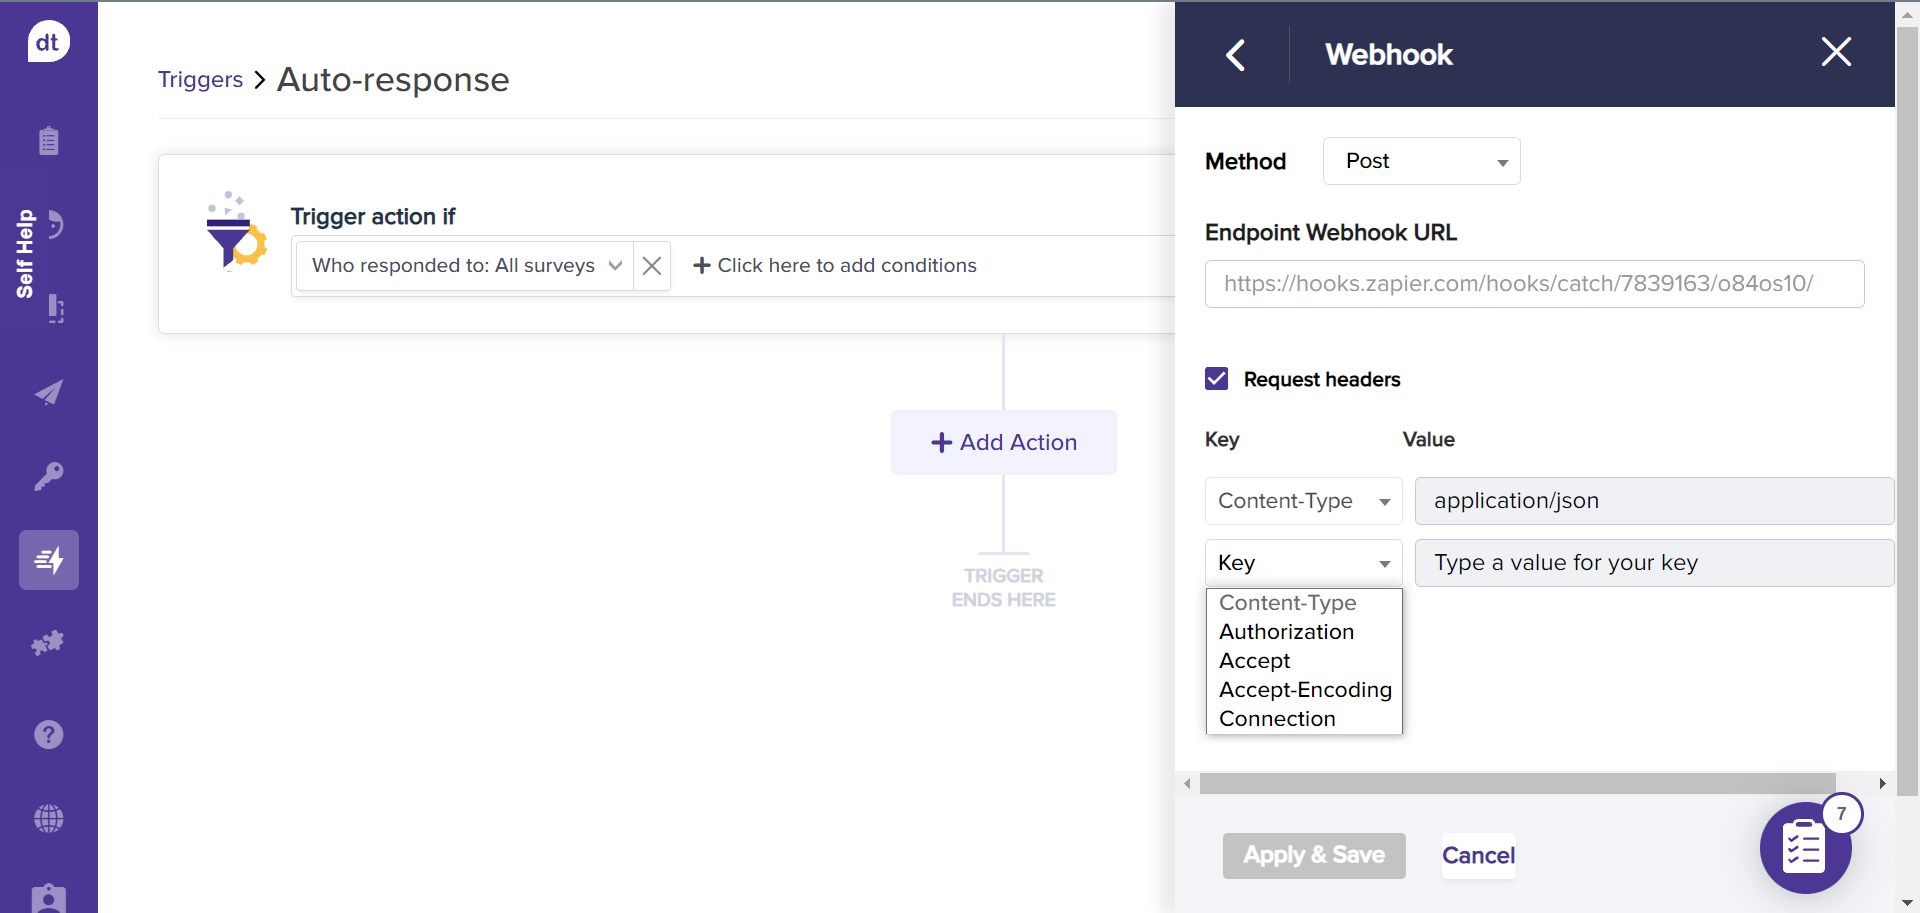
If you desire to delete a field, click the minus sign next to the field.
Click on the Save and Apply button.
The method provides a drop-down menu including POST and GET Webhook methods.
Webhook URL
The URL has a limit of 2,083 characters.
The system will verify if the URL structure is valid. If not, we will display the error message. Please enter a valid URL in red below the text field.
Once a valid URL is entered, the Save button becomes activated. The save button will be inactive till then.
Key and Value
Select Key will be written in the drop-down menu, which, when clicked, will list the available Keys.
The value will be a text box with the default label Type a value for your key.