Elements of Customization
|
|
|


This article will help you understand the following:
What are the various elements of customization?
When to use these elements?
Note: Click on Save when making any customizations to avoid missing out on any settings you have made.
Theme Type
By default, your program will be applied with a Dropthought color theme. However, these can be customized as per your brand guidelines.
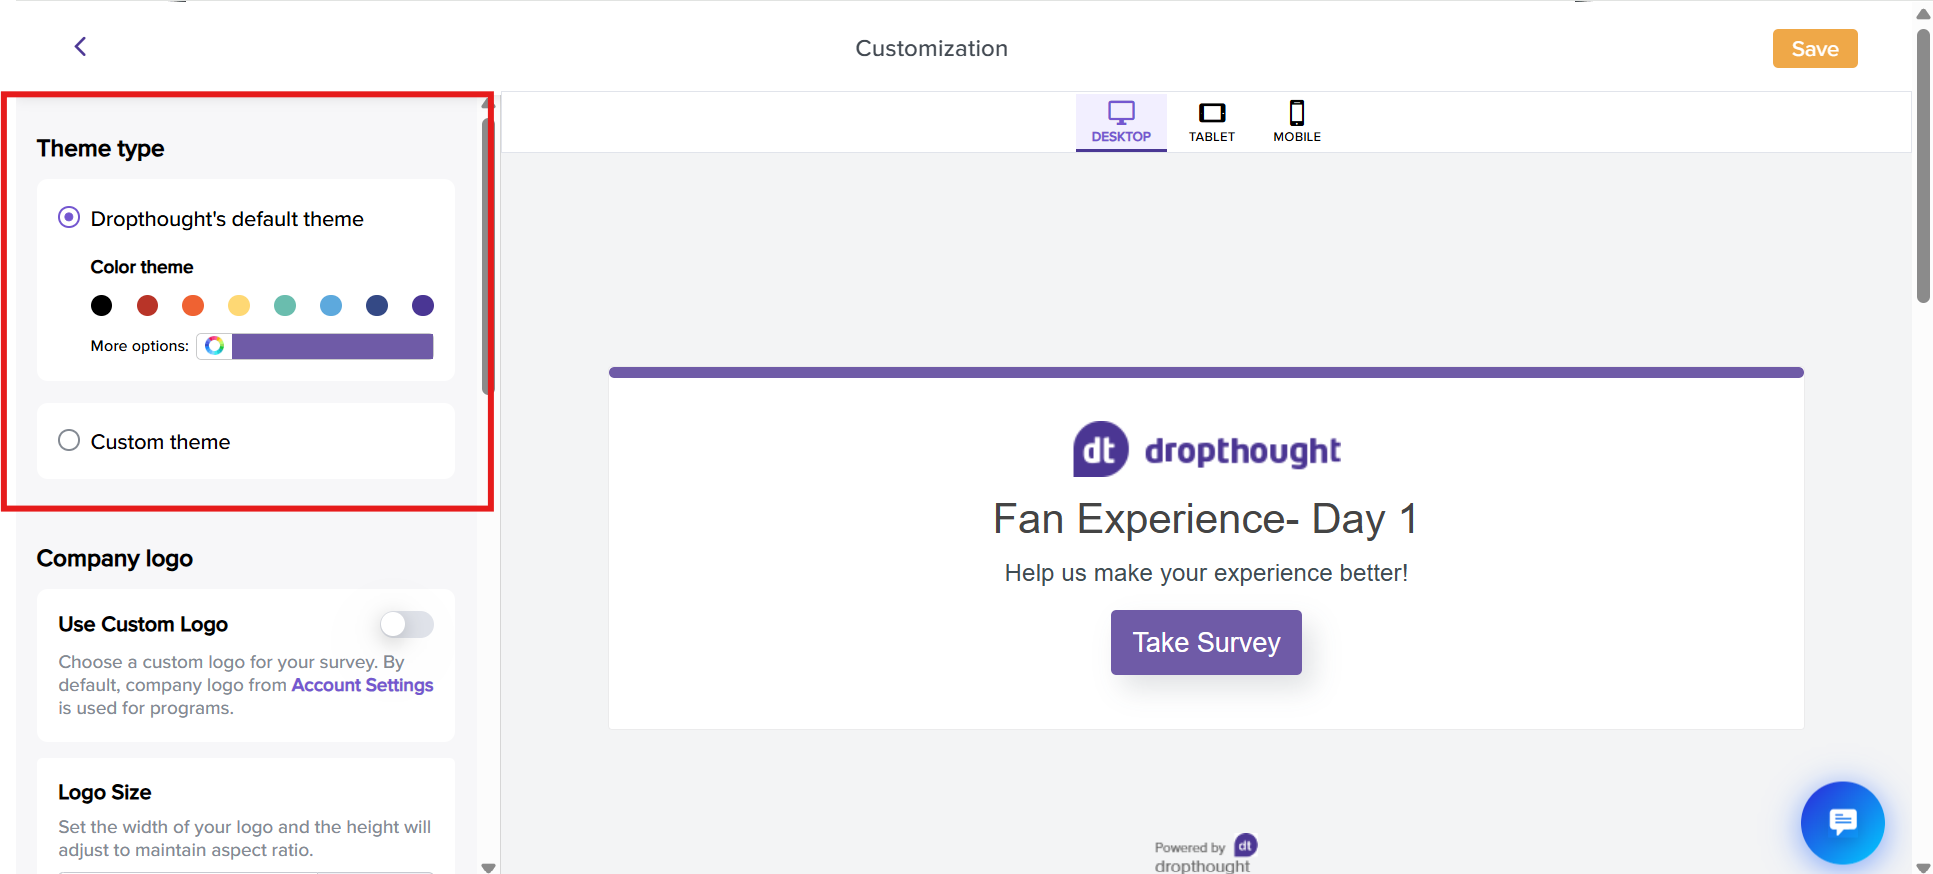
Click on the color dots to select a color for your program.
Additionally, click on the color bar against More options. You can select a required color using any of the below methods:
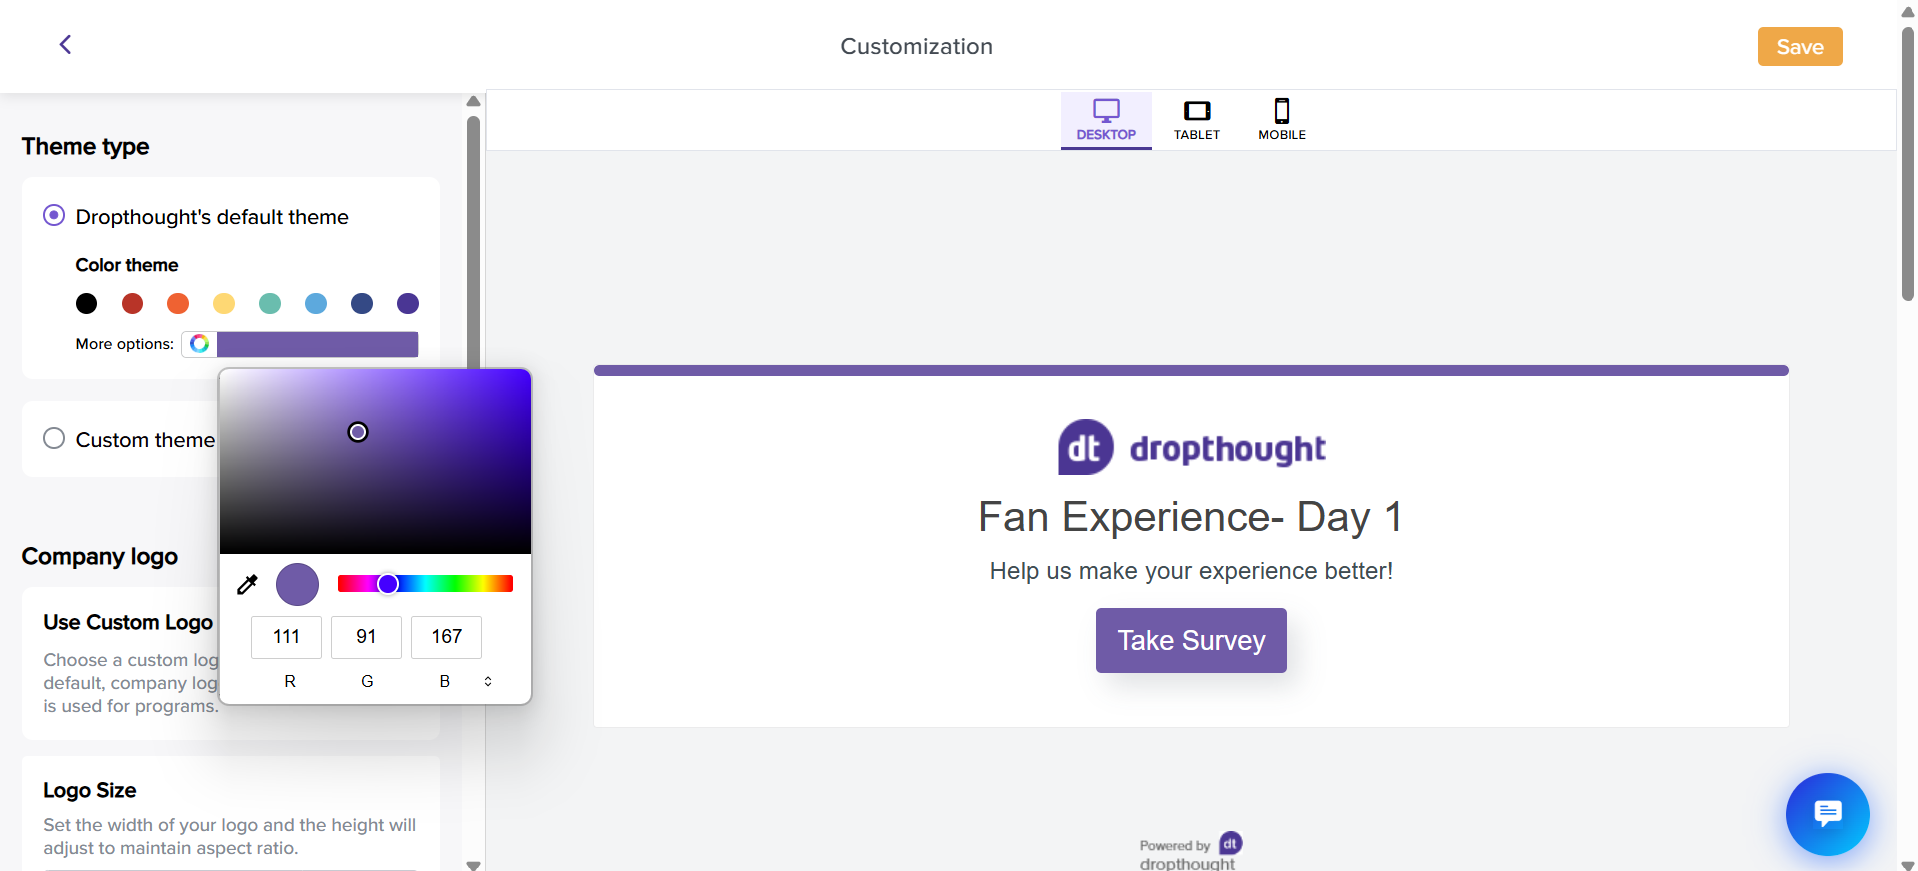
You can drag and drop to the appropriate color.
You can enter color codes manually in RGB, HSL, or HEX formats. Click on the up and down arrow to switch between the formats.
Use the scroller to adjust the color. The color codes will be set accordingly.
Further, click the color picker icon to pick up a color from anywhere on the page.
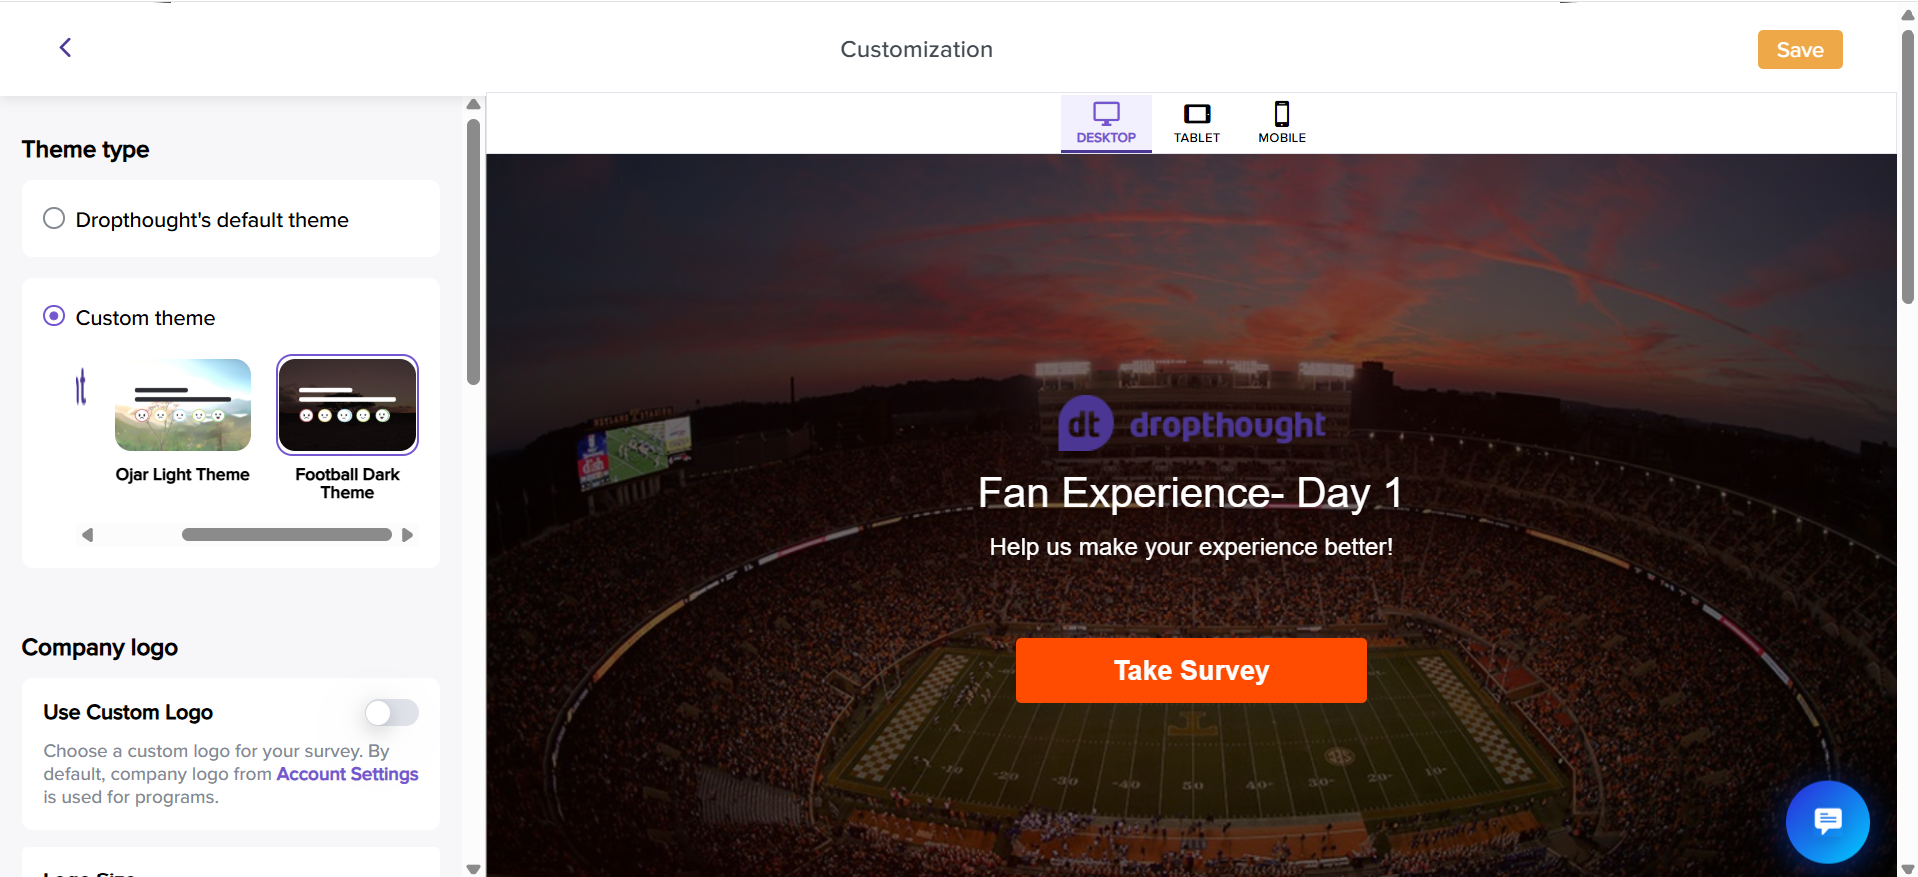
If you have any custom EUX enabled for your account, you can find them within the Custom theme. Click on it, select a theme, and the preview will update with the selected theme.
Custom Logo
Using your organization logo on the program will give you a final and professional touch. Also, it provides the recipients with a sense of familiarity, impacting their responses.
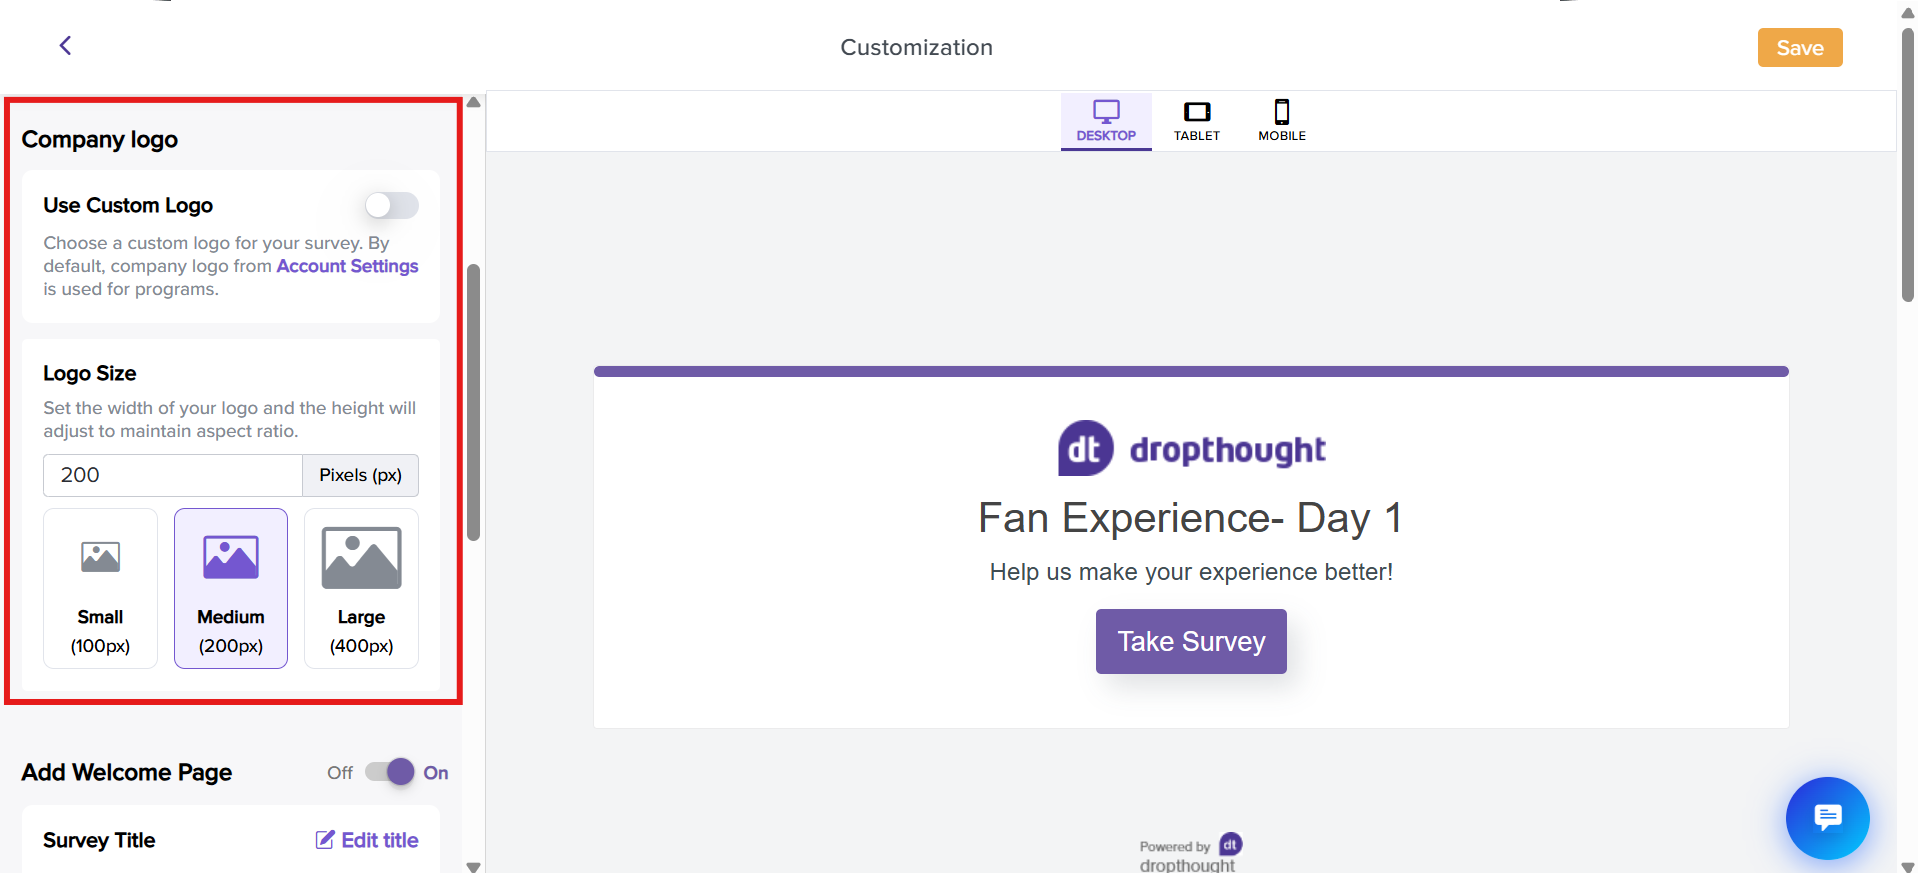
To upload another logo, enable the Use custom logo toggle.
The toggle button will be turned off by default when the Dropthought logo is added to the program.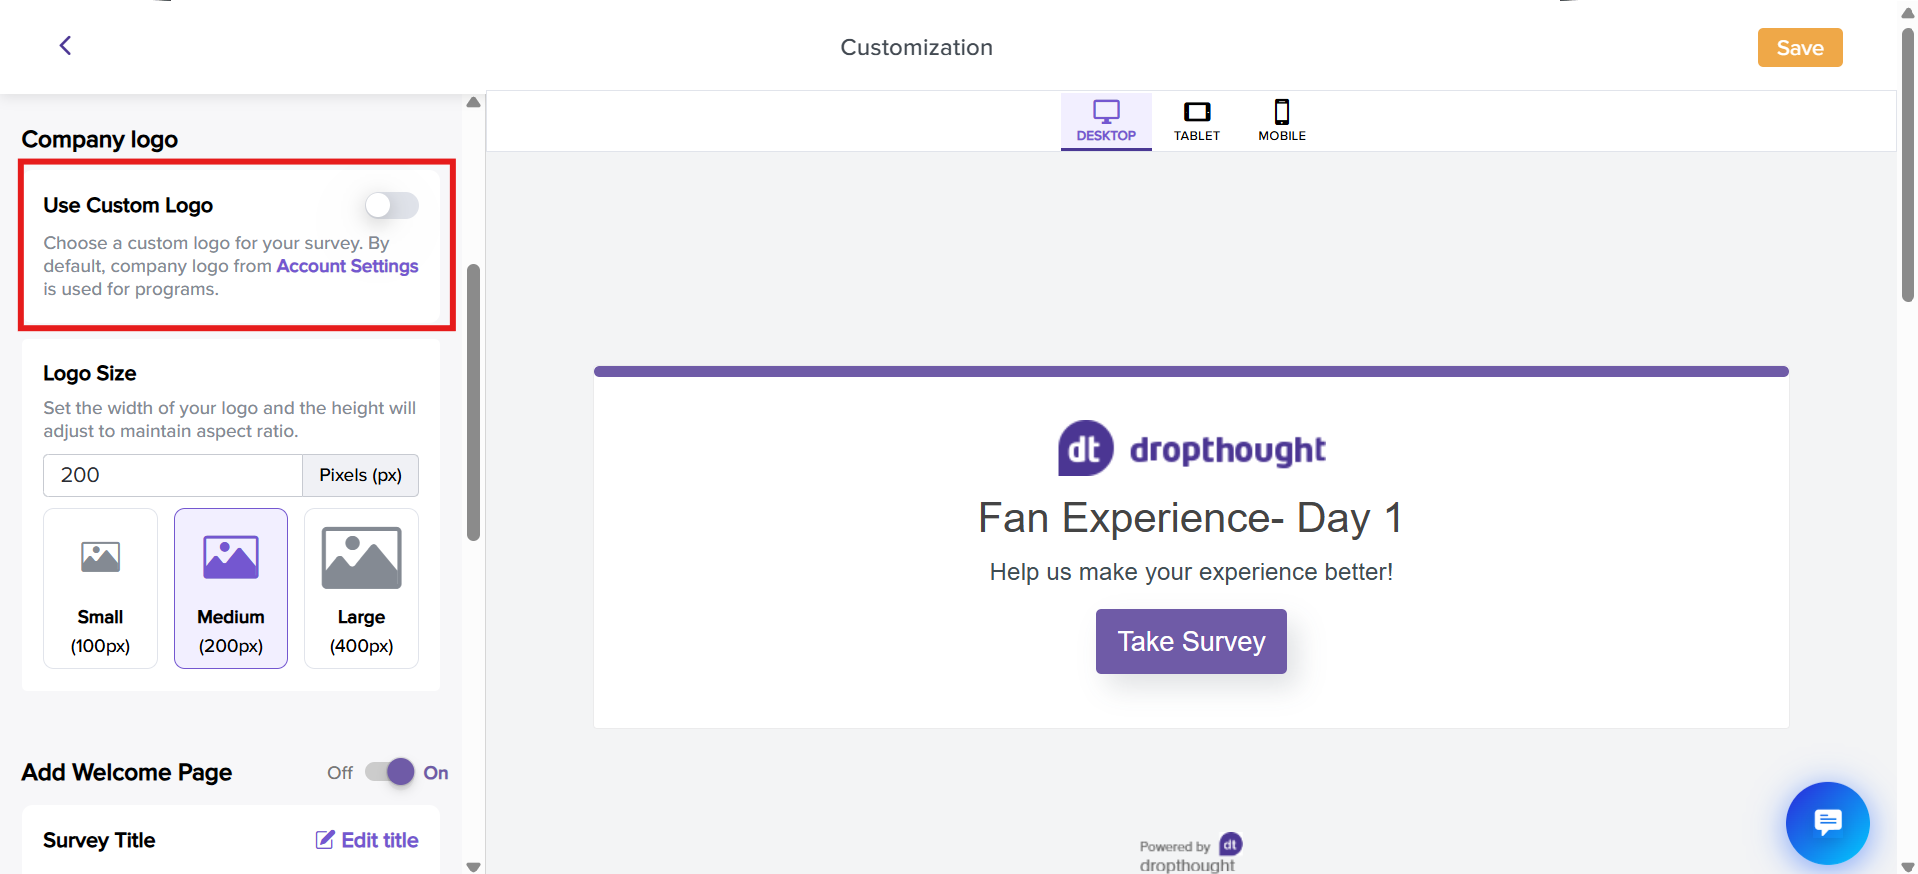
It will automatically open your local files. Select and upload the logo from your system.
Further, the logo size can be adjusted from the customization screen.
You can click on the default sizes: Small, Medium, or large. This will help you resize the logo without distortion.
Otherwise, you can also manually enter a logo size in pixels.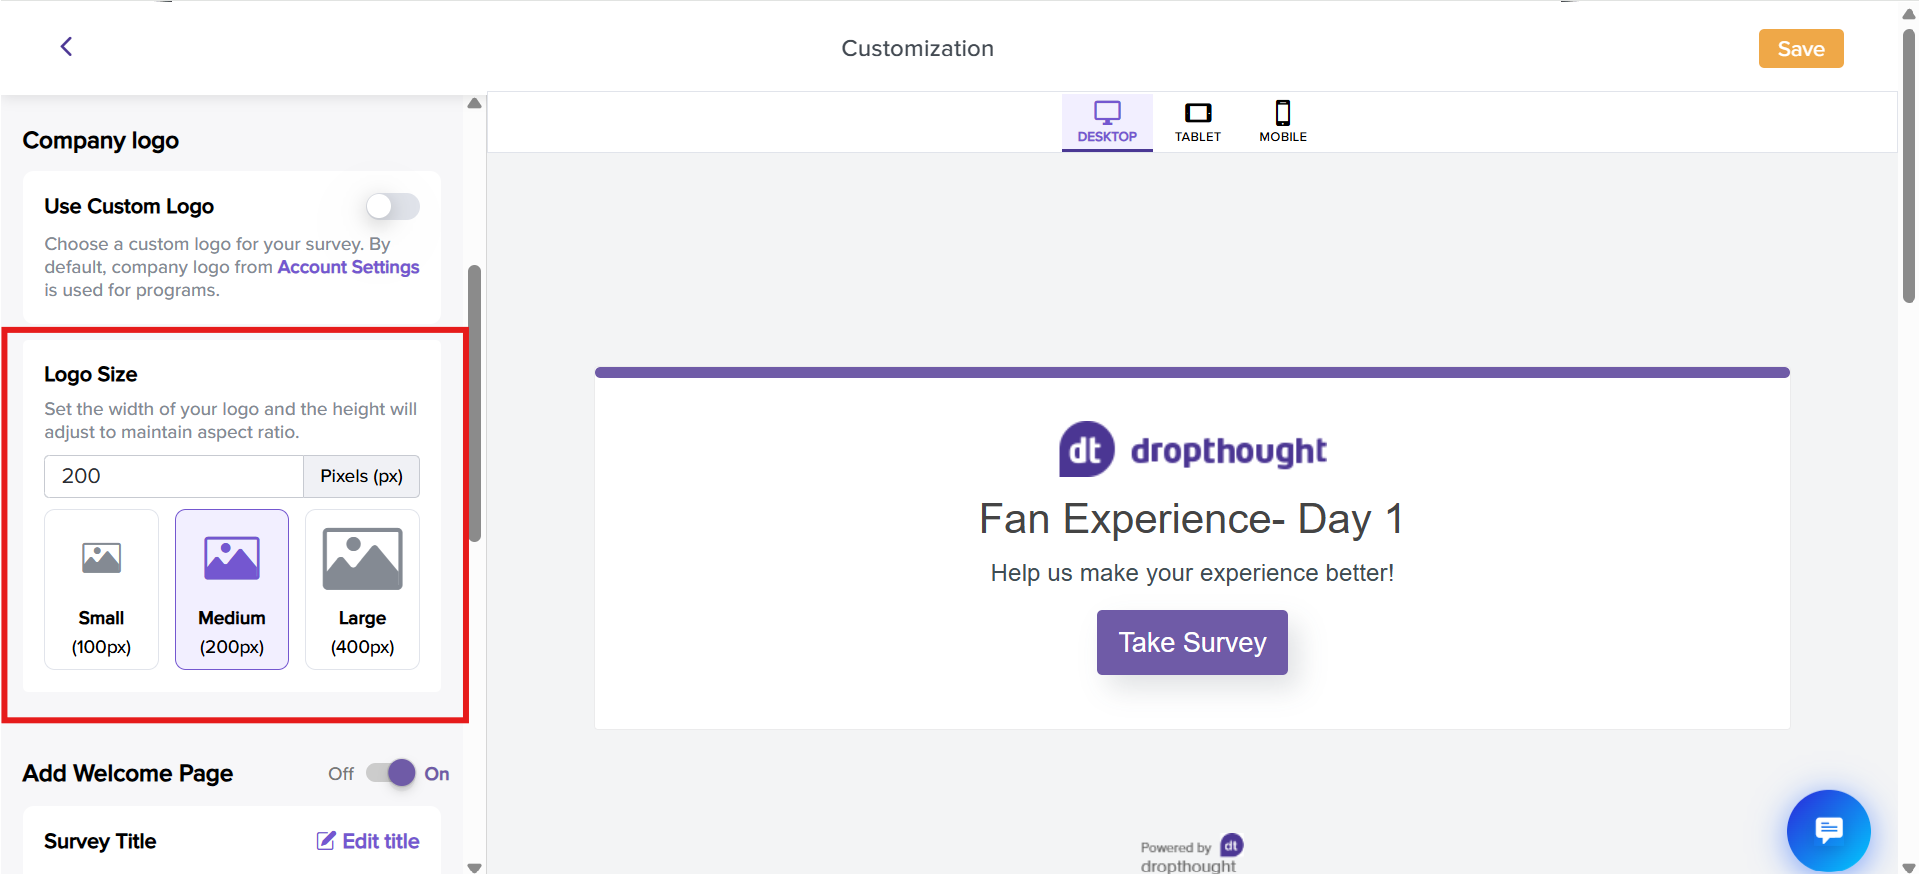
Formatting tools
These tools help you edit your message, survey title, and more, making it easier to improve your survey.
Alignment: Select text alignment as Left, Center, Right, or Justified
Text Formats: Add highlights using Bold, Italics, Underline, or Strikethrough formats
List: Insert a bullet list or a numbered list
Link: Add a backlink to the text
Quote: Insert a quotation or citation
Divider: Separate content with a horizontal line
Text Color: Select the text colour that will be applied to the entire "Thank You Message."
Text Styles: Select from various heading styles
Font: Select a suitable font
Edit in HTML view.
<> to edit the text and format in the HTML view. It will open a pop-up where you can format the text in HTML.

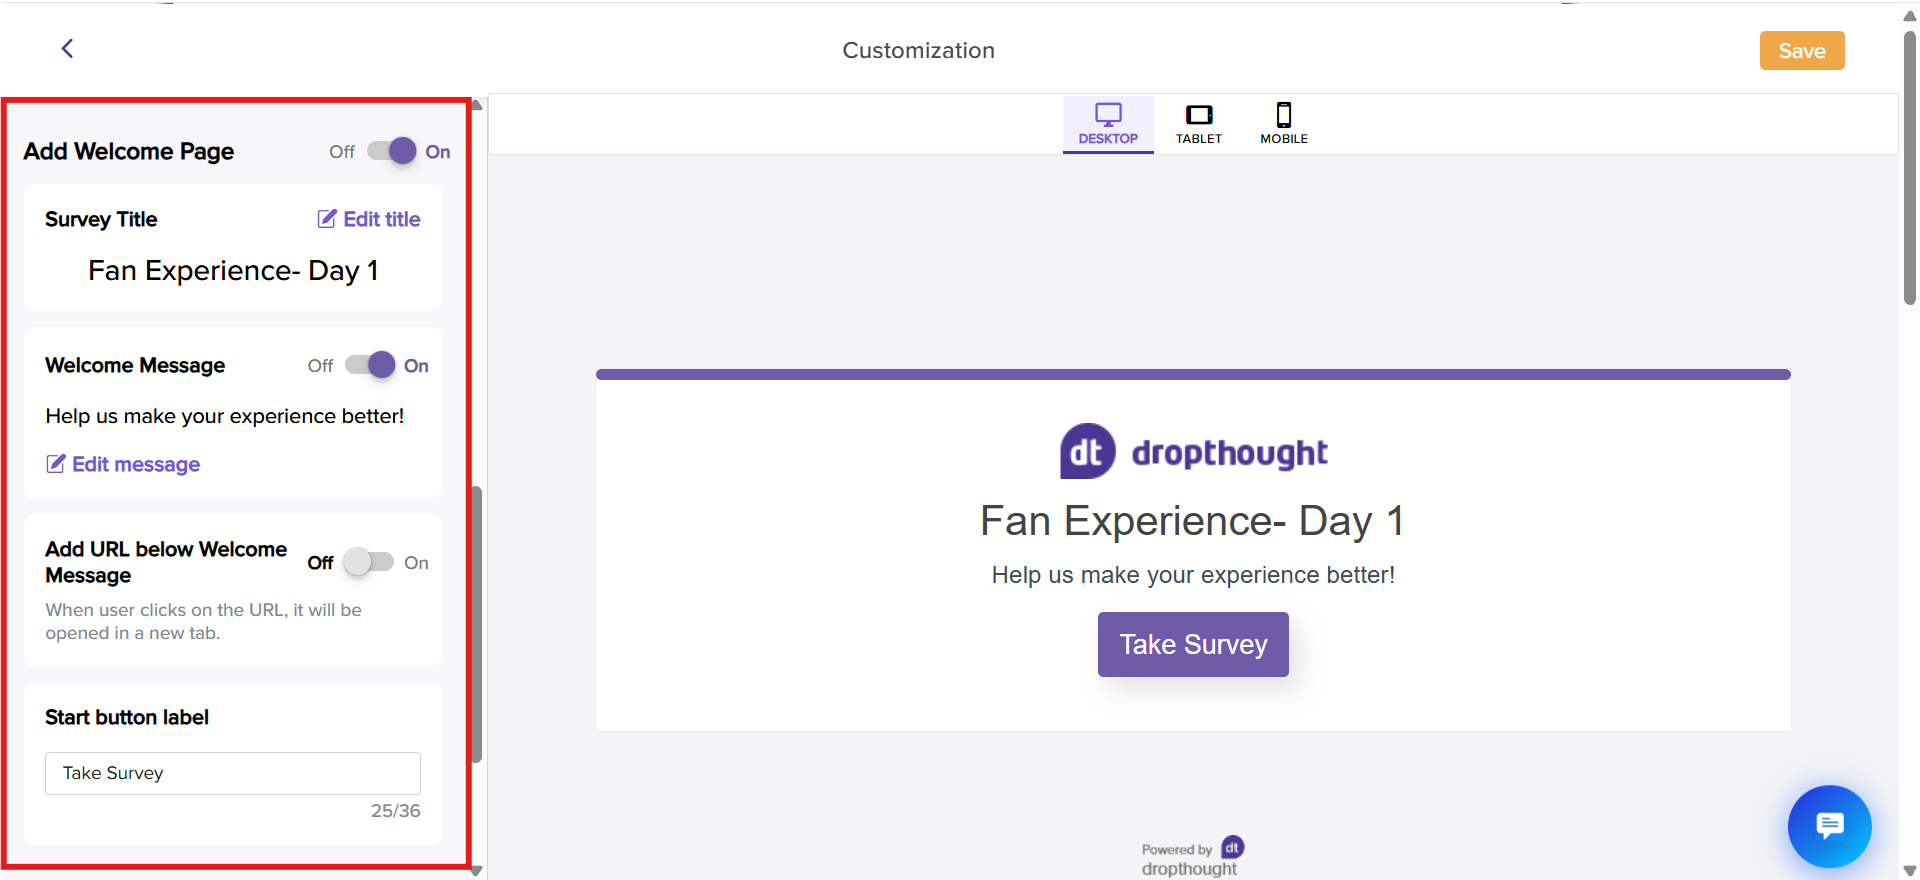
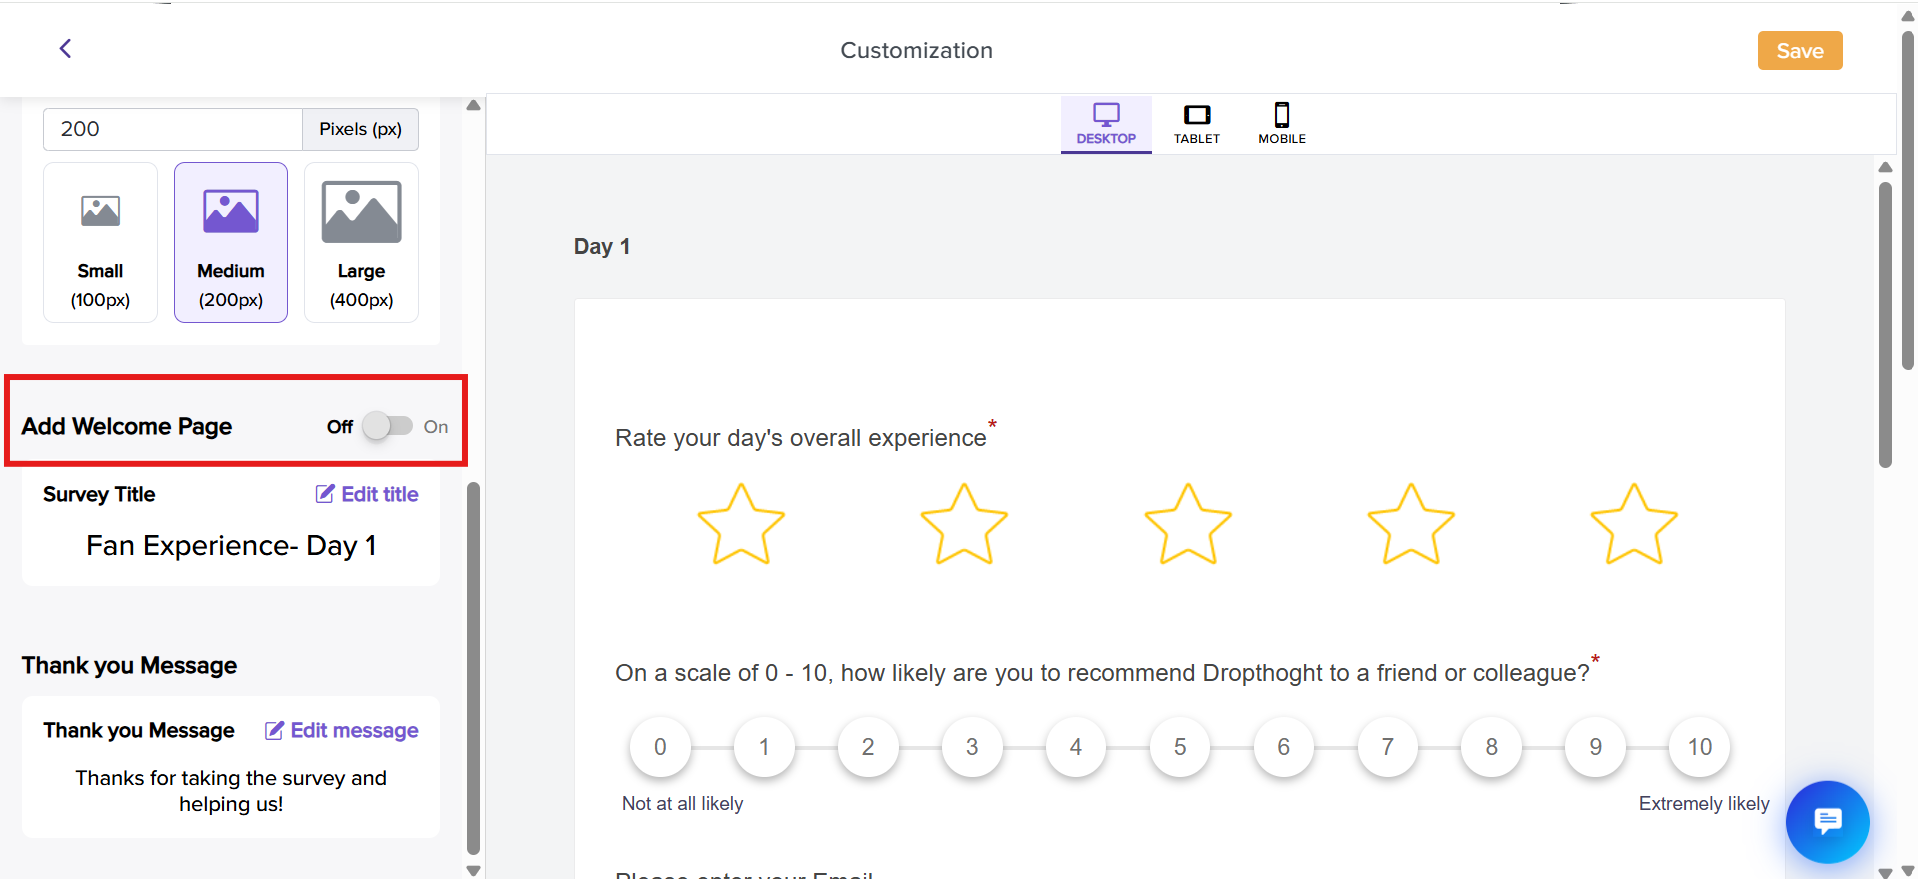
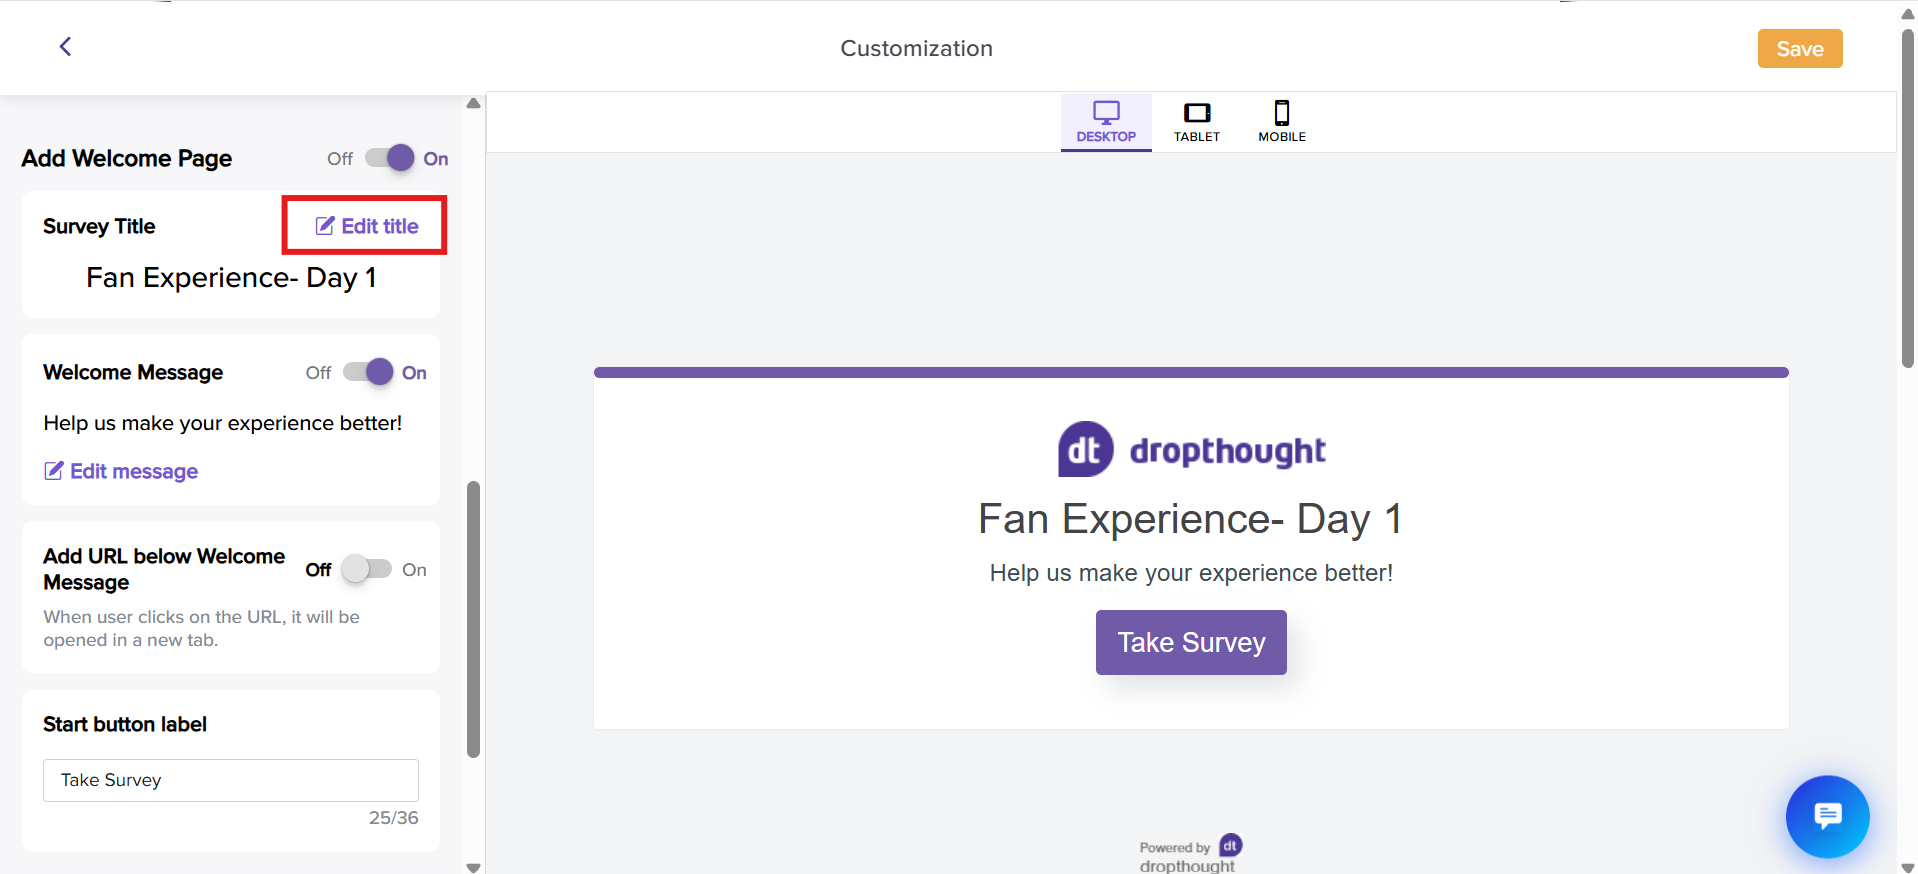
Welcome Page
By default, your program will have a first page added. This acts like the cover page with your organization logo, any message for the recipients, and a CTA to begin entering their responses.
If you toggle OFF the button for the Welcome Page, your recipients will be redirected to the program's first page. Refer to the screenshot below:
However, it is recommended that you have a Welcome Page, set up context for your audience, and add instructions.
This feature can be used when you have embedded the survey’s first page on the email body.
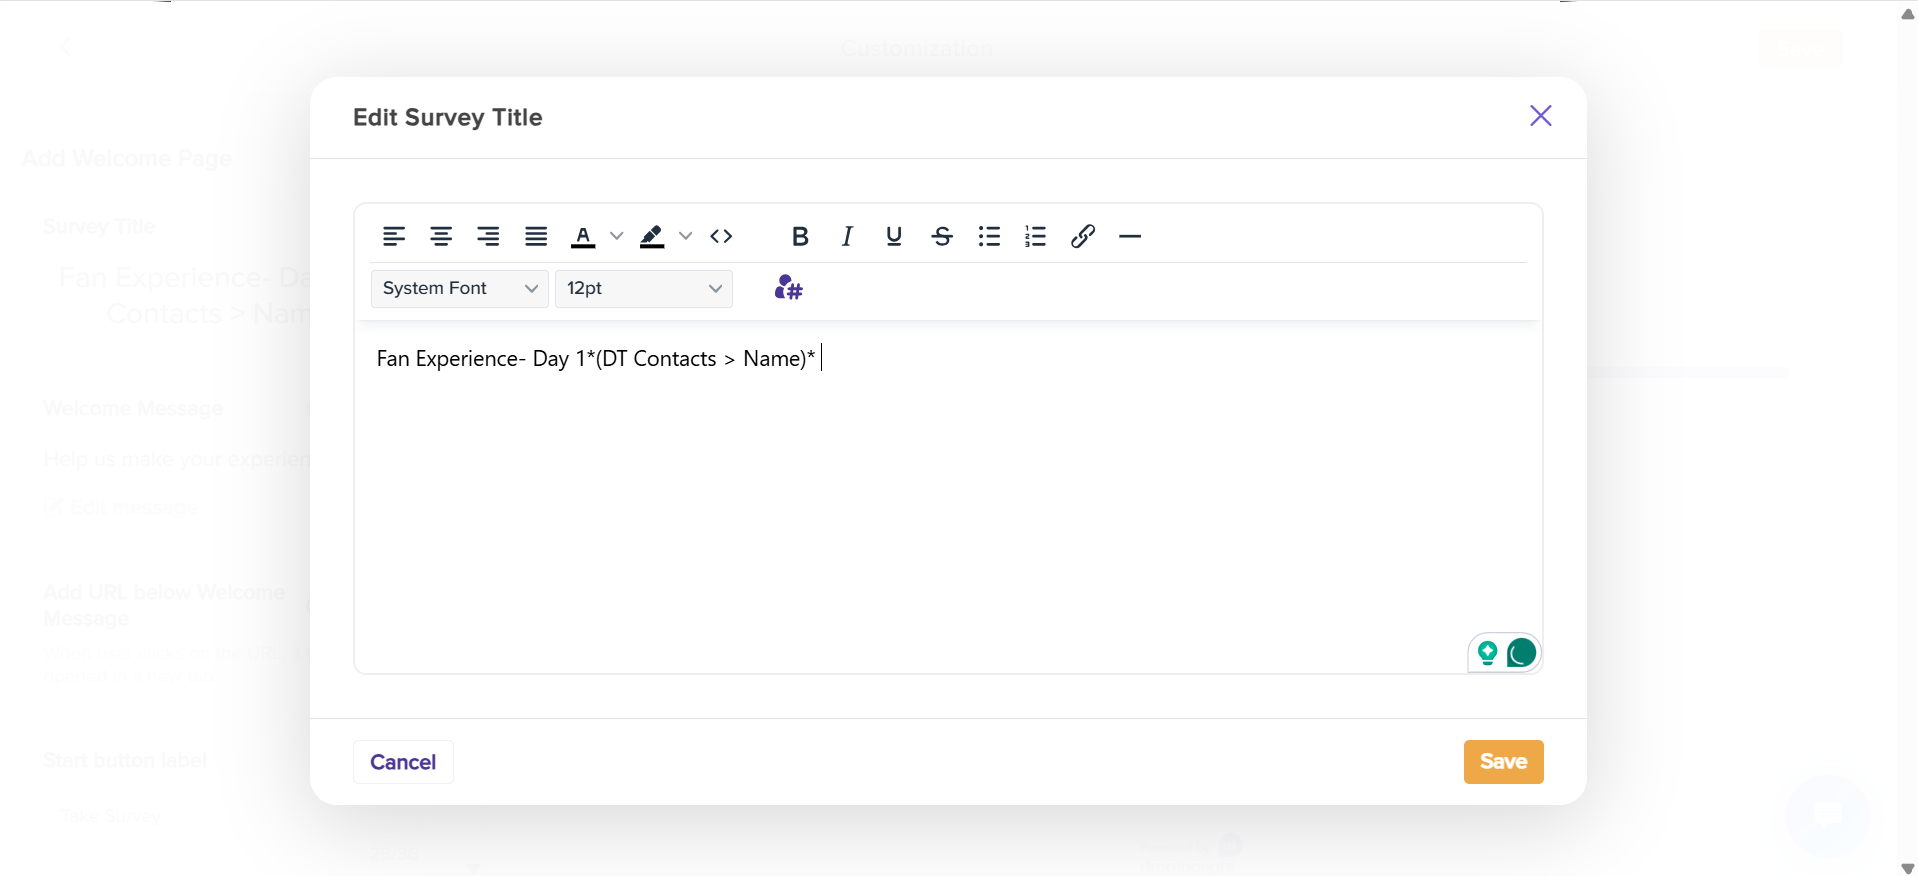
Survey Title
Click on the Edit title to open the editor.
You can edit your survey title using the formatting tools from the following pop-up.
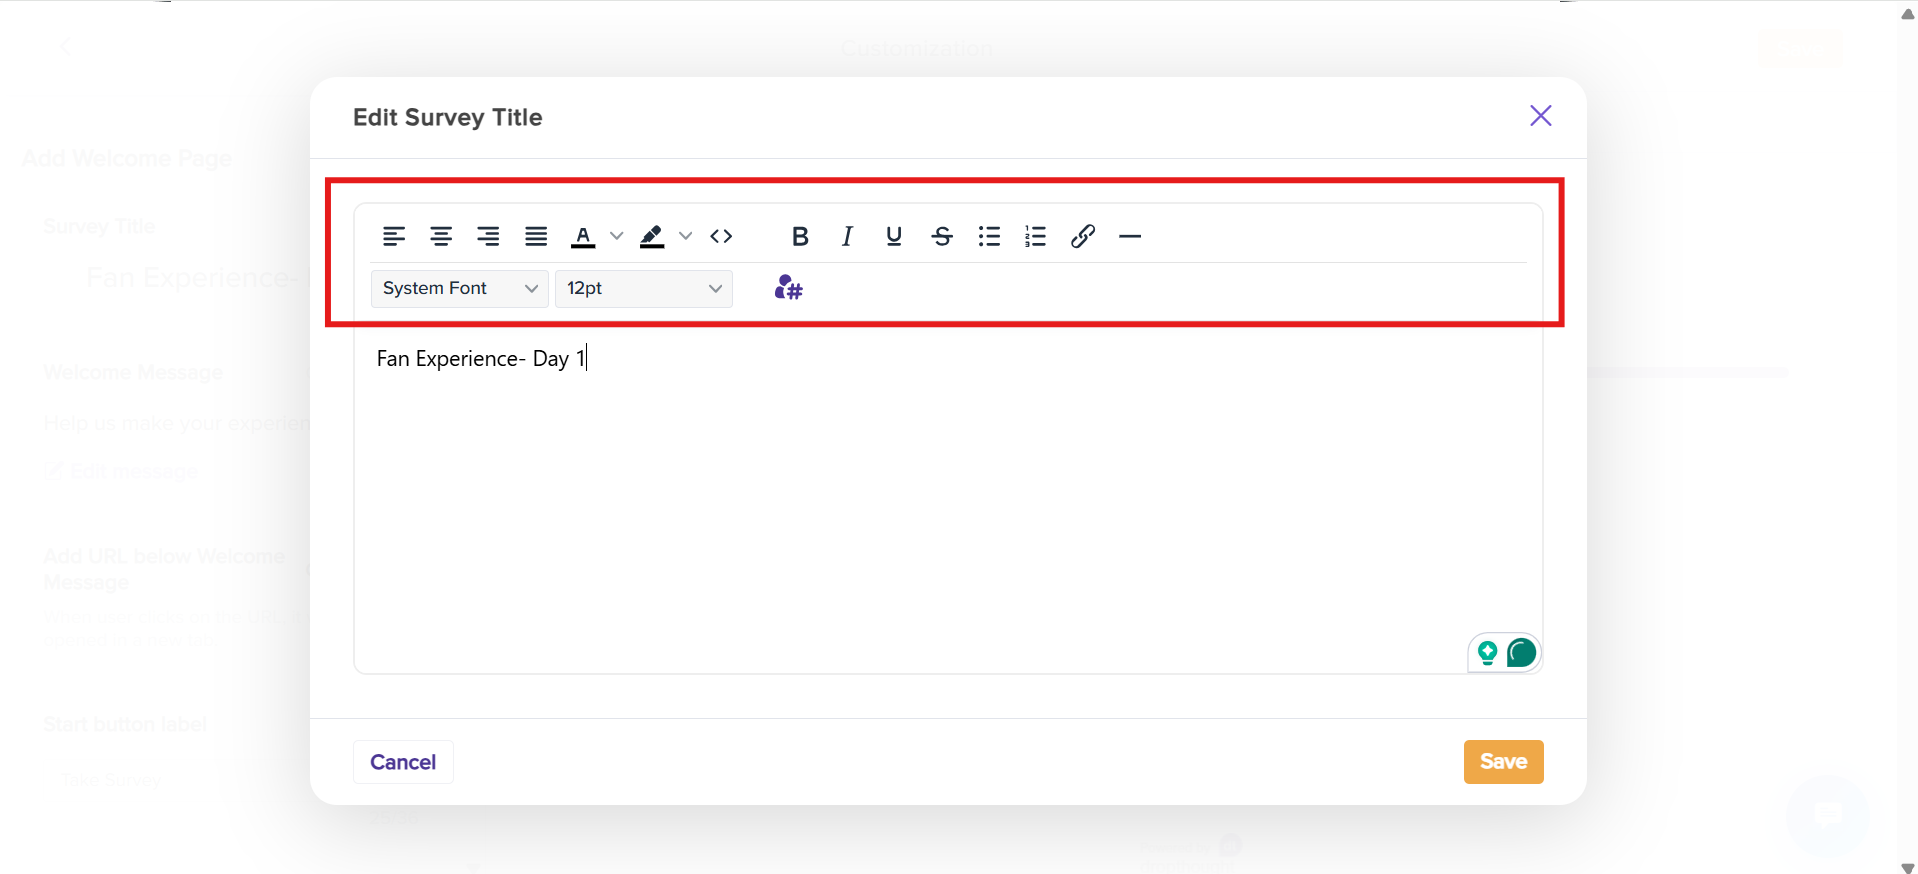
Click the Metadata tag icon to add metadata.
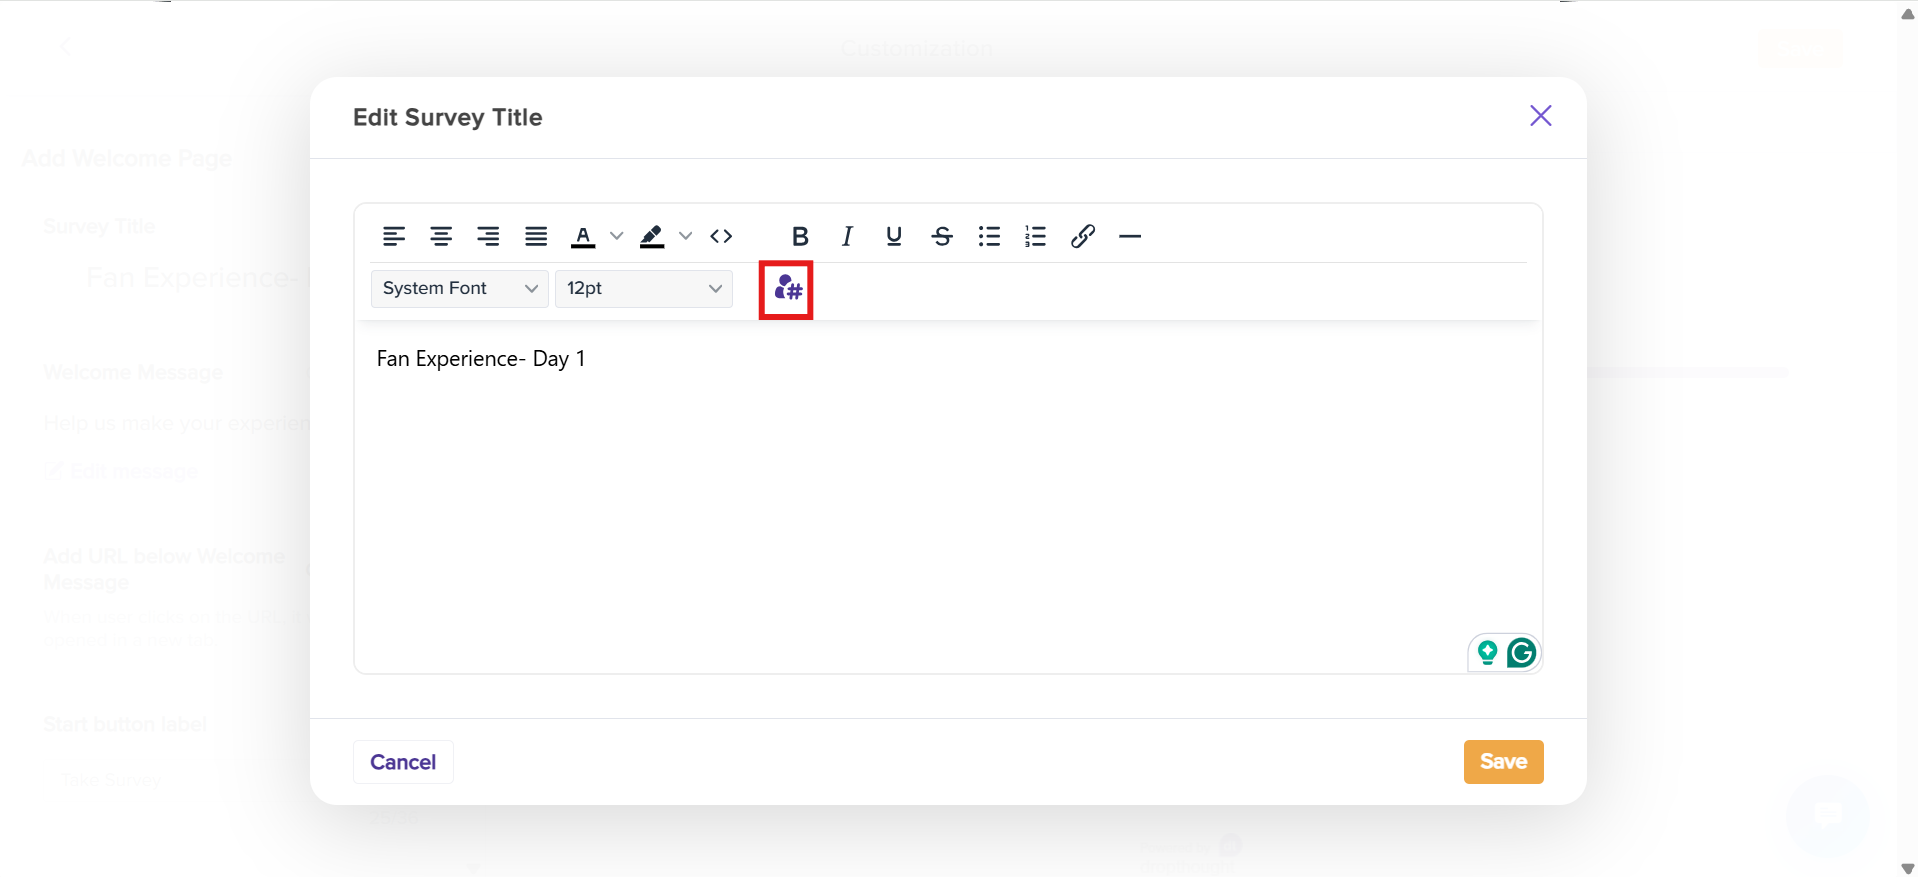
Choose a tag from the list, and it will automatically update your survey title for better personalization and organization. Click on Insert.

Click Save to finalize your title. For the respondents, the placeholder text will replace dynamically with relevant metadata value.
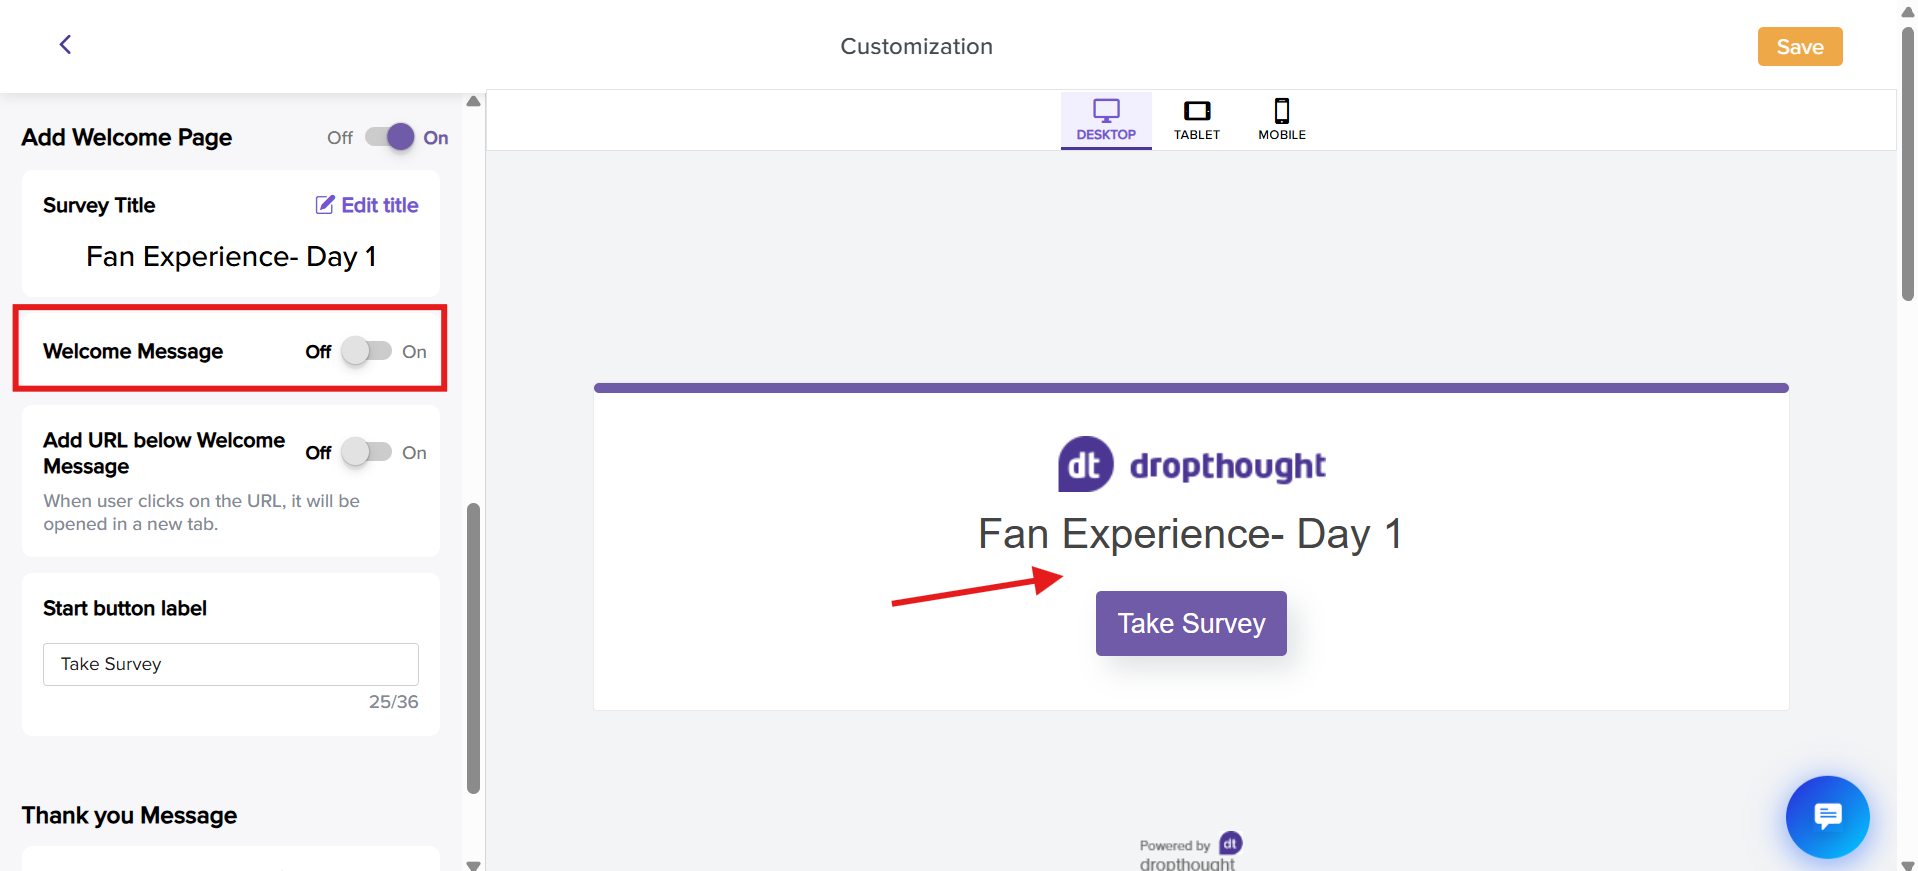
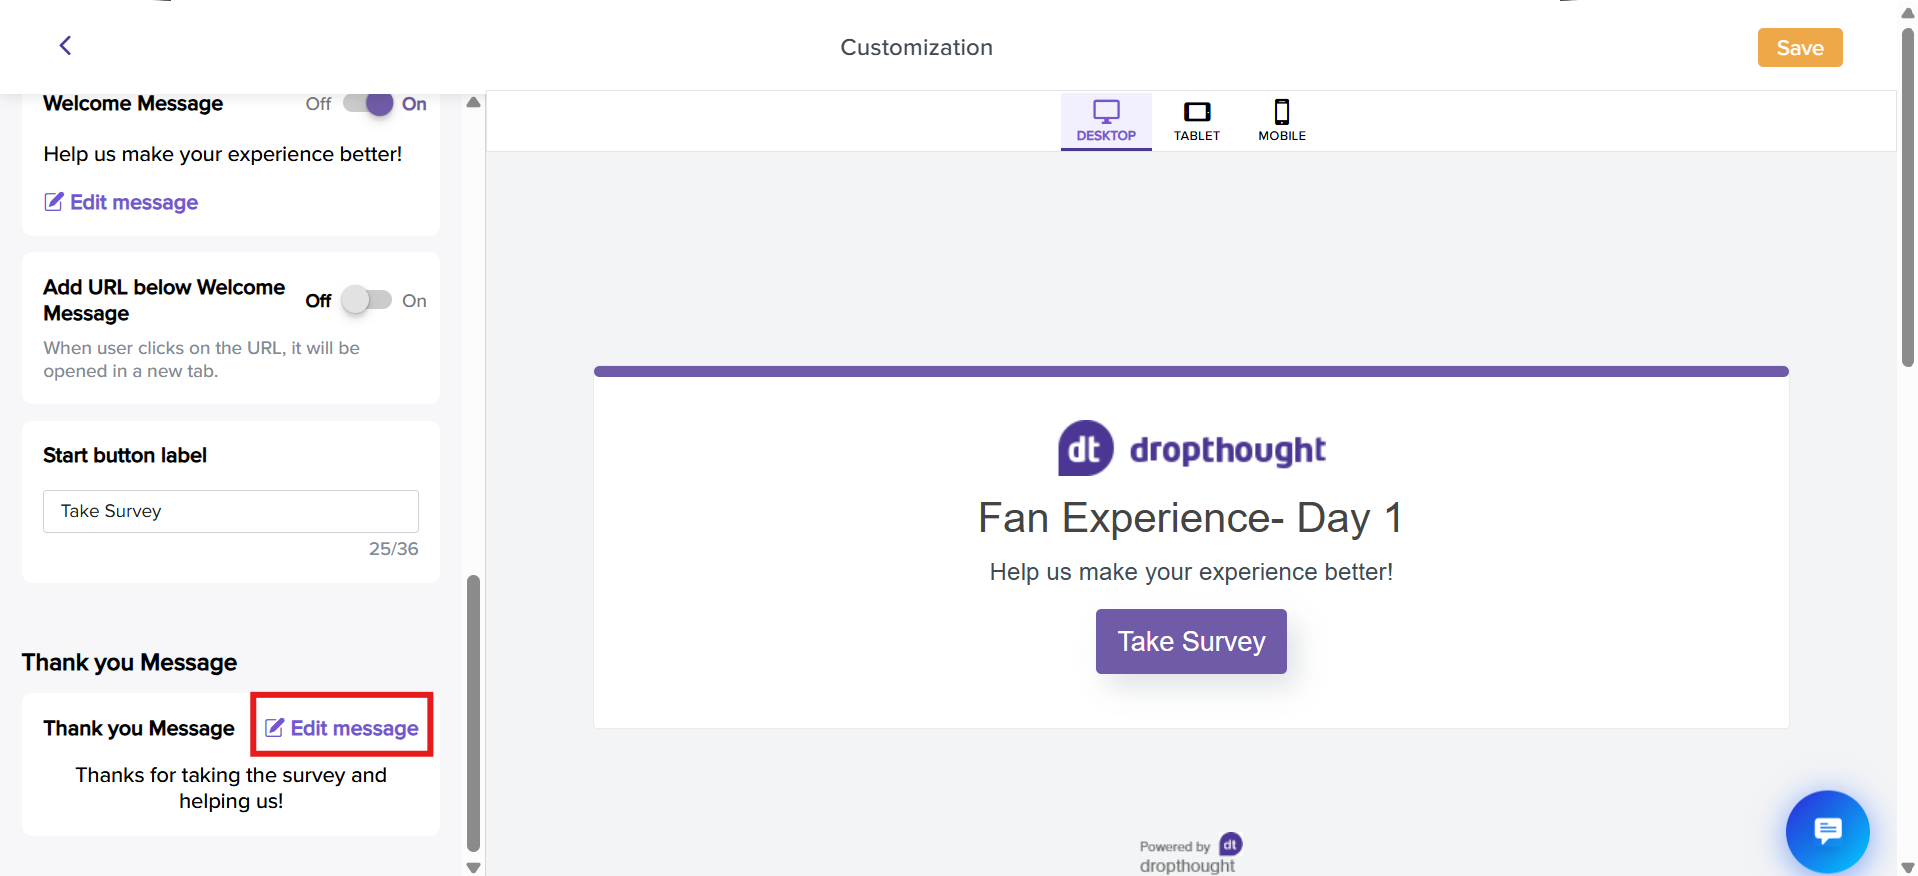
Welcome Message
The welcome message is an optional text that can brief the expected questions.
These appear below the Survey Title on the program's Welcome Page. (In the below example, below the survey title: Fan Experience- Day 1).
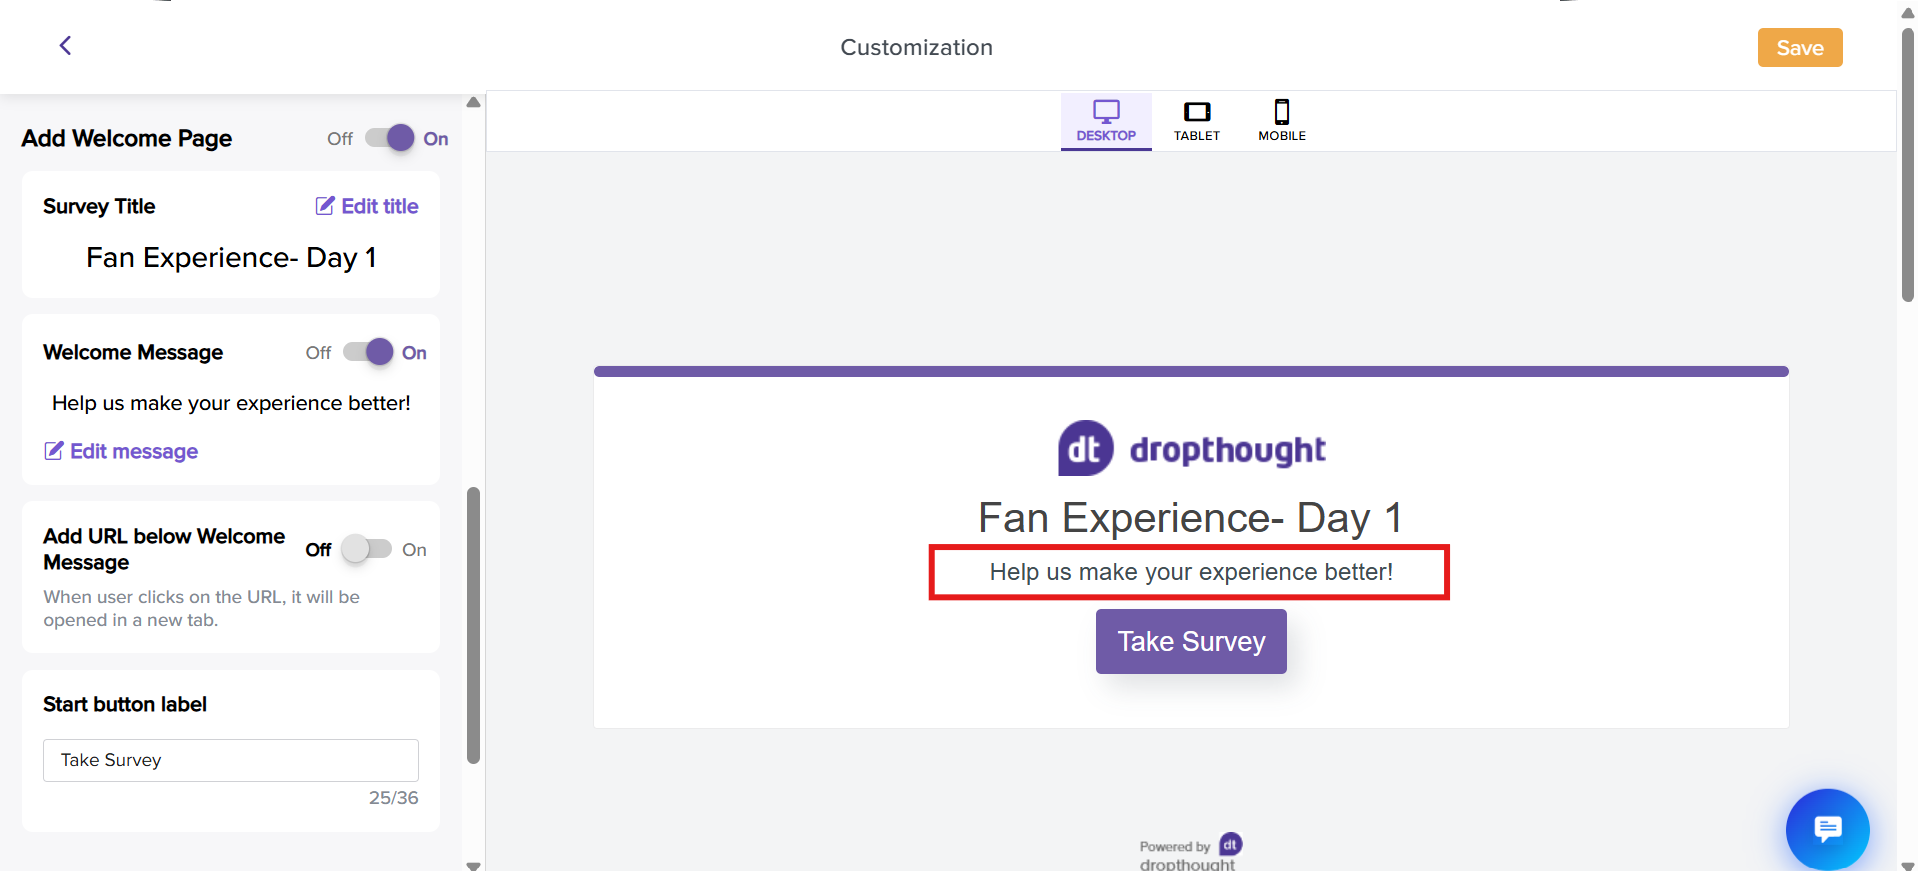
You can toggle off the welcome message anytime. It will automatically turn off if you leave it blank and save it.
However, it is recommended that you have a Welcome message, set up context for your audience, and add instructions.
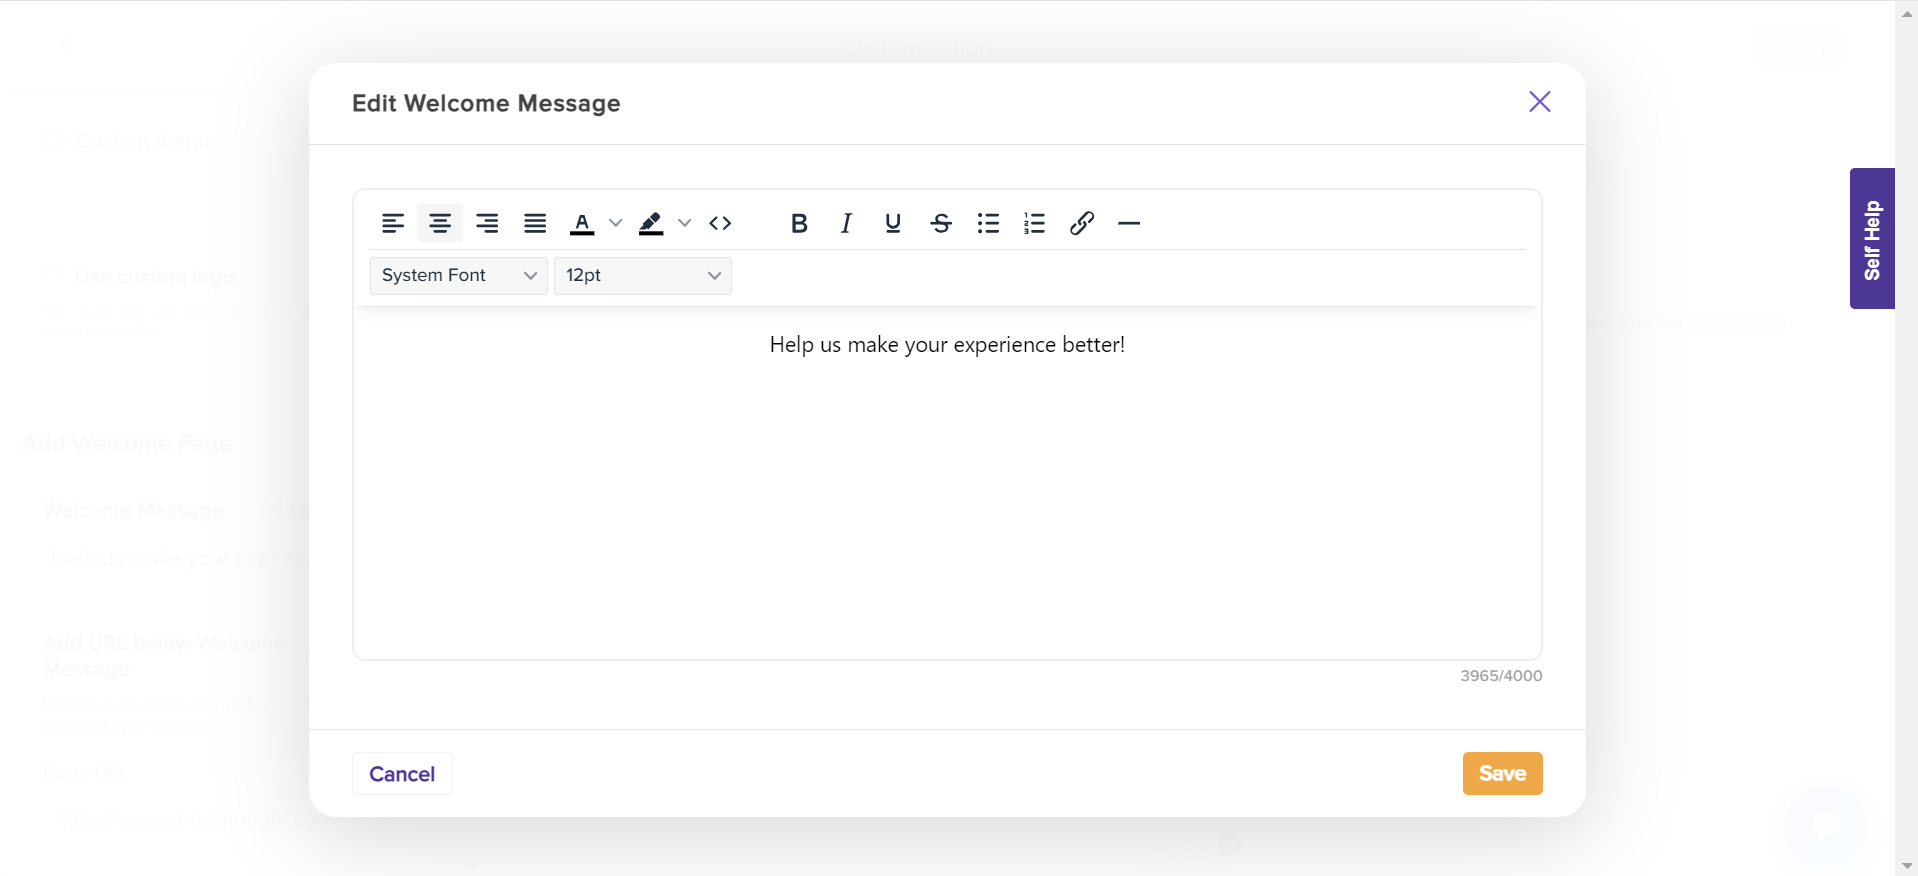
Click on Edit Message to open the editor.
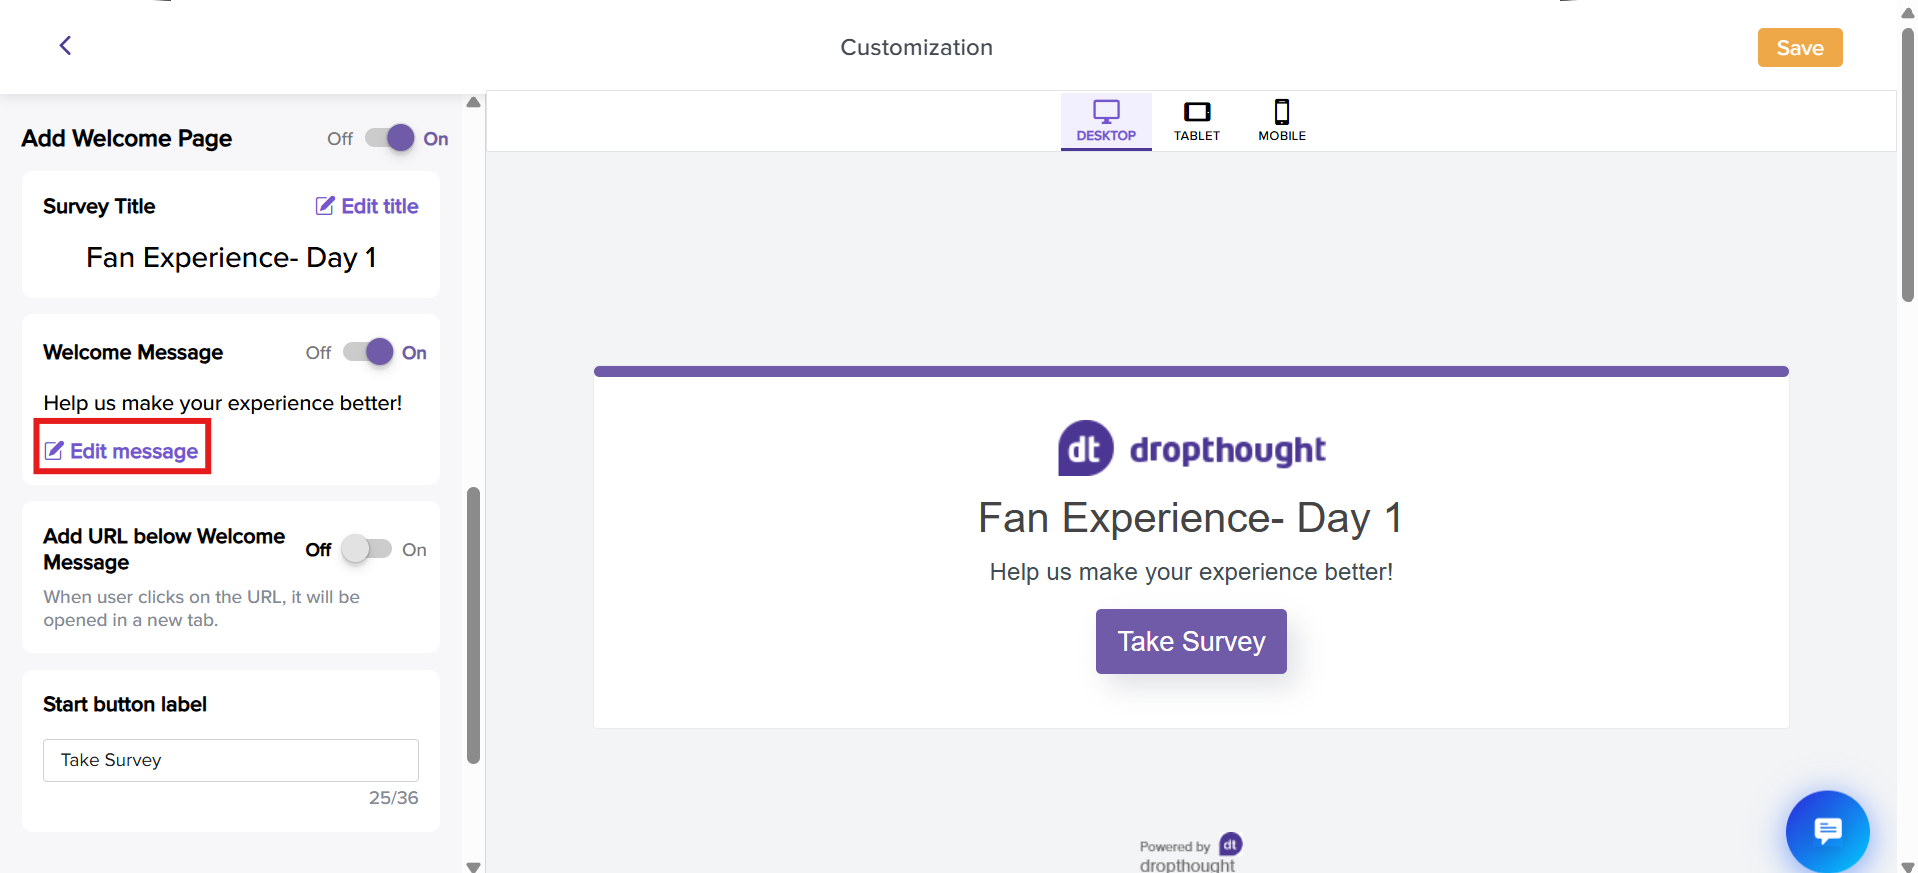
You can edit your welcome message using the formatting tools from the following pop-up. Also, You can add up to 4000 characters over multiple lines.
By default, the Welcome Message will display 500 characters on the welcome page.
Followed by the text Read more. You can click on Read More to view the entire text.
Add URL below Welcome Message
You can also add links to your organization-specific pages, such as the website, T&C, etc. By default, the toggle button will be turned OFF, and there will be no webpage link below the Welcome Message.
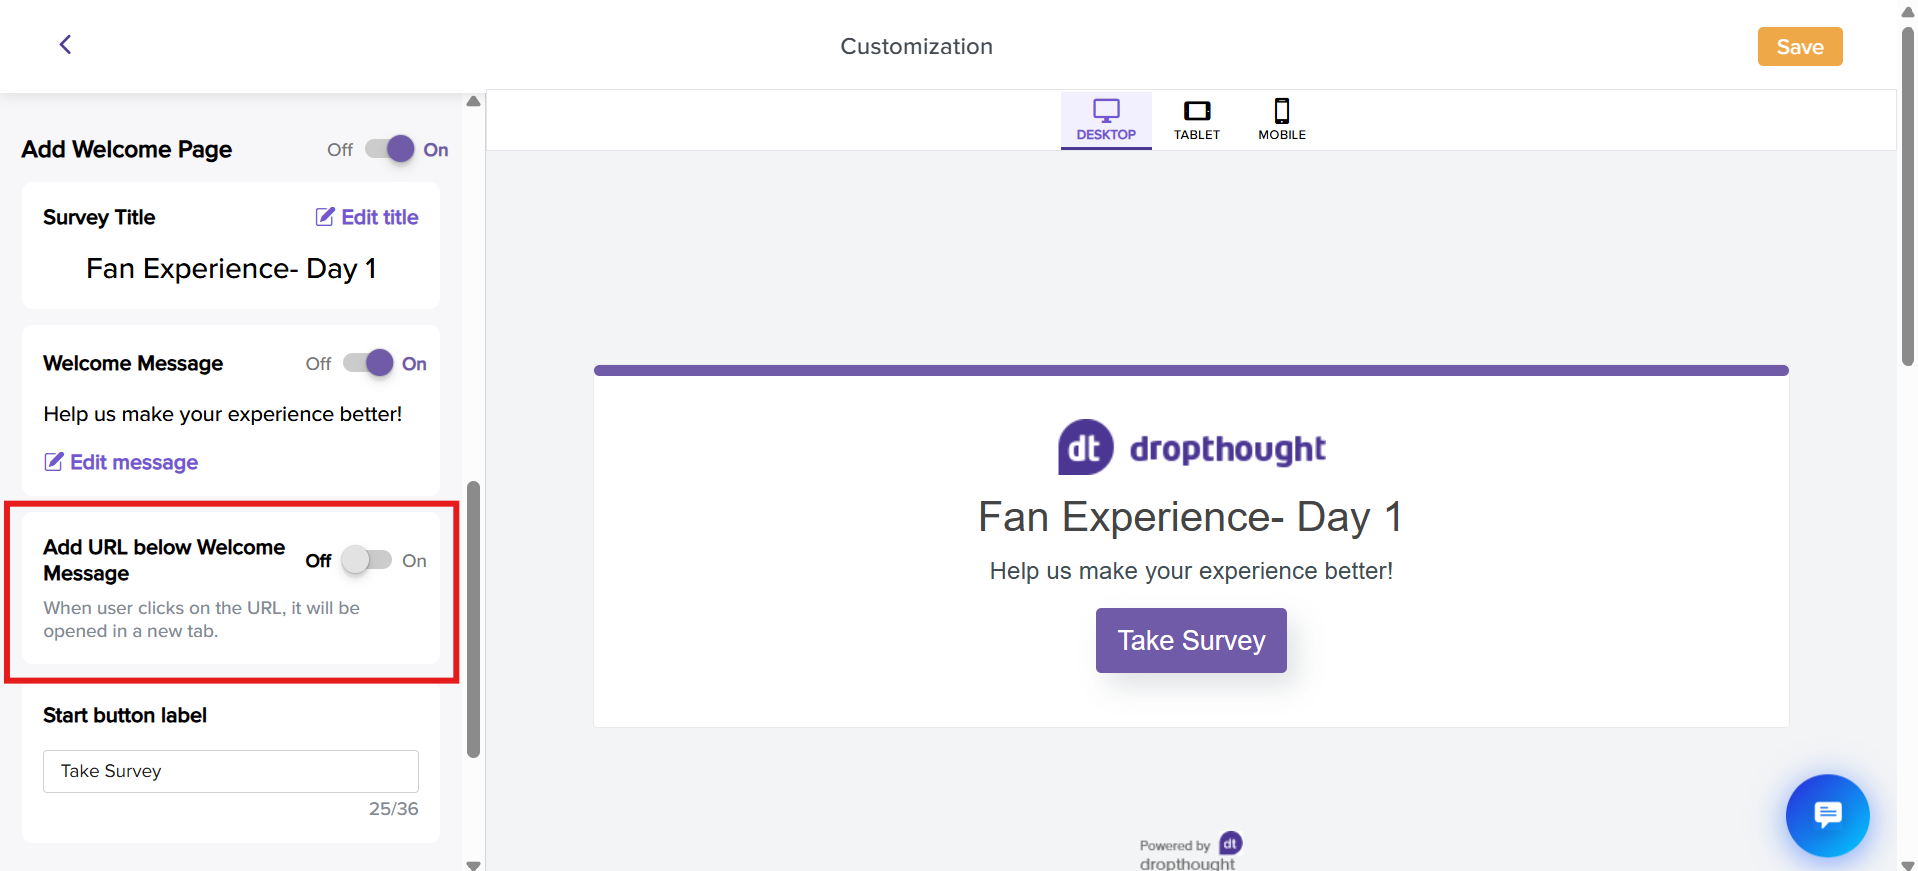
Toggle the button ON to get further options to add and name the URL.
Copy and paste the webpage URL.

It will appear below the Welcome Text.
You can add a URL with up to 400 characters.Click on the checkbox Name your URL to shorten it and replace it with a word.
You can add up to 64 characters for the same.You can view the changes on the screen's preview panel on the right-hand side.
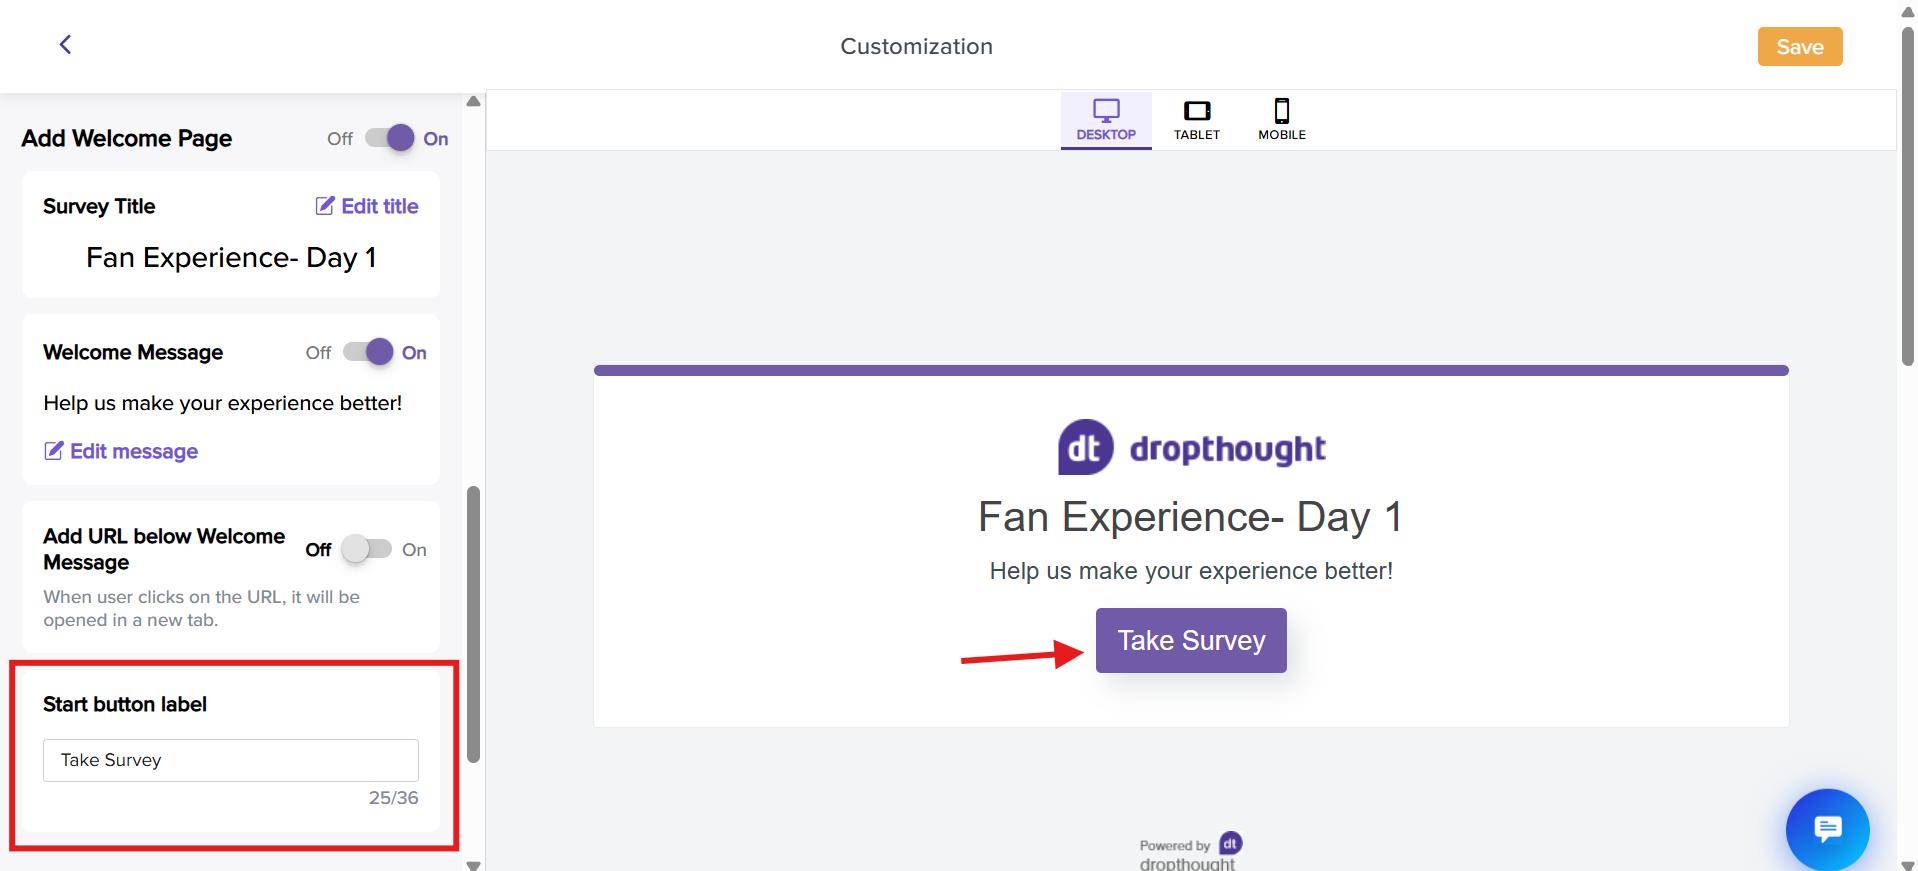
Start Button Label
The Start Button stands for the CTA label. You can add text up to 36 characters.
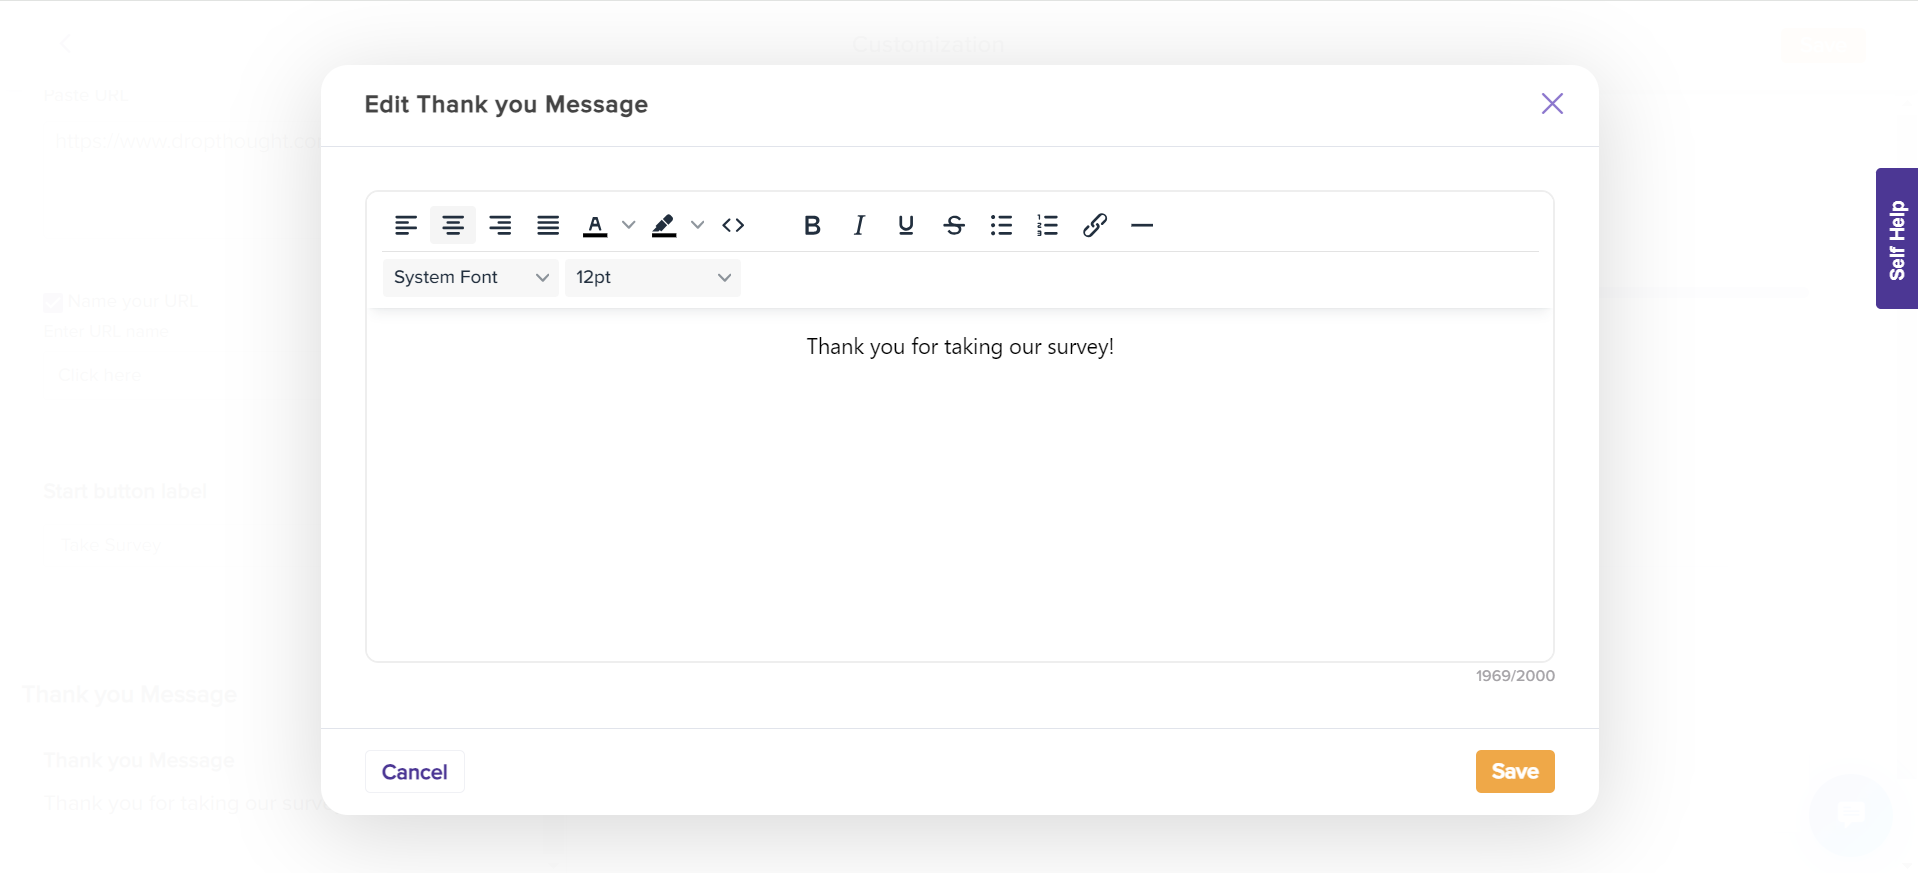
Thank You Message
The thank you message appears as the final screen after a respondent completes their responses. It is optional and can be added at the end of the program.
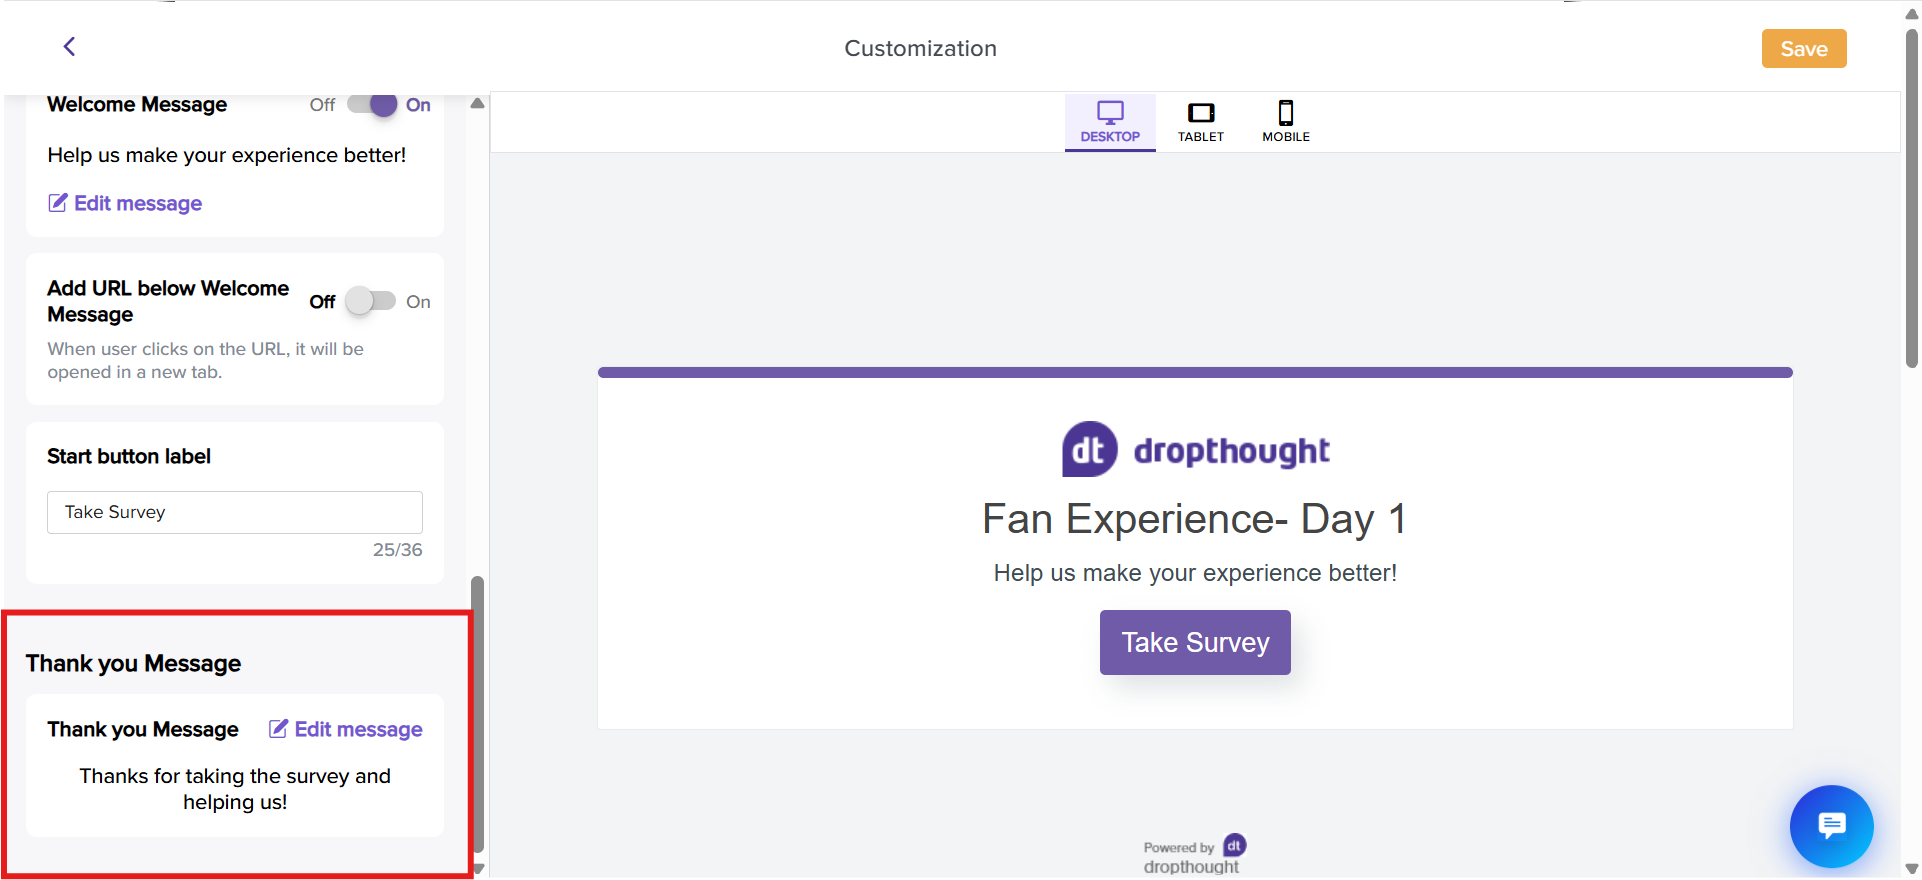
Click on Edit Message to open the editor.
You can edit your message using the formatting tools from the following pop-up. Also, You can add up to 2000 characters over multiple lines.
Note: Click on Save when making any customizations to avoid missing out on any settings you have made.