Apply & Save Filters
|
|
|


Dropthought Reports allows you to customize your response view. This enhances your analysis and helps you derive faster and more accurate findings.
This article will help you understand:
Where to find the filter for reports?
How to apply a filter?
What are the various conditions that you can add to a filter?
How do you save a filter and reuse it?
Add a Date Range
All your reports can be viewed based on the date range of response received.
From the program’s Reports page, locate the Date Filter in the top right corner.
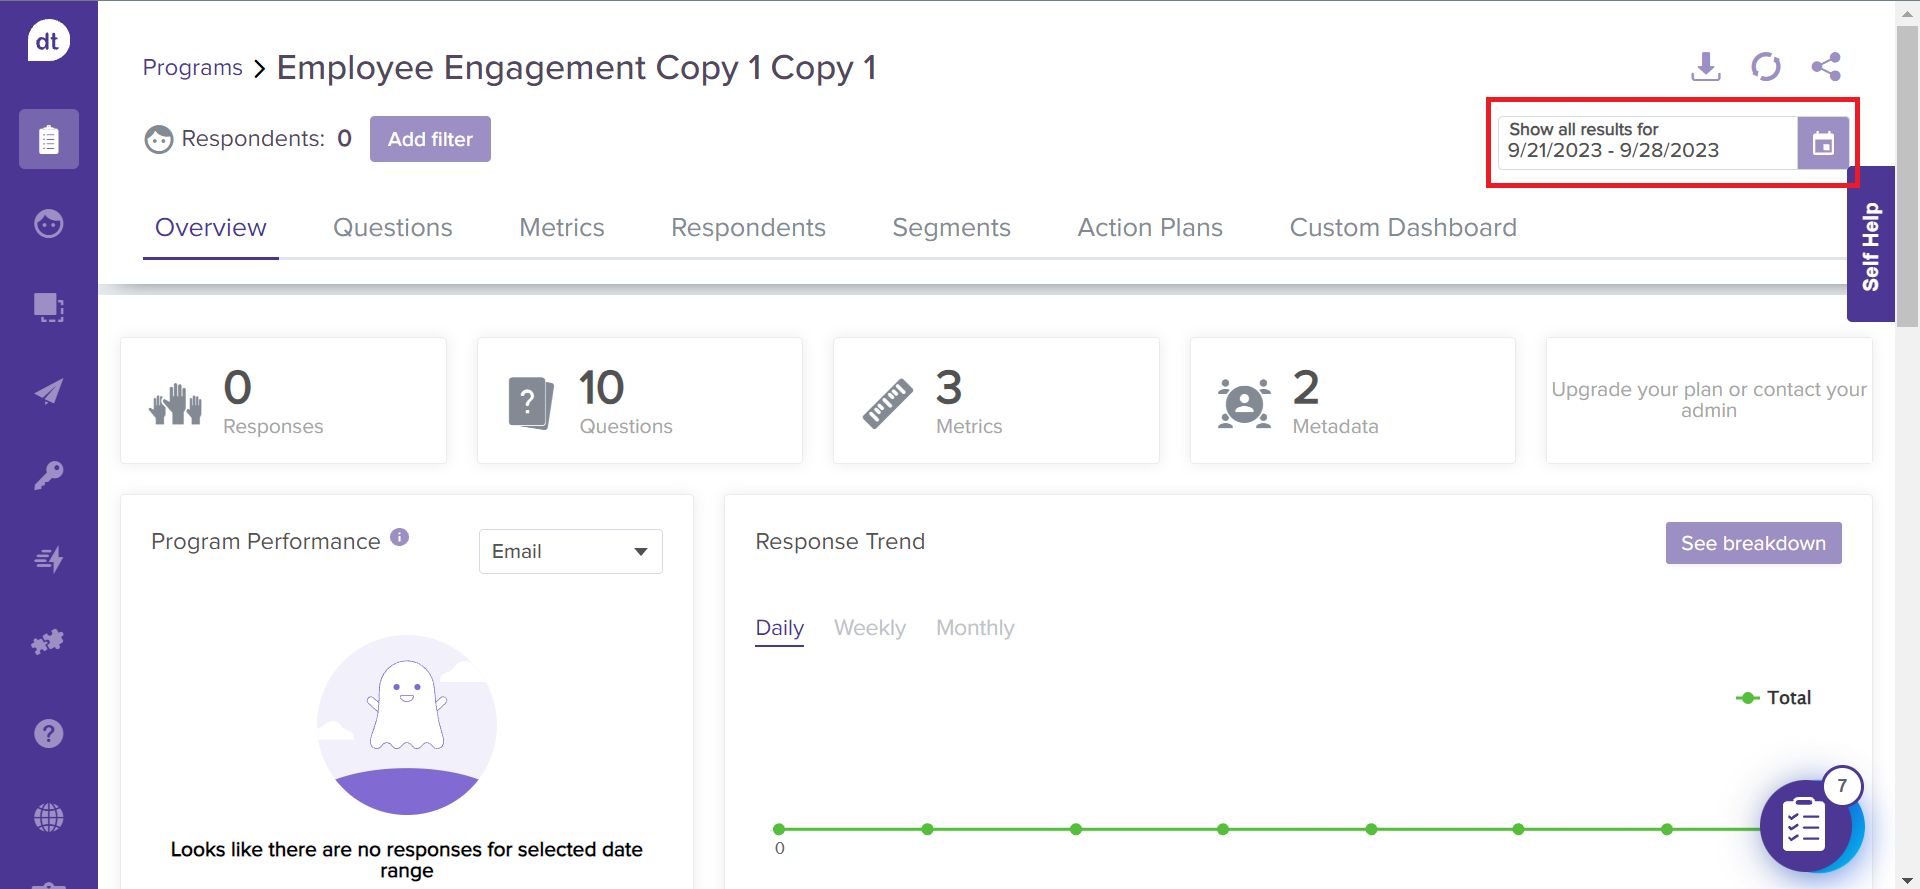
Select the required date filter from the drop-down menu.
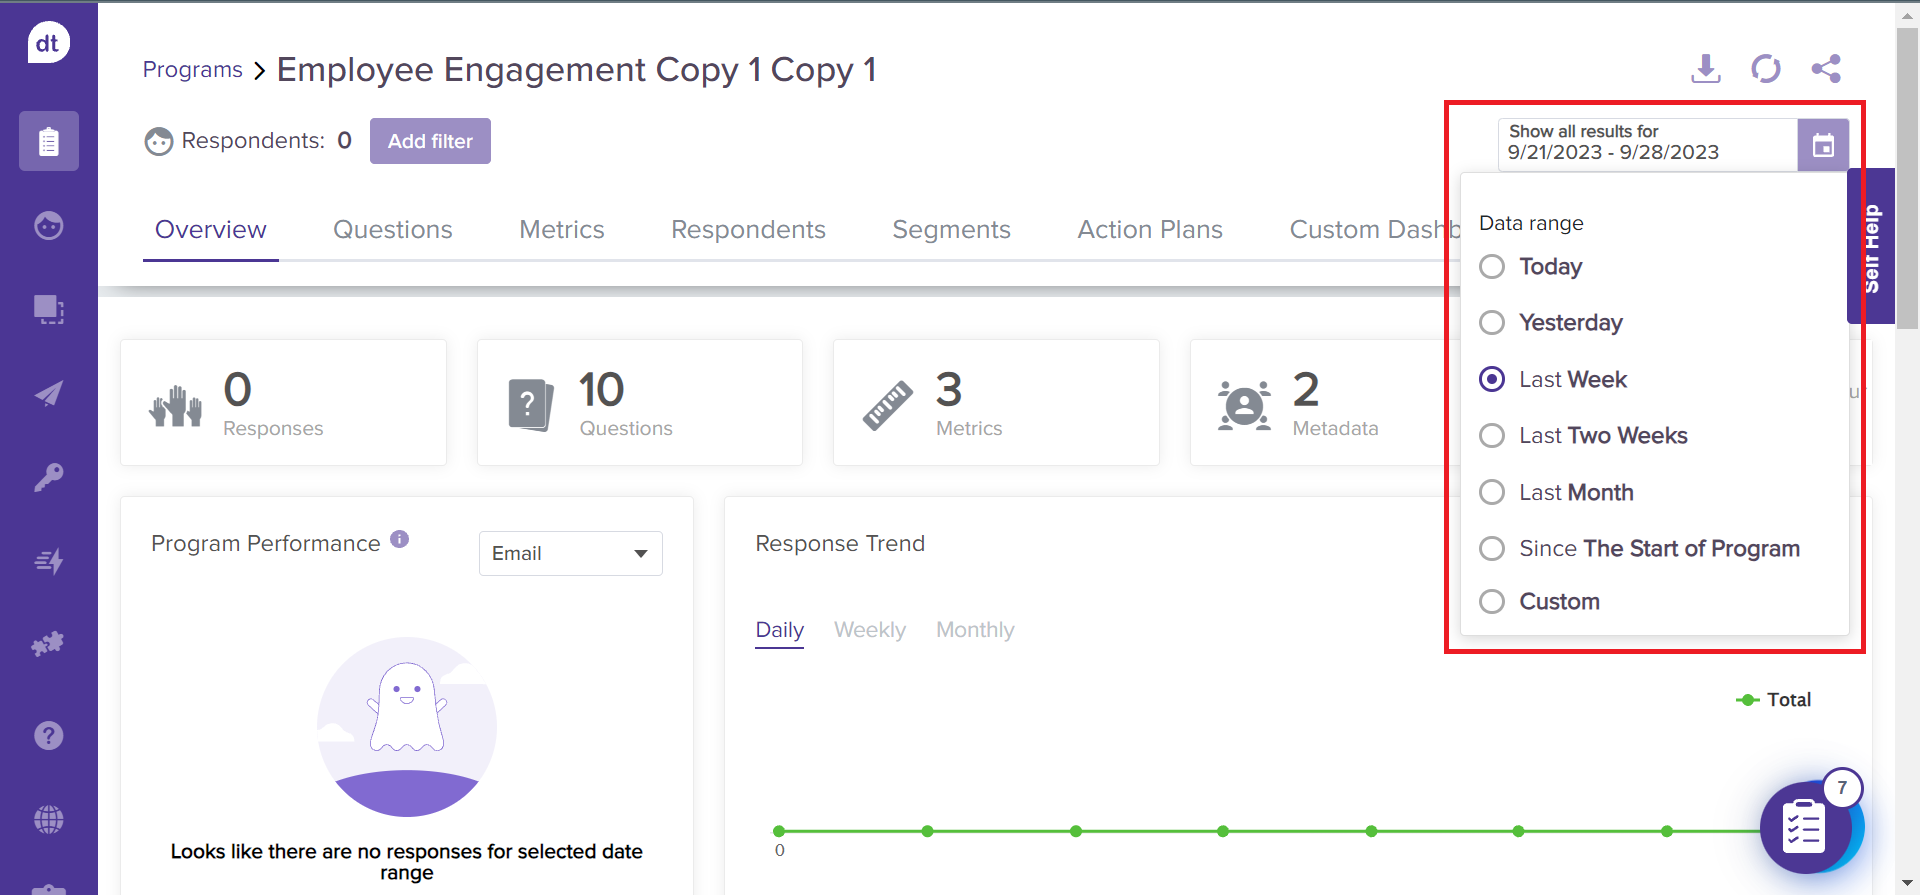
Today: it will display reports based on the responses received on the day you perform this action.
Yesterday: it will display reports based on the responses received the day before you perform this action.
Last Week: It will display reports based on the responses received during the previous week and when you performed this action.
Last Two Weeks: it will display reports based on the responses received during the last two weeks to when you perform this action.
Last Month: It will display reports based on the responses received during the last month when you perform this action.
Since The Start of Program: It will display reports based on the responses received from the day the program was published and distributed via various channels.
Custom: You can select a custom date range of your choice. By default, the program's start date and the current date will be selected.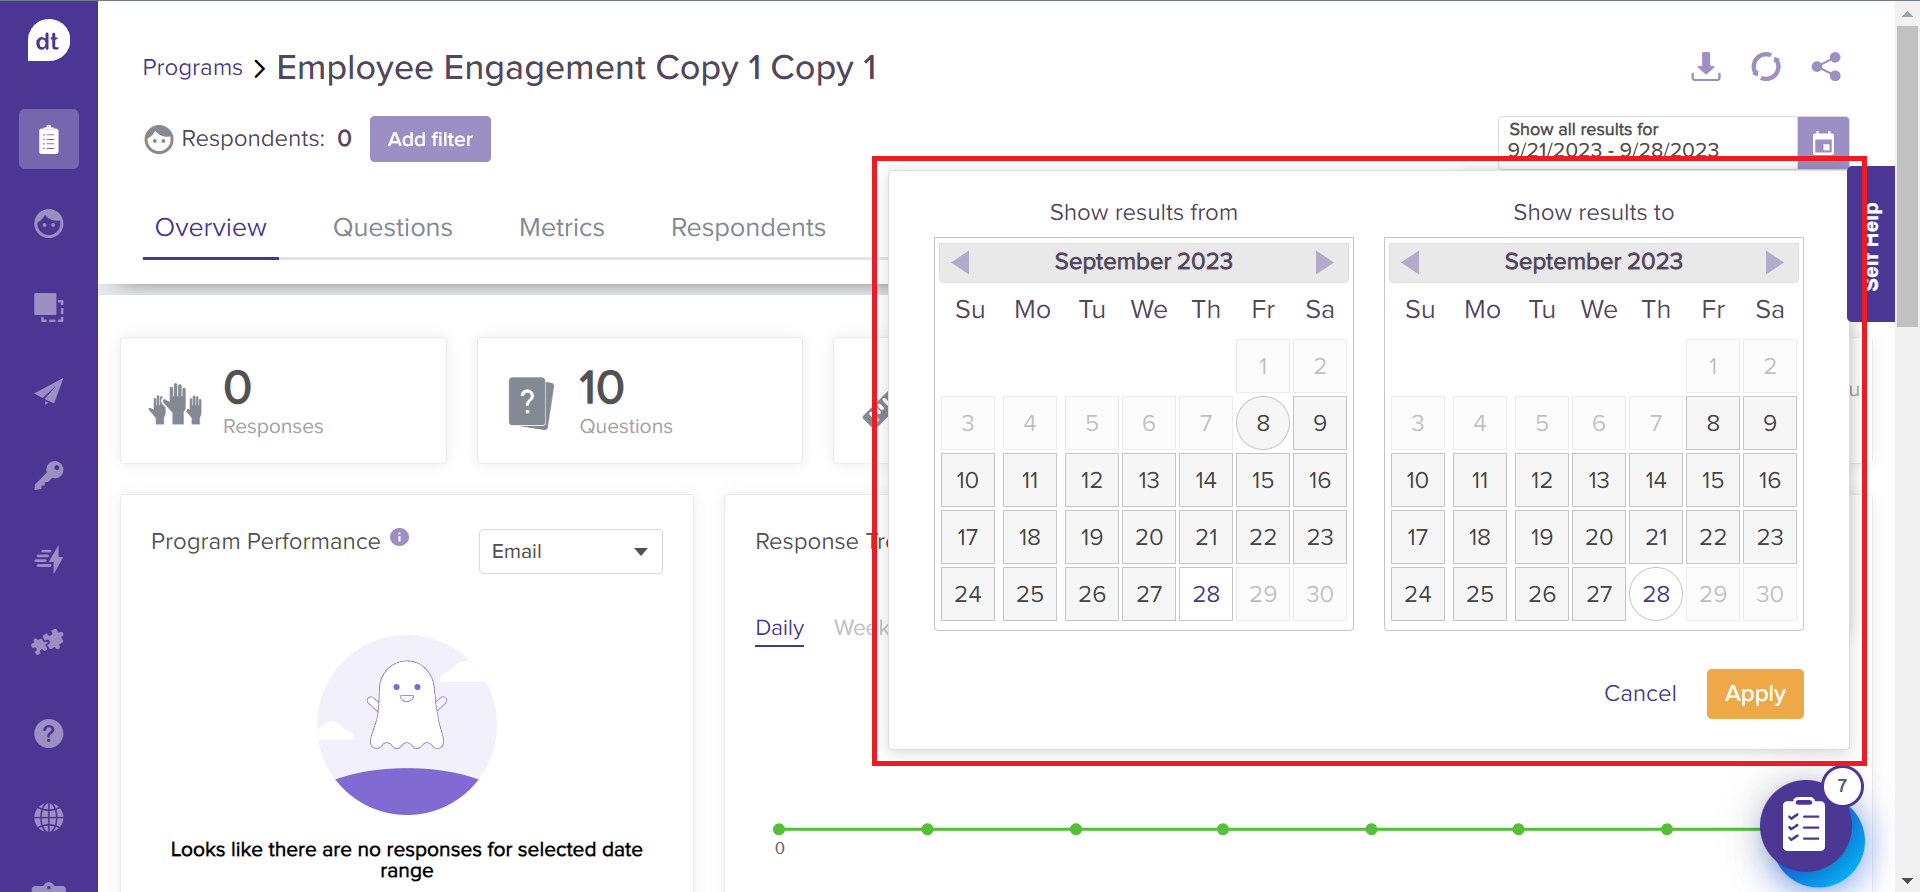
Find and Select a “Filter”
Follow the below steps to find the Filter for reports:
Navigate to the reports tab for the required program.
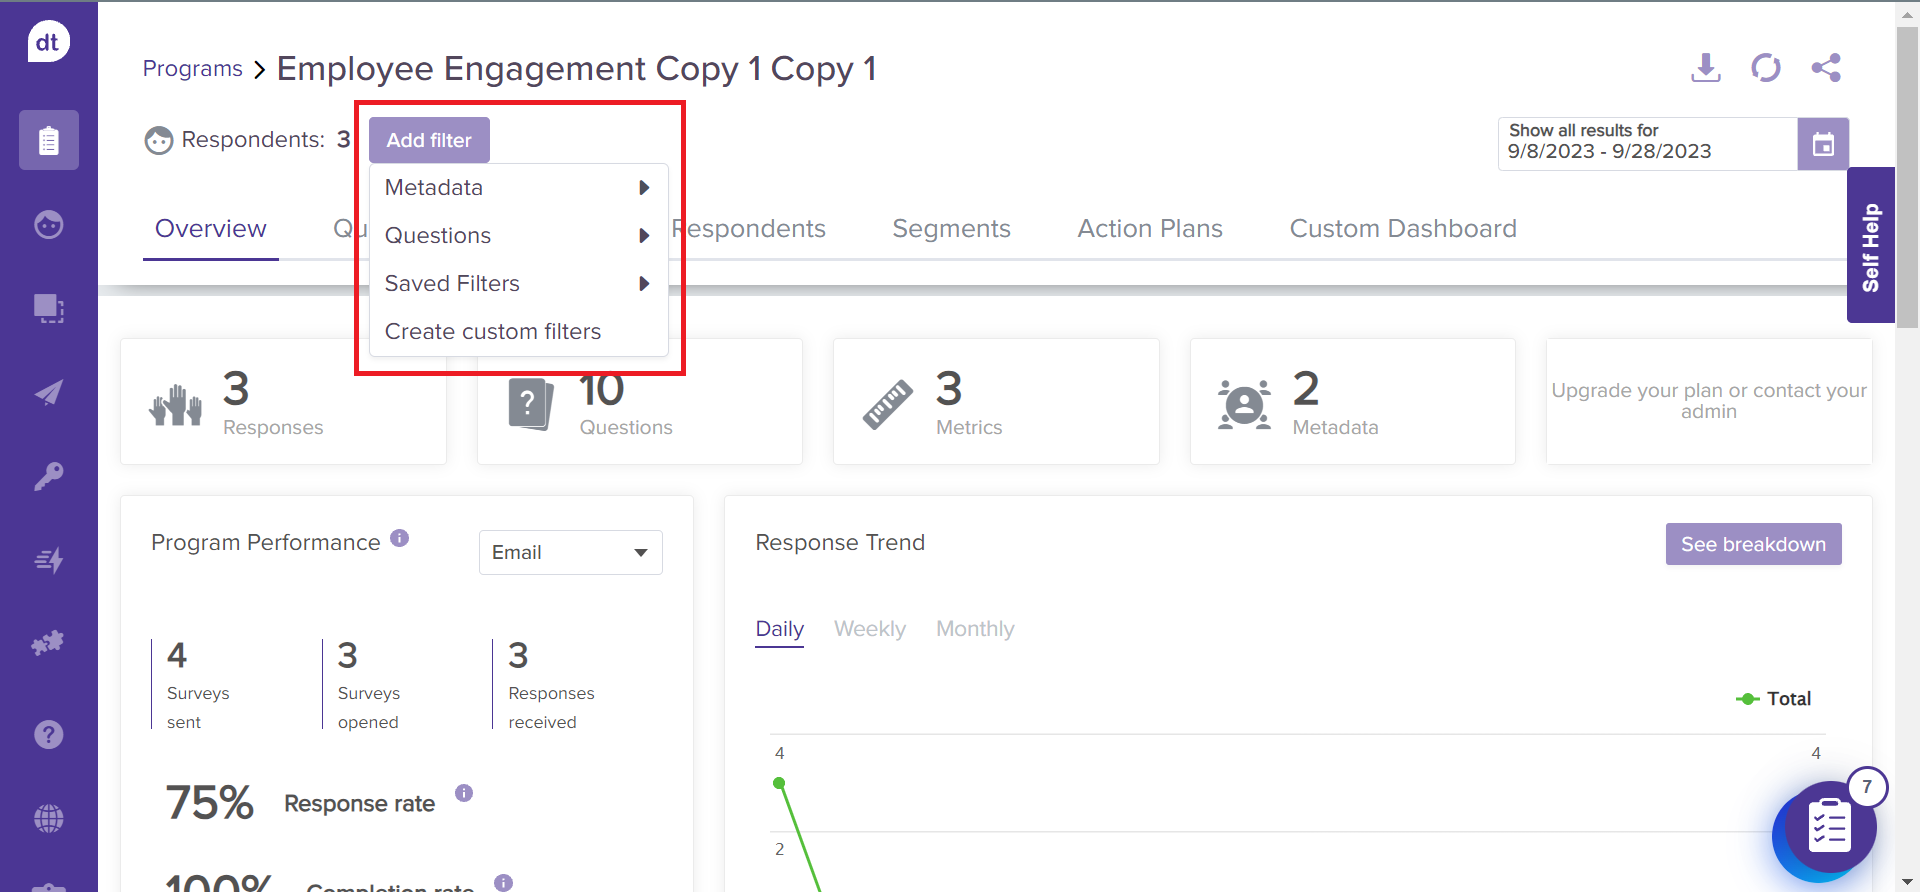
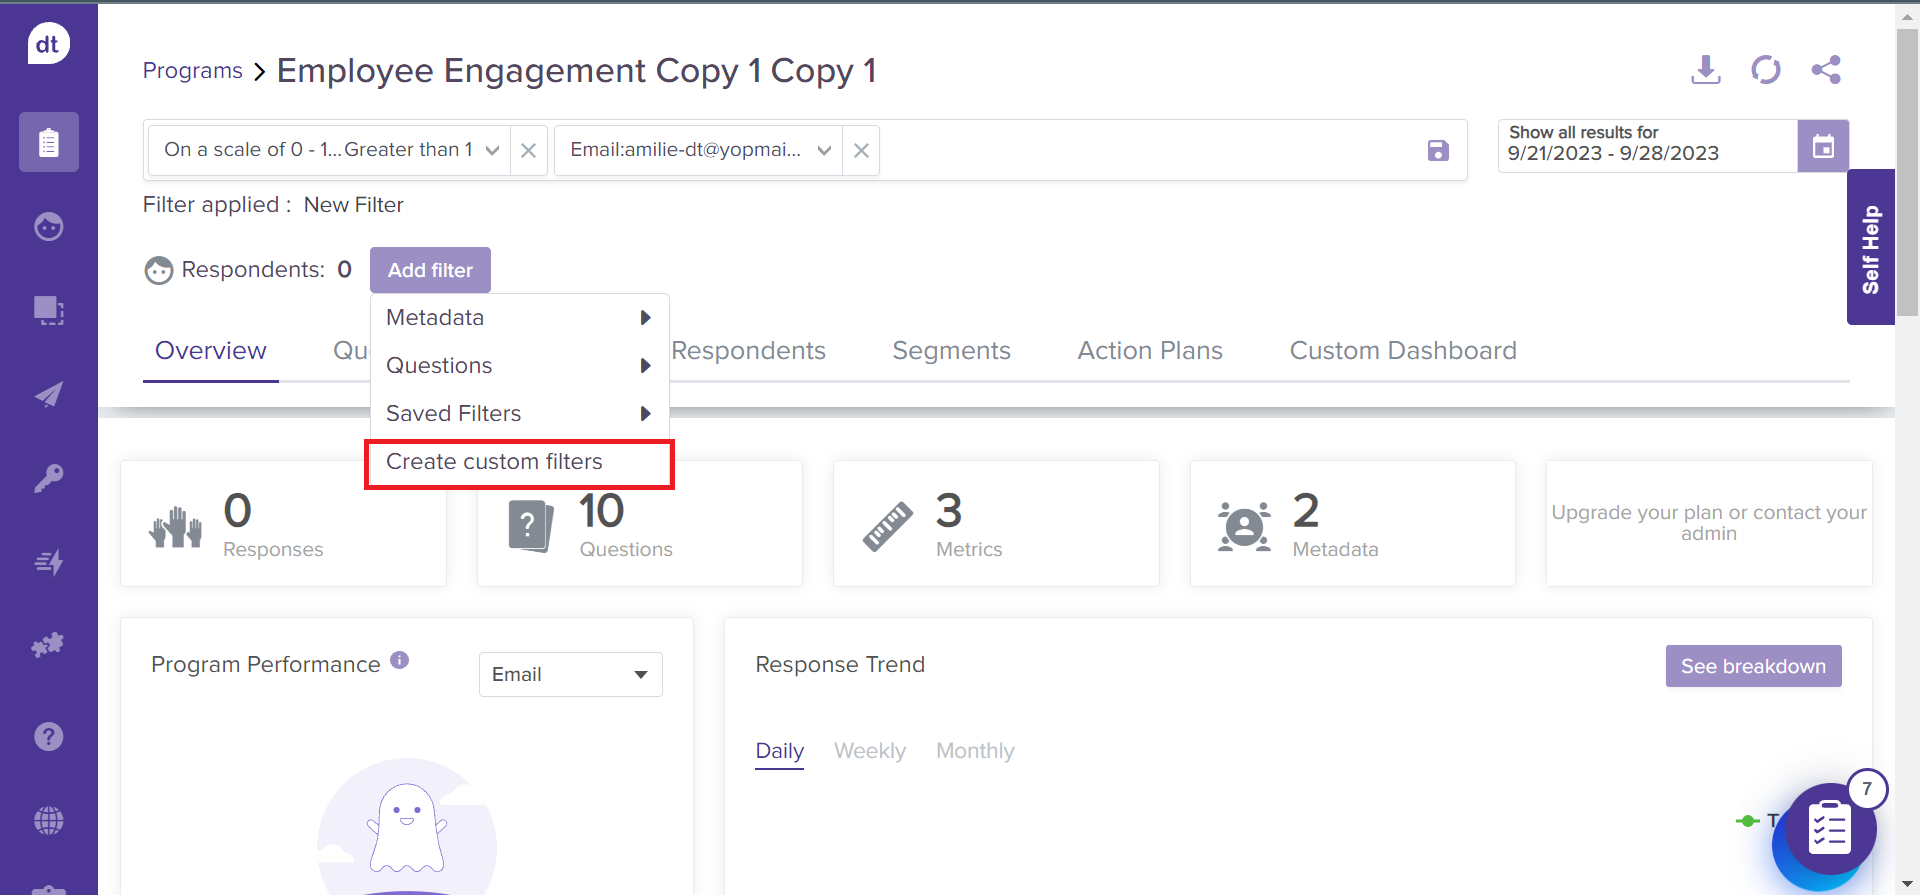
From the Reports dashboard, you will find the Add Filter button on the top-left side of the page.

Click on Add Filter.
Select the filter, choose from a saved filter, or create a custom filter to customize your reports' view. The following section explains each of the filter types.
You can combine various types of filters as required. The filters are auto-applied.
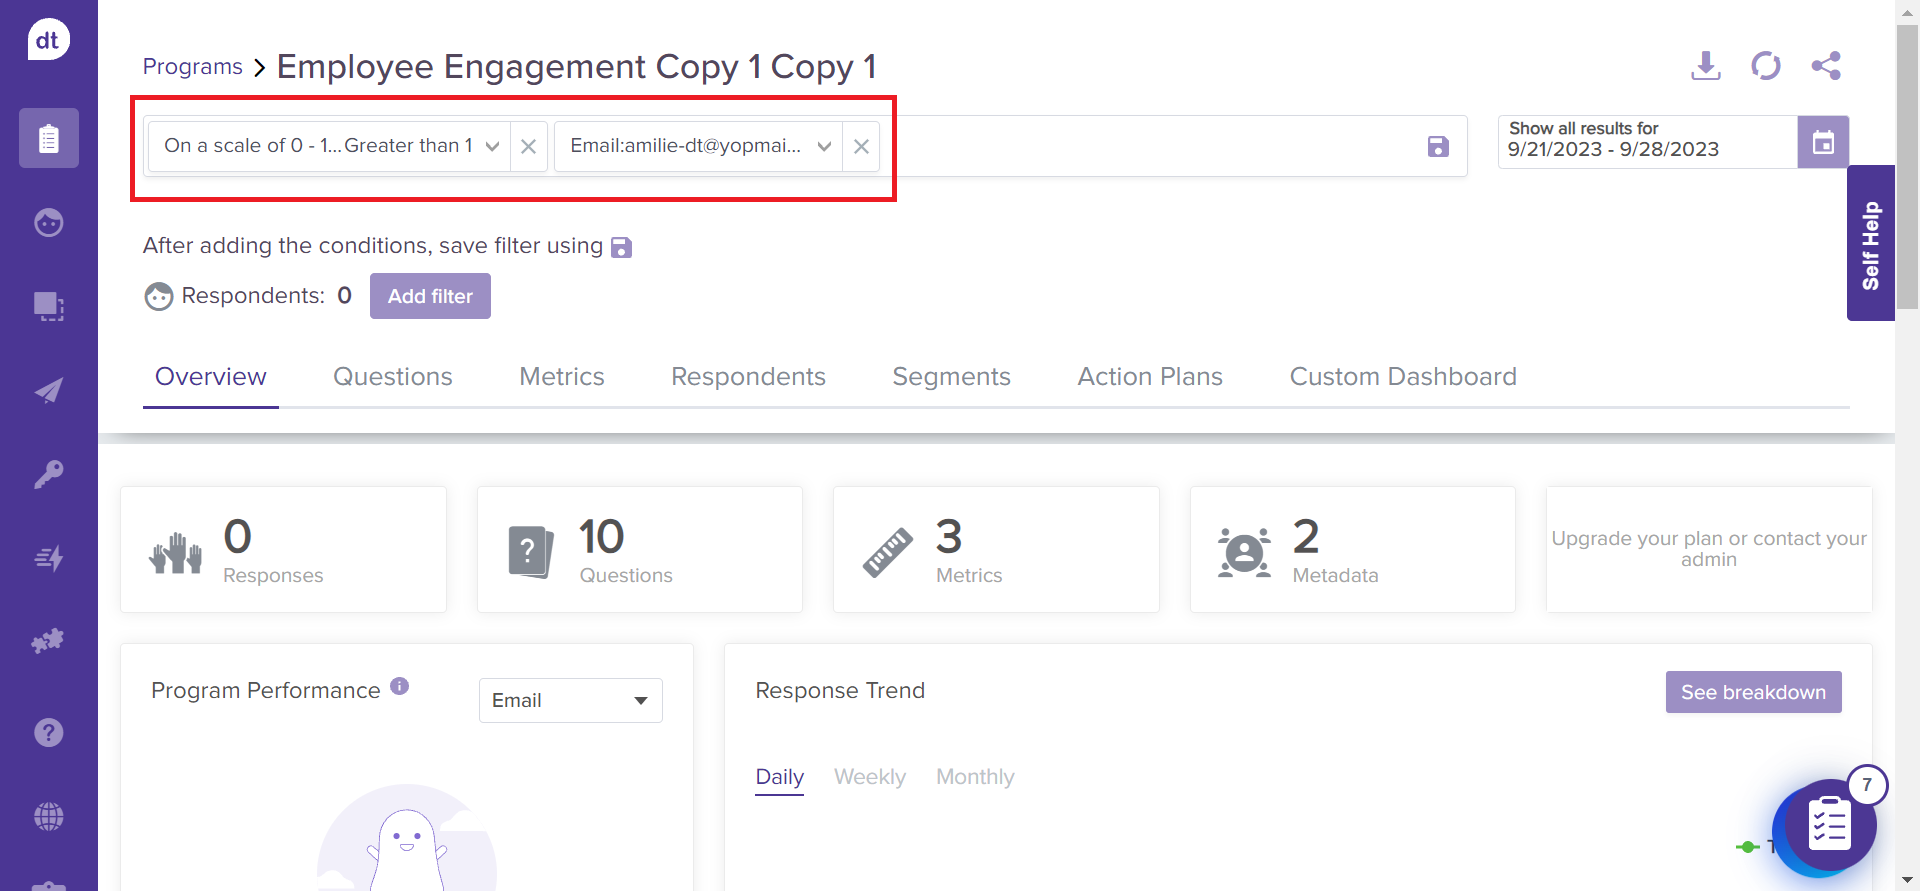
Click on the Save icon to save the filter.

From the following pop-up. You can add a filter name and add or remove conditions.
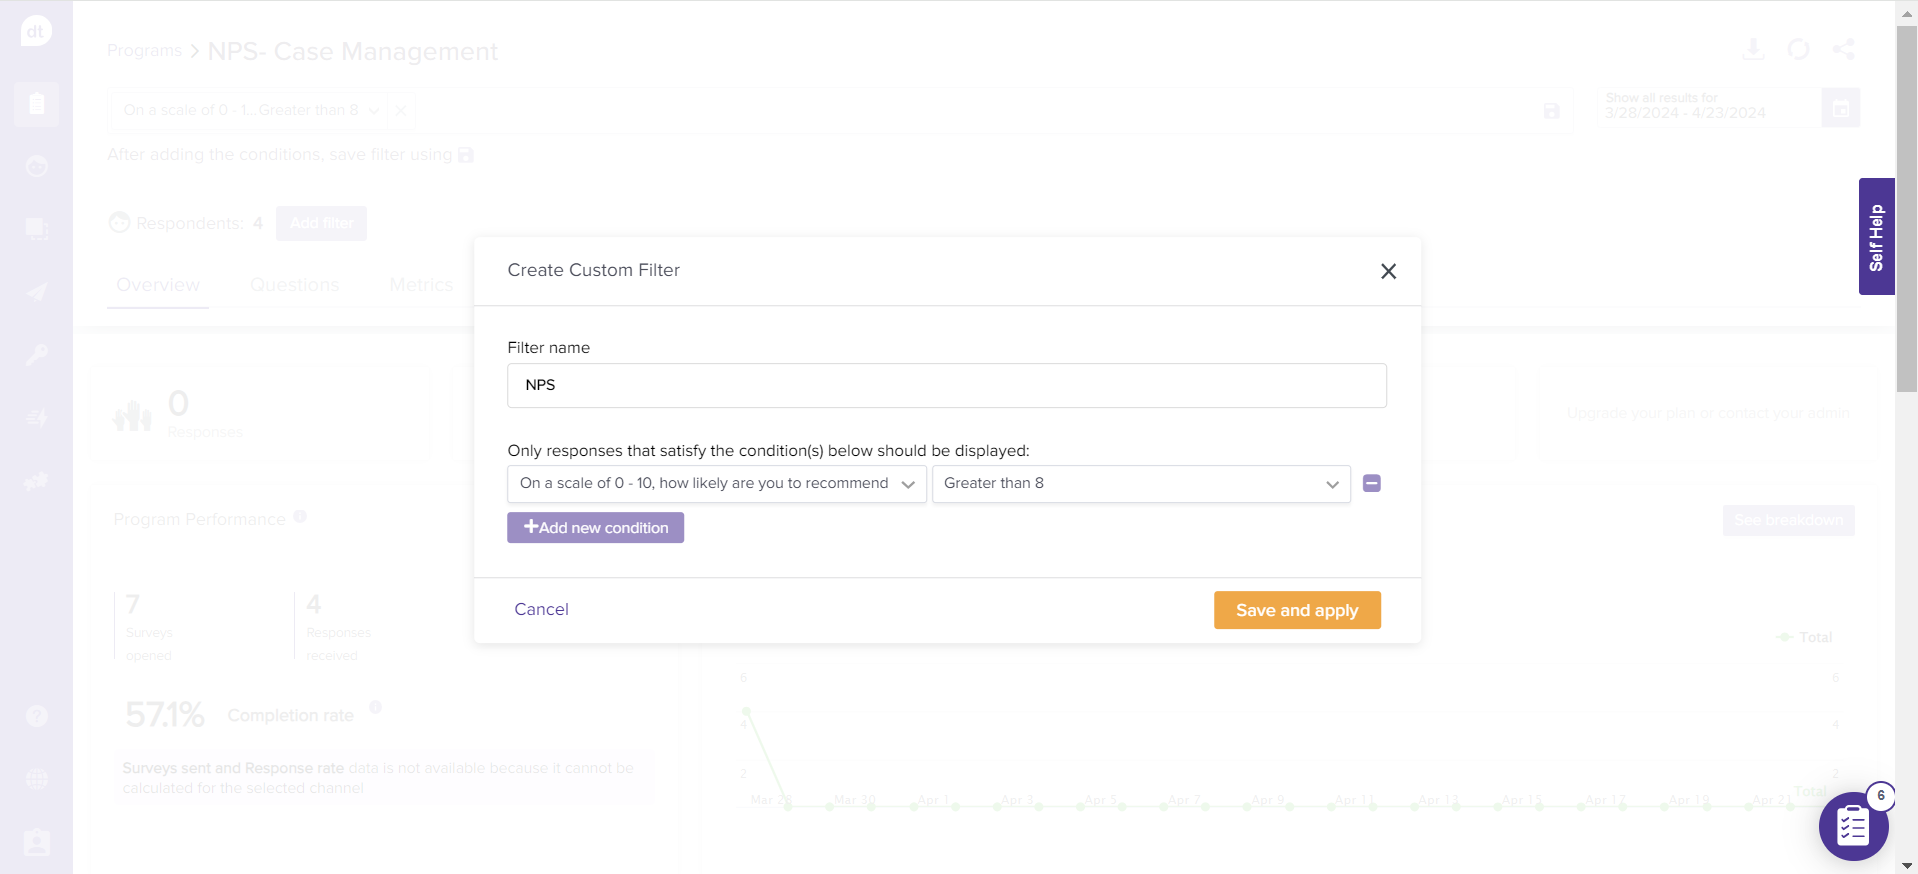
Click on Save and apply. The filter will be auto-applied.
The saved filter can be used later by navigating to the Add Filter > Saved Filters.
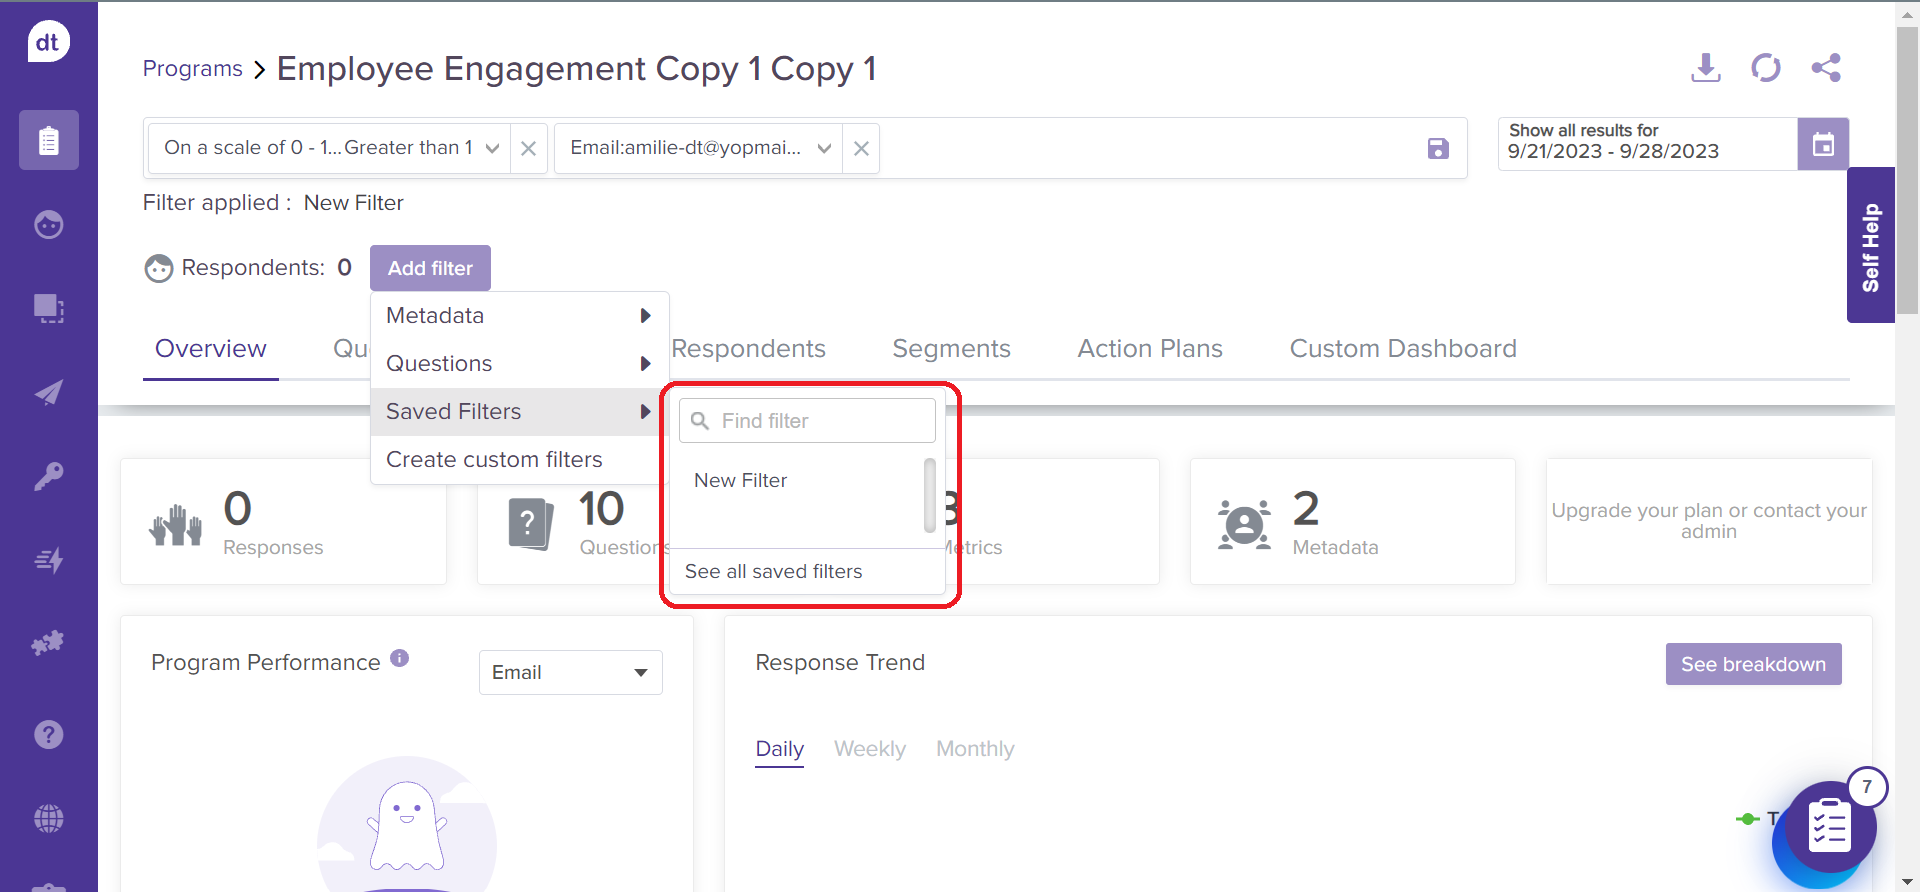
Click on See all saved filters to view them and their respective conditions.
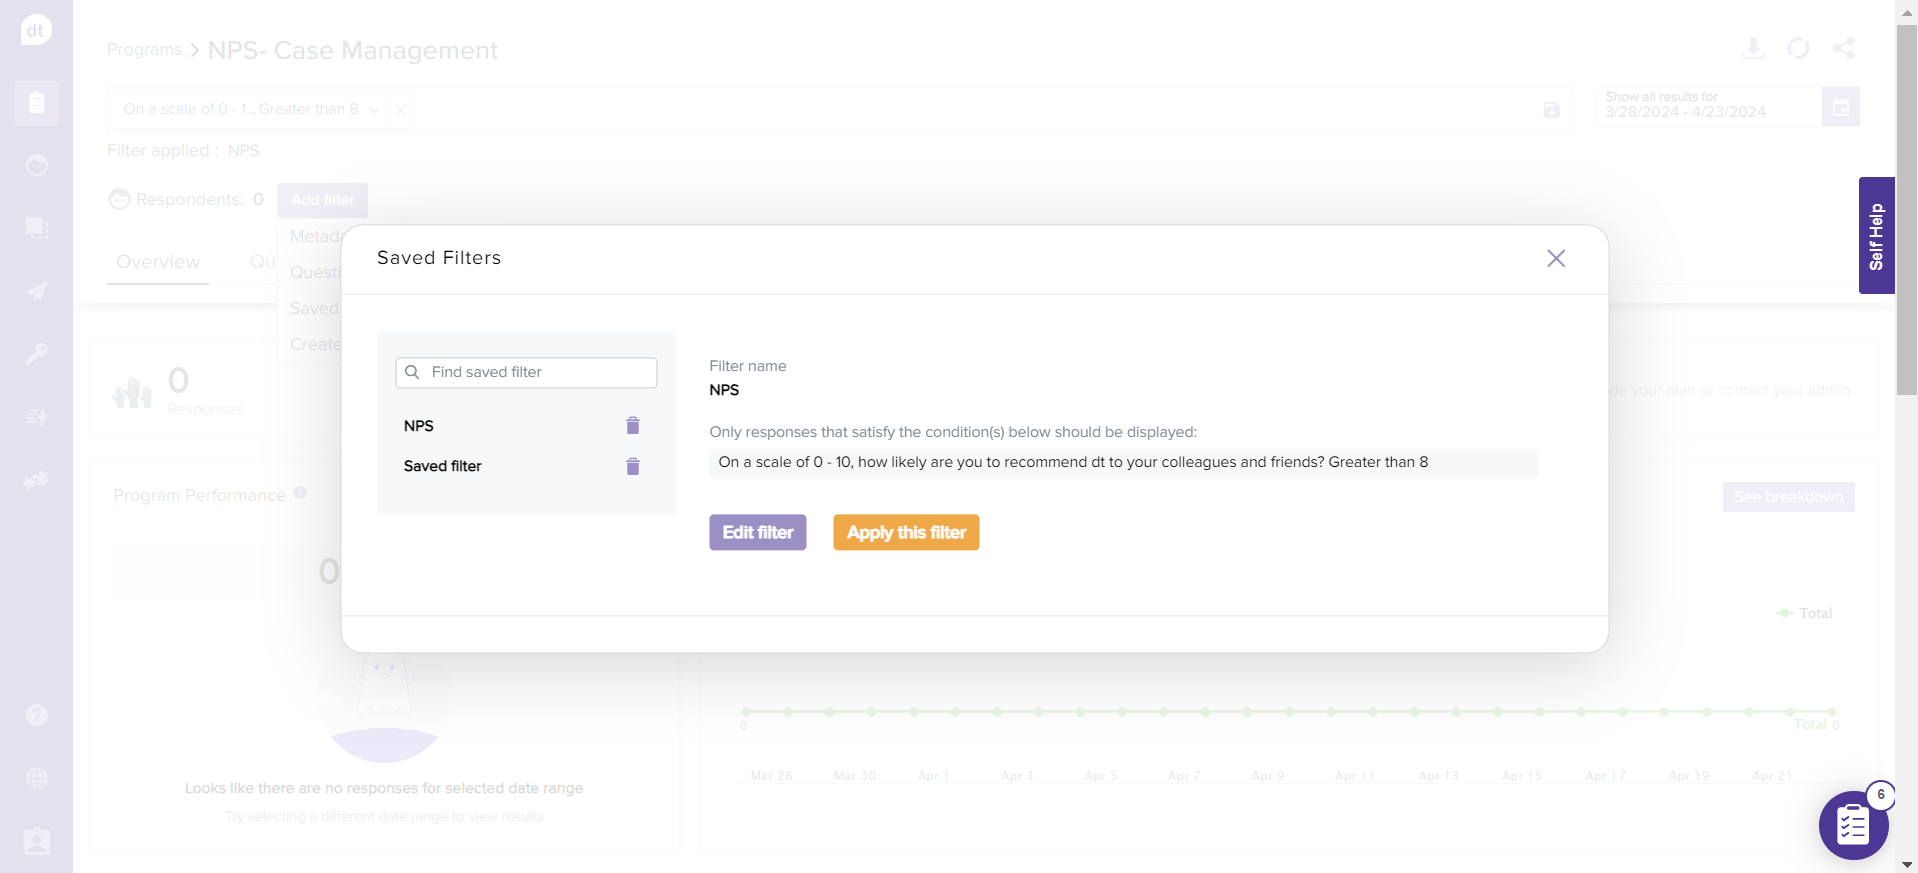
If necessary, click on Edit filter to edit the filter from the same pop-up.
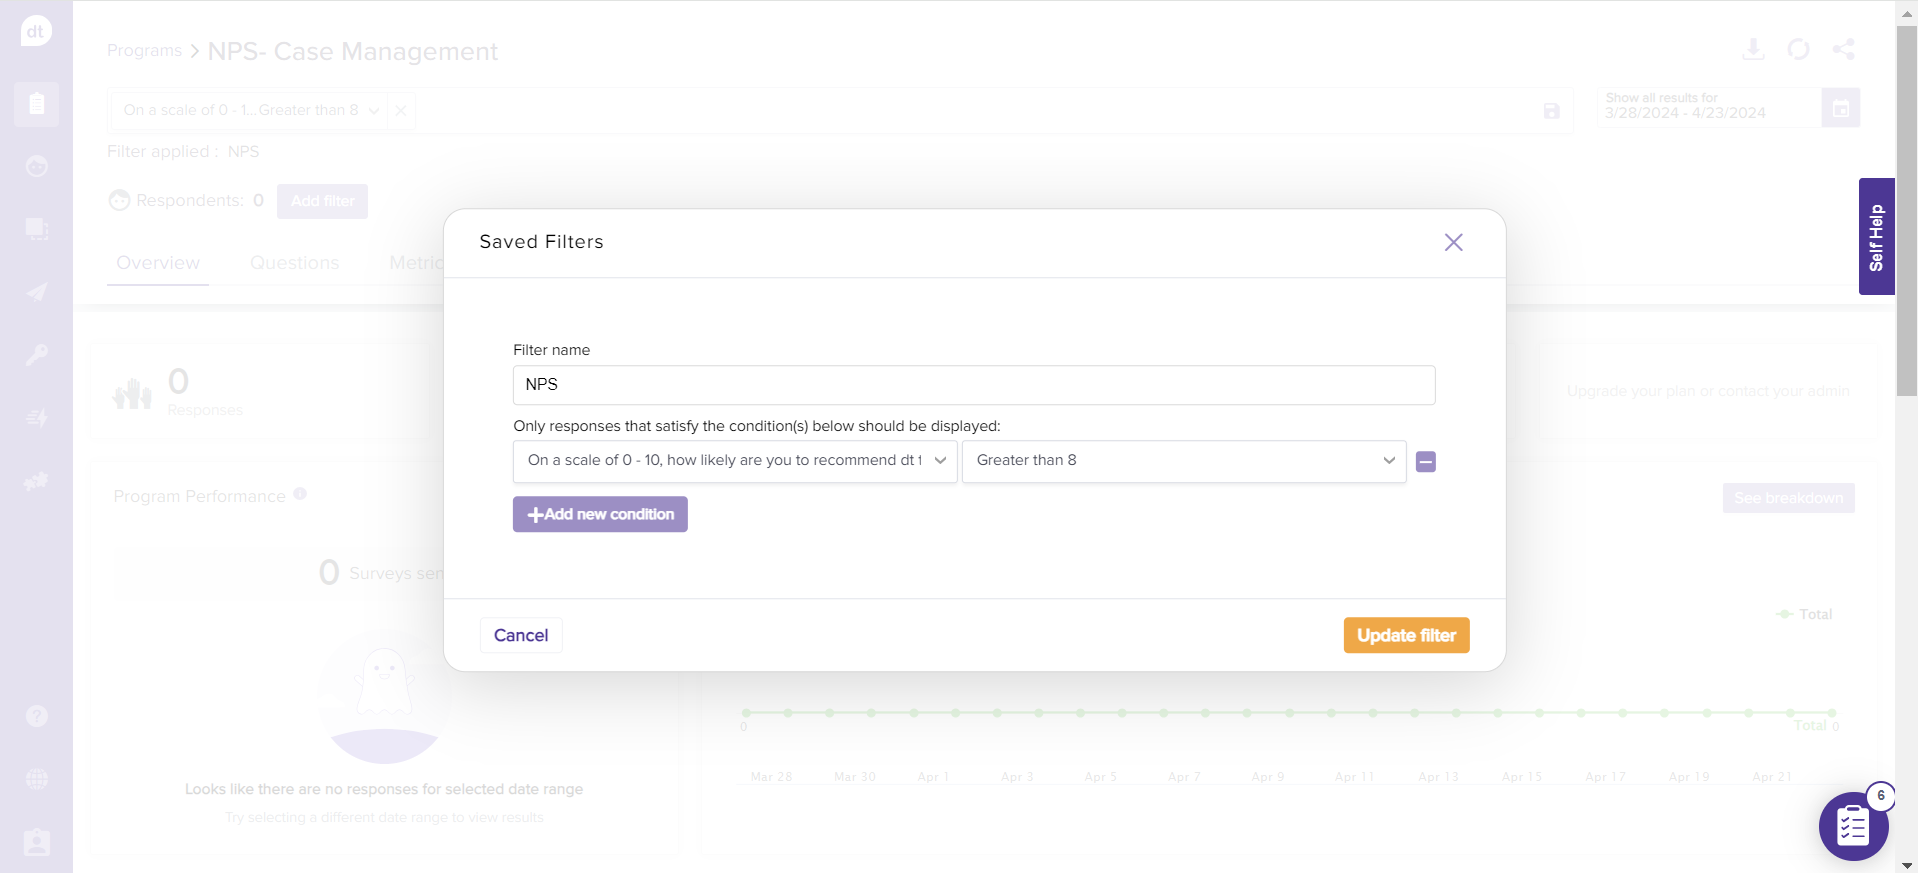
Click on Update filter to save changes to the filter.
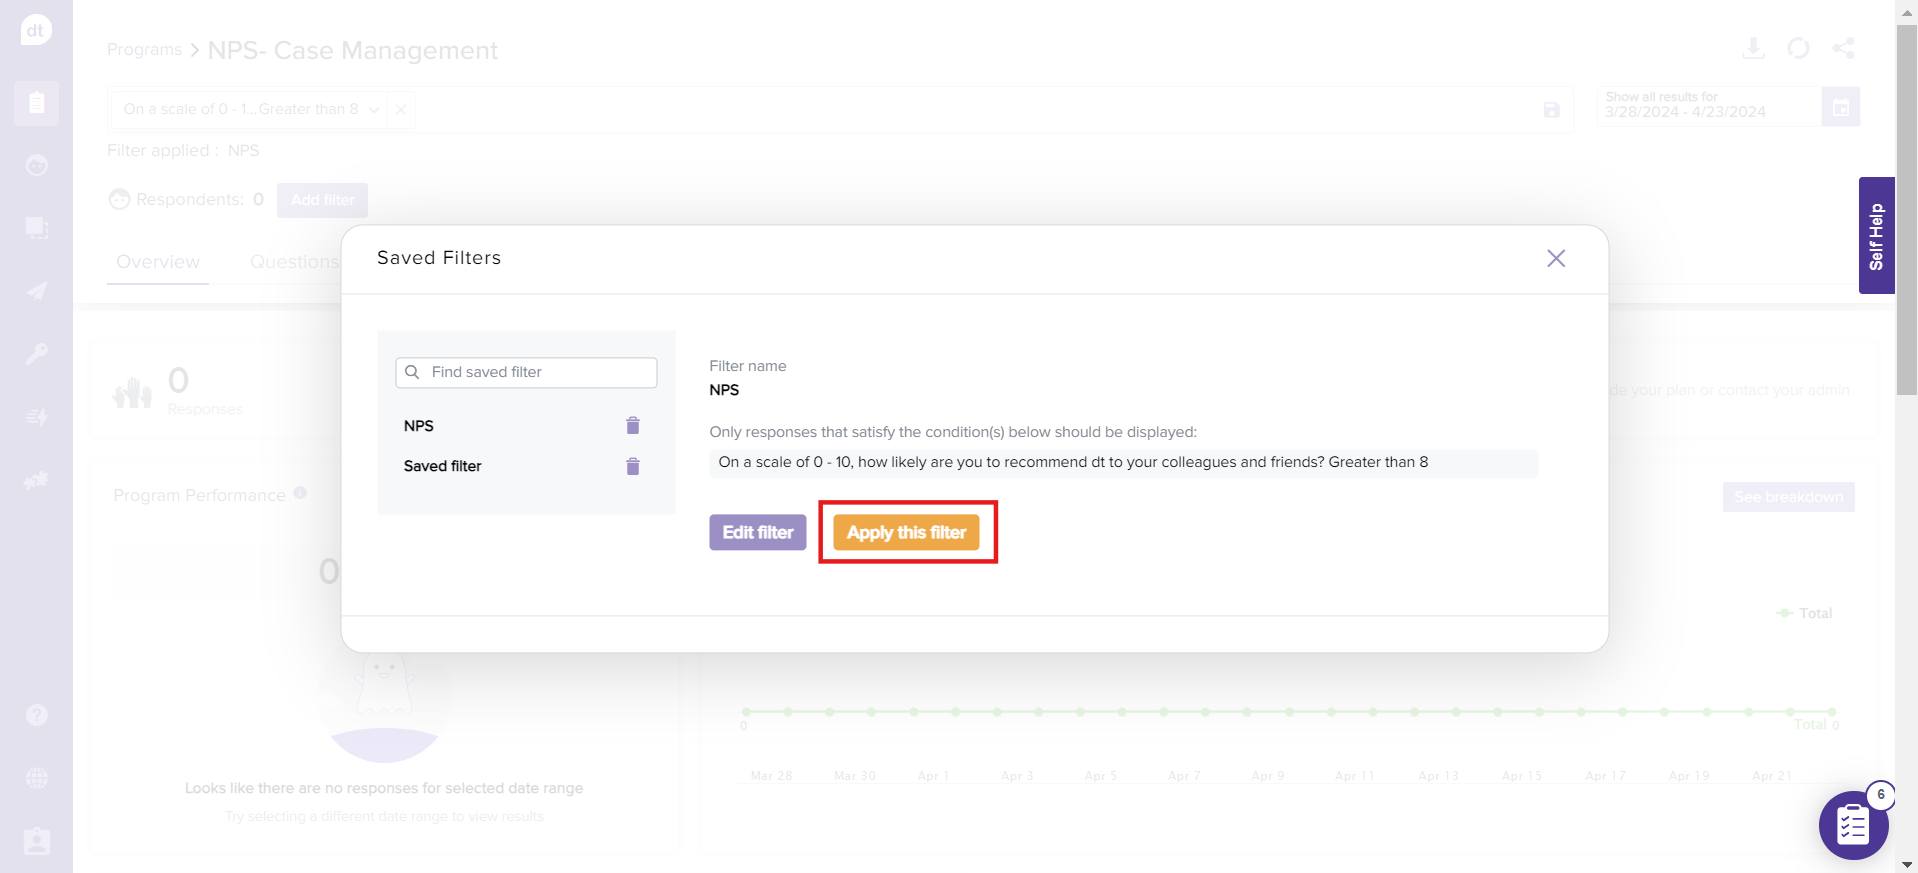
Click on Apply this filter to filter out the reports per your custom filter.
Note:
When duplicating a program, you can select whether you want to duplicate the saved filters as well.

Filter Types & Conditions
Here are the various filters and their application conditions.
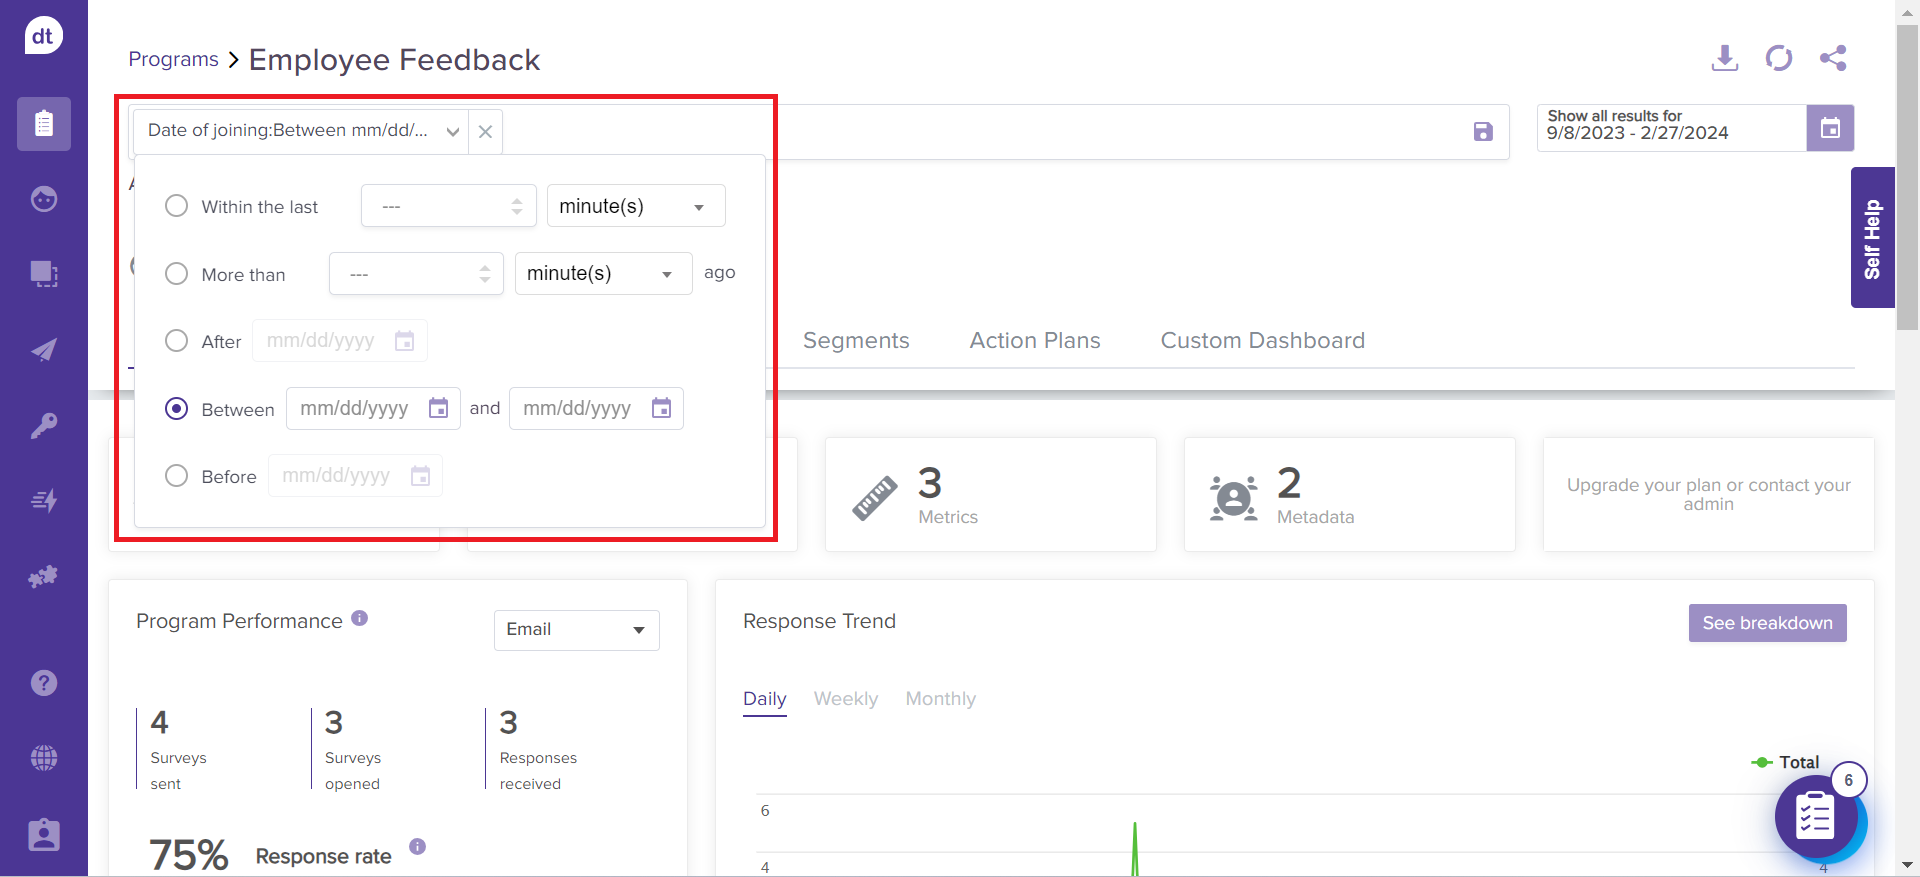
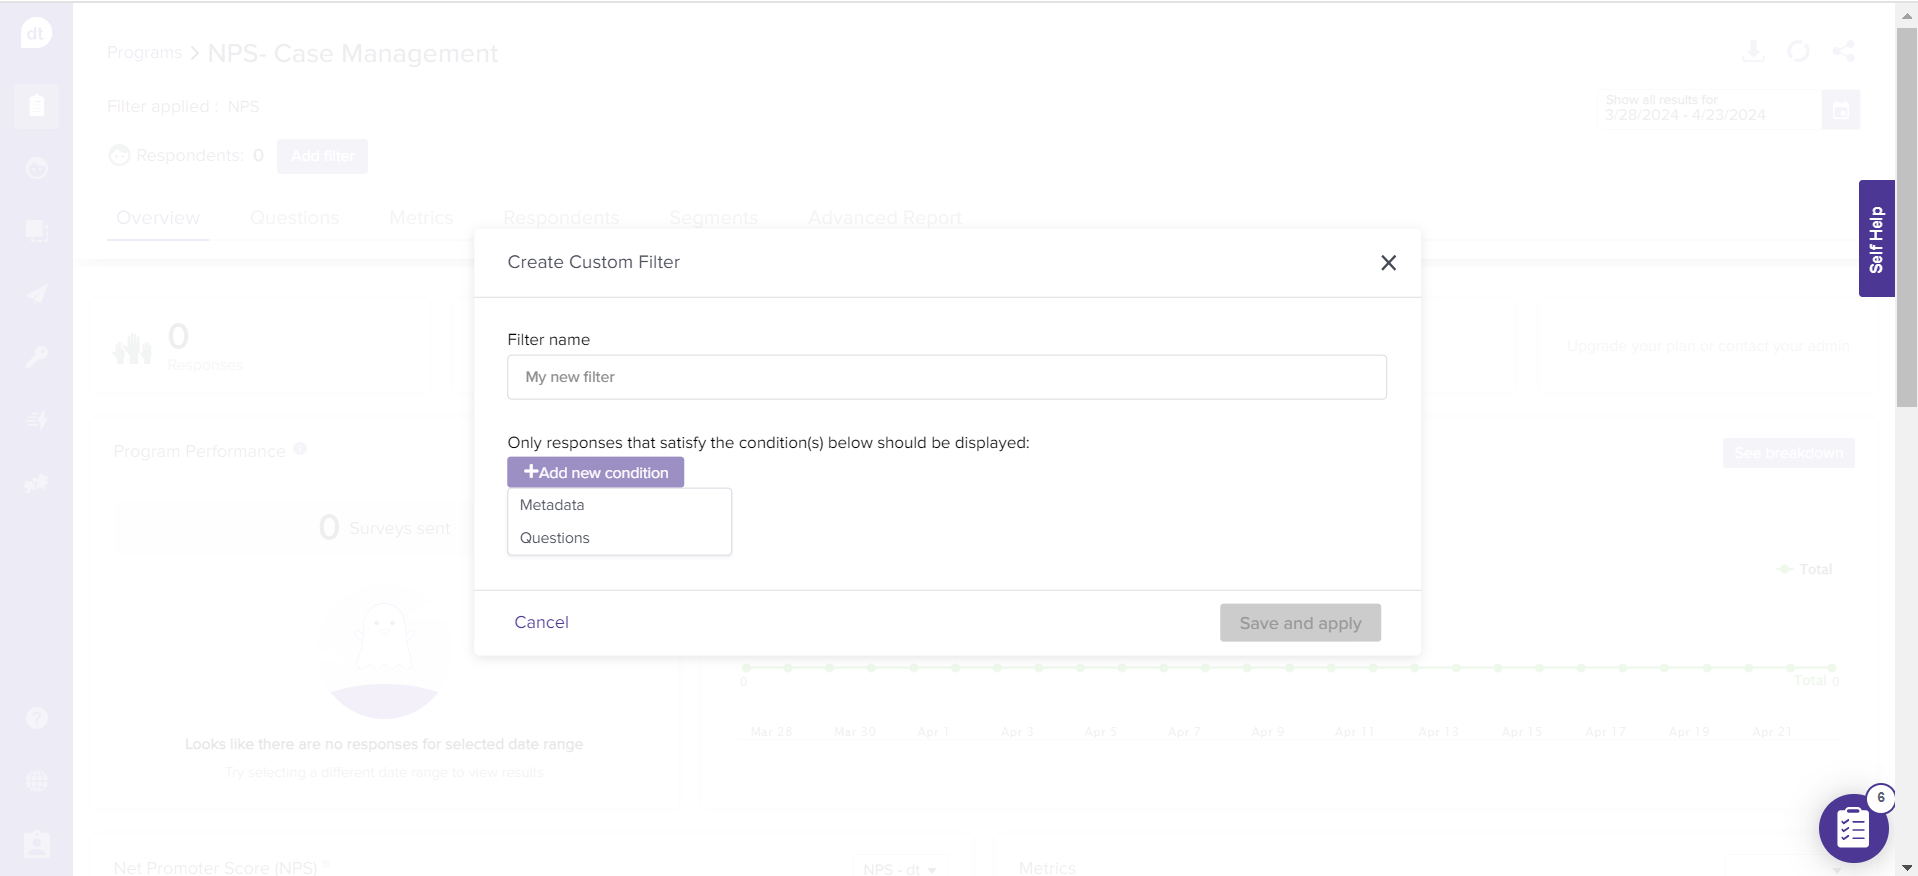
Metadata
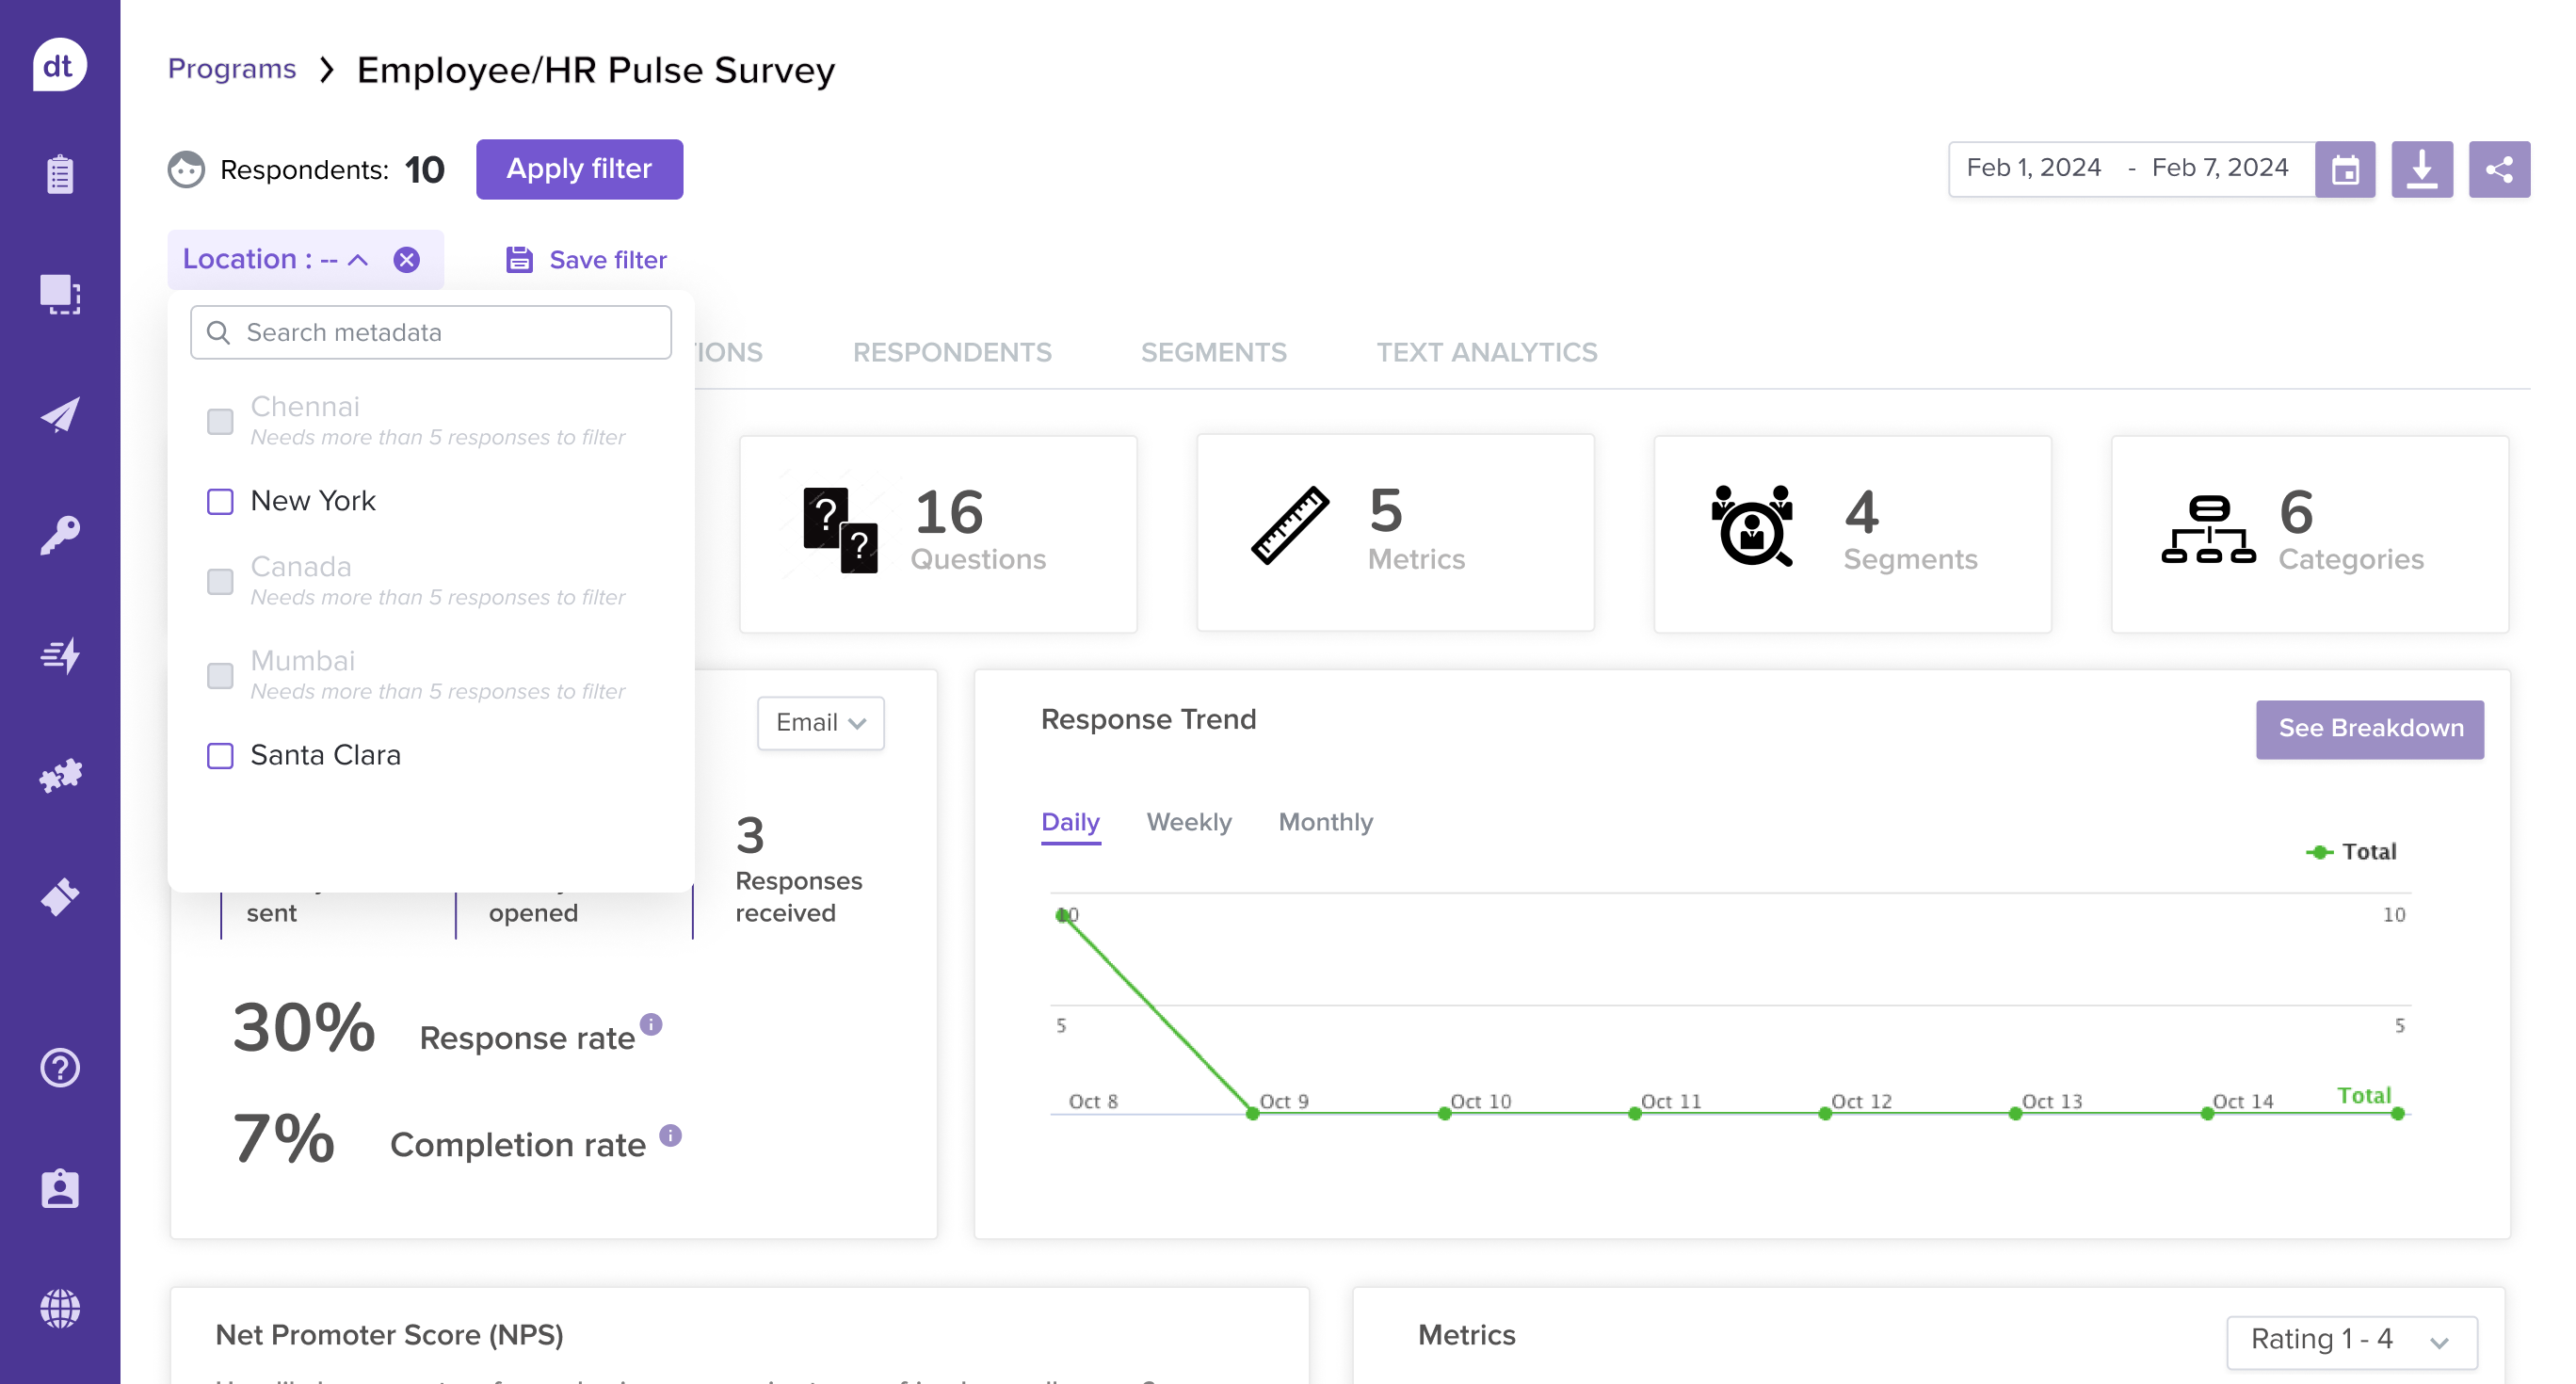
You can select one or more metadata to customize the view of your report. When you click on Metadata here, all the available Metadata for the program will be listed.
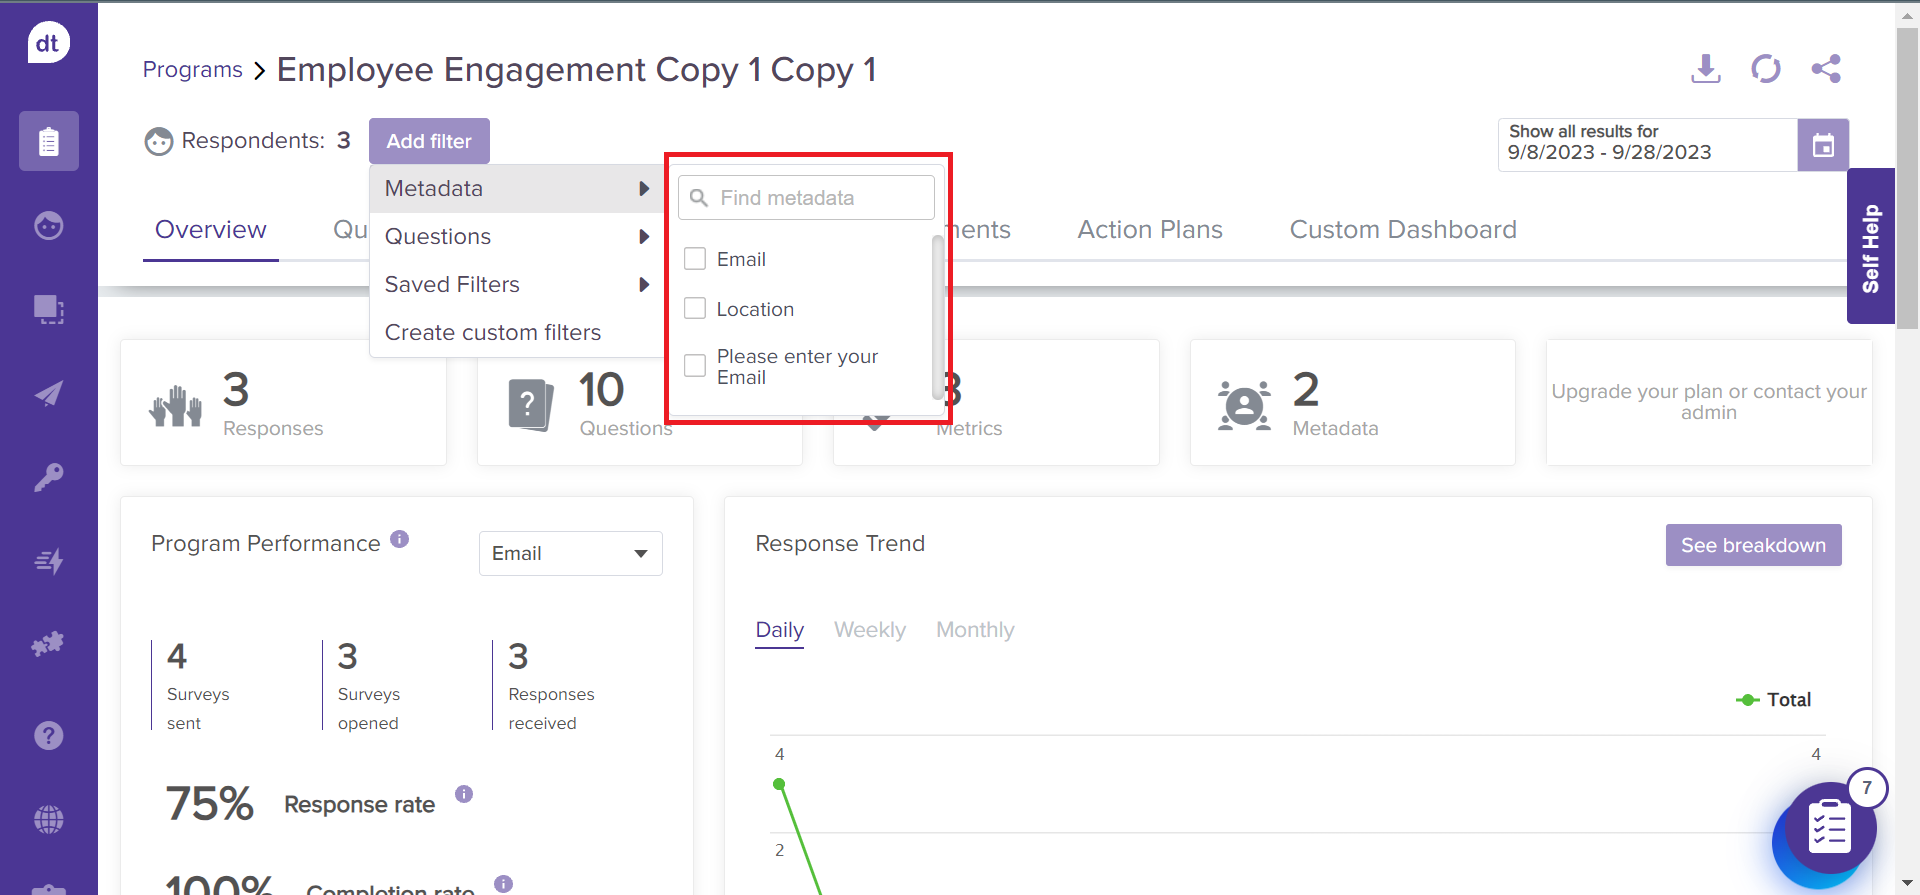
Upon selecting metadata, you can specify the metadata you want to use to filter out the report's view. Click on the drop-down arrow to view the available Metadata from responses.
For example, if you select Email as the metadata, the following step will allow you to further select the email addresses captured from various responses. You can choose one or more email addresses from here.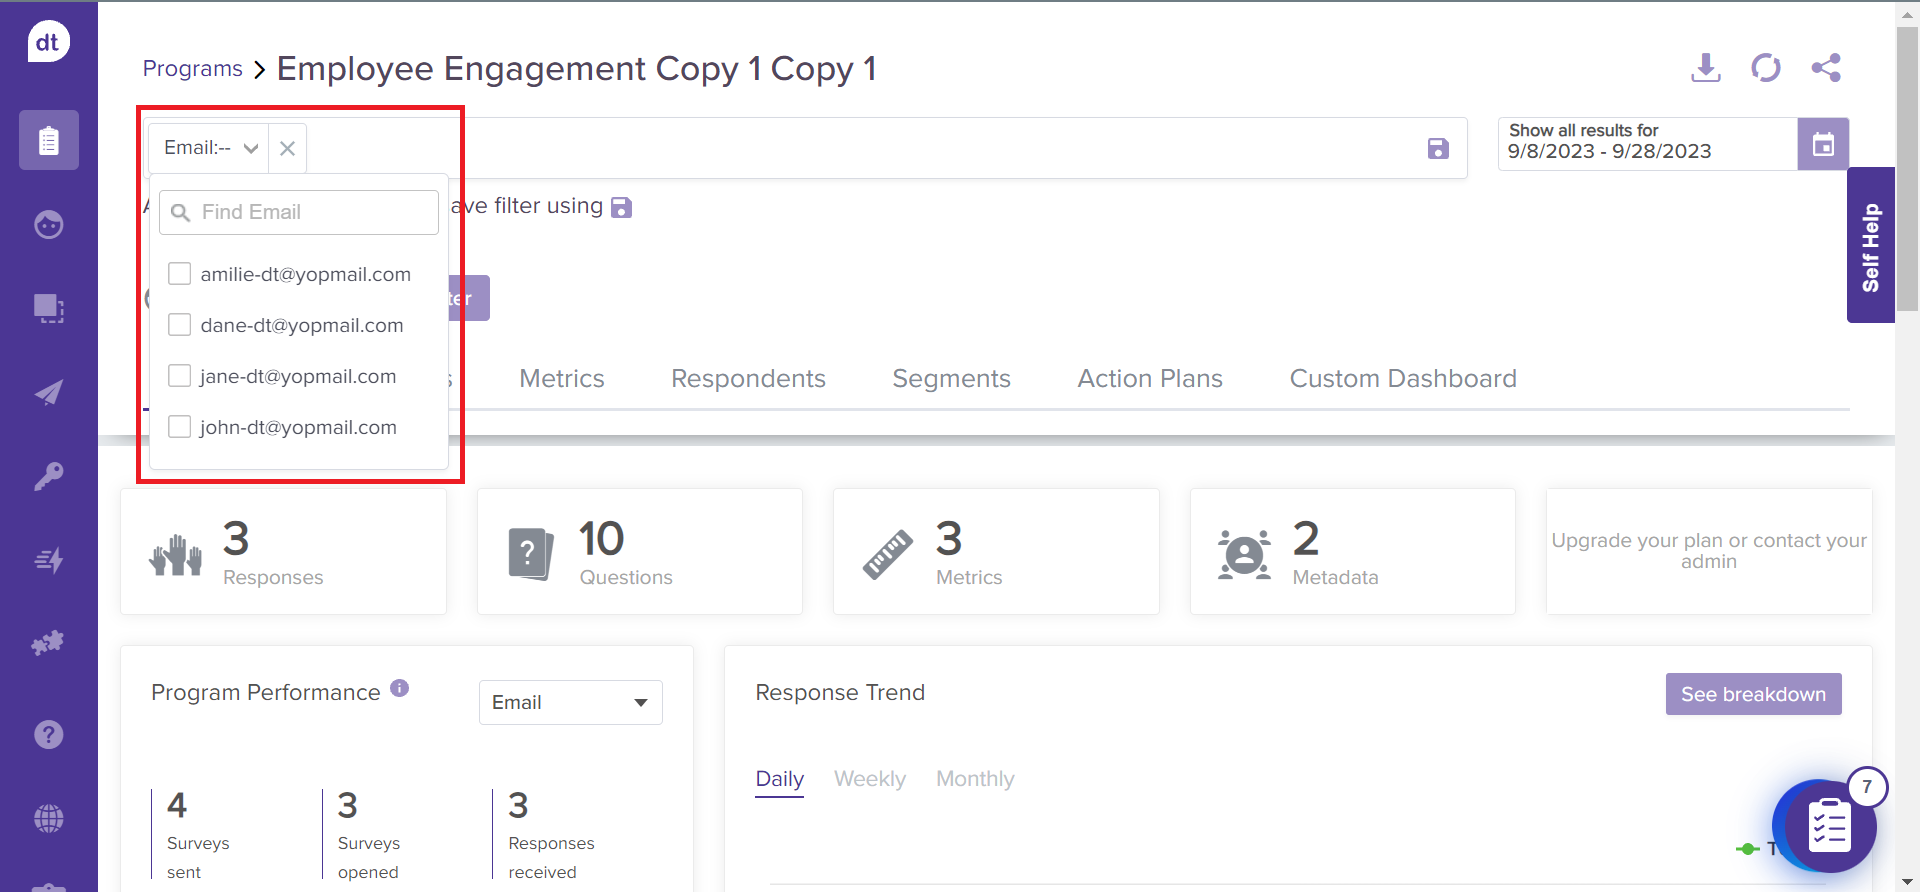
The filter options change based on the metadata type.
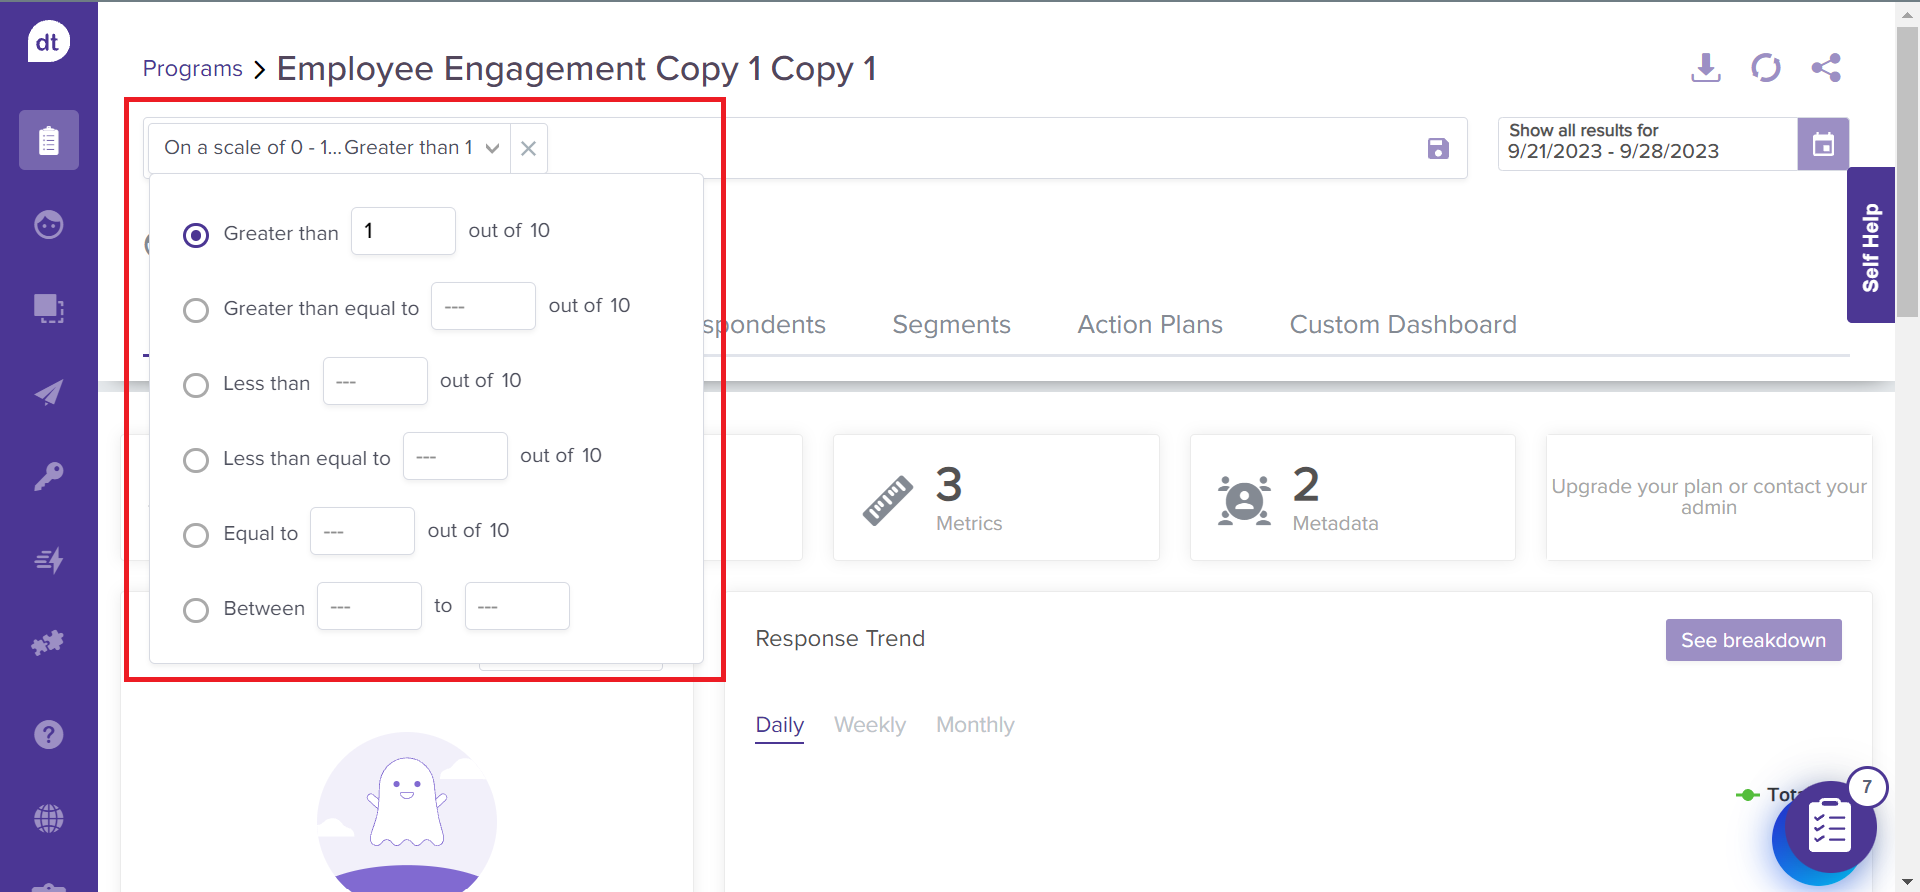
Questions
Click on the Questions filter to add a filter based on the questions in the program.
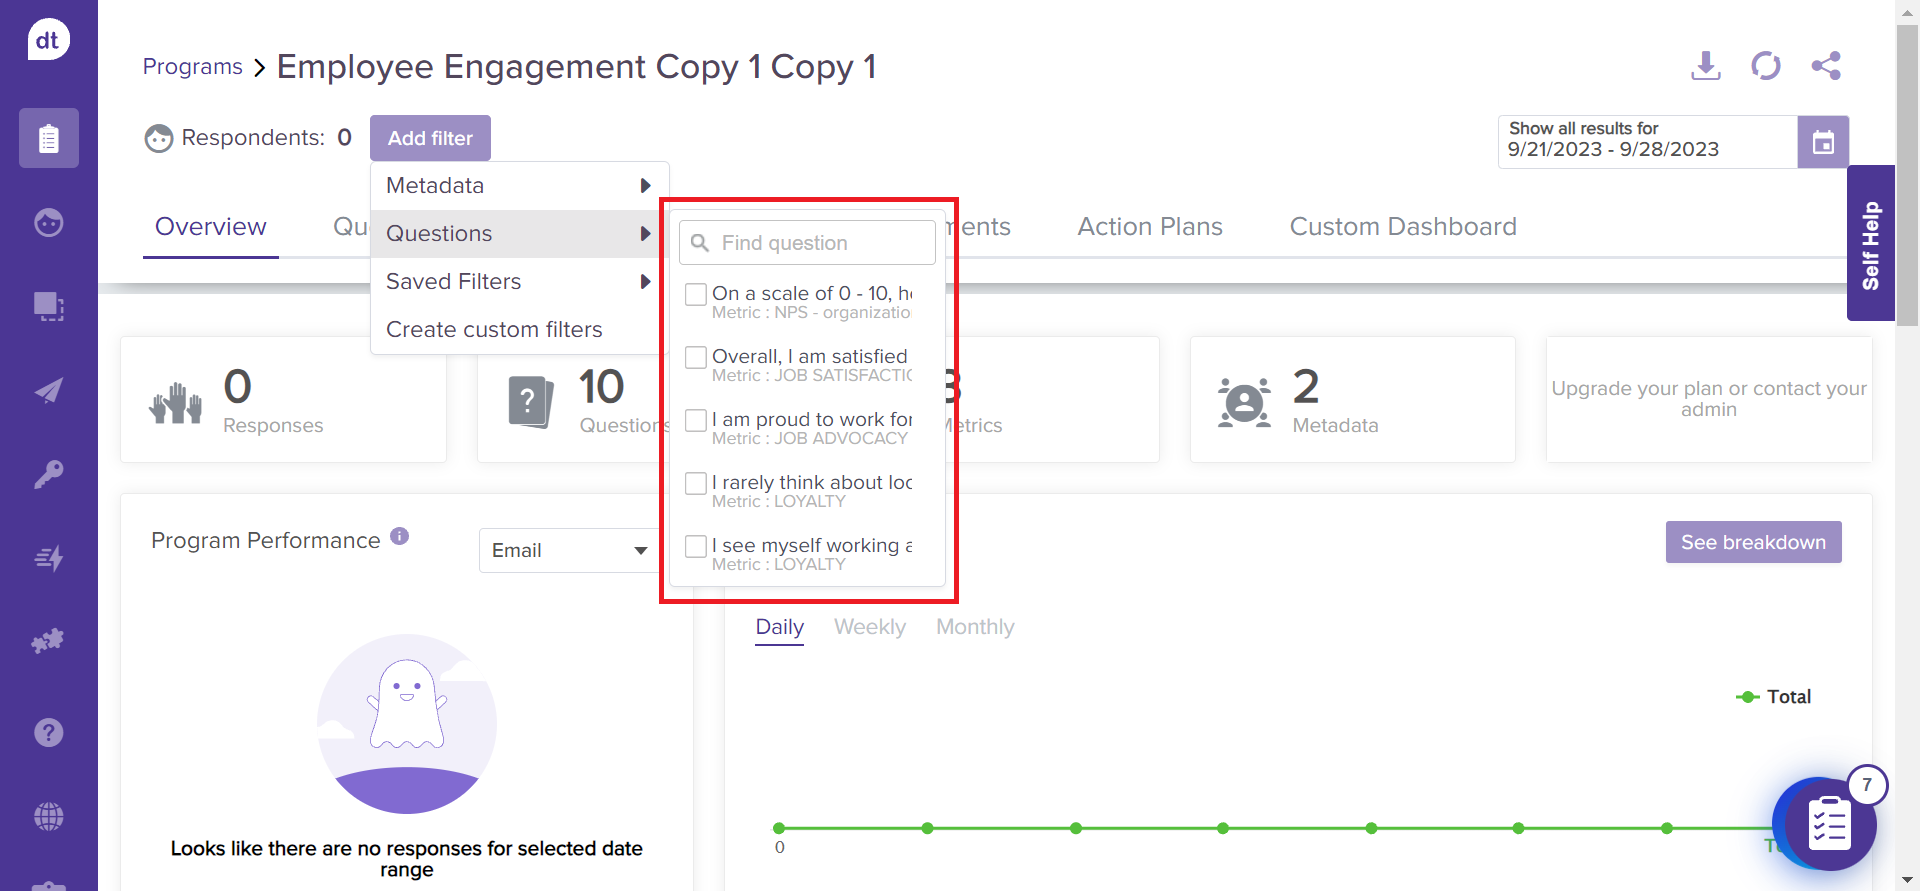
Select the desired question; specify the response type you want to add as a condition. Please note that the response type conditions will vary depending on the question type.
Create custom filters
The below method is when you add conditions and save a filter on the go.
Instead, you can Create custom filters and add conditions to save the filter.
Navigate to Create Custom Filter.
From the following pop-up. You can add a filter name.
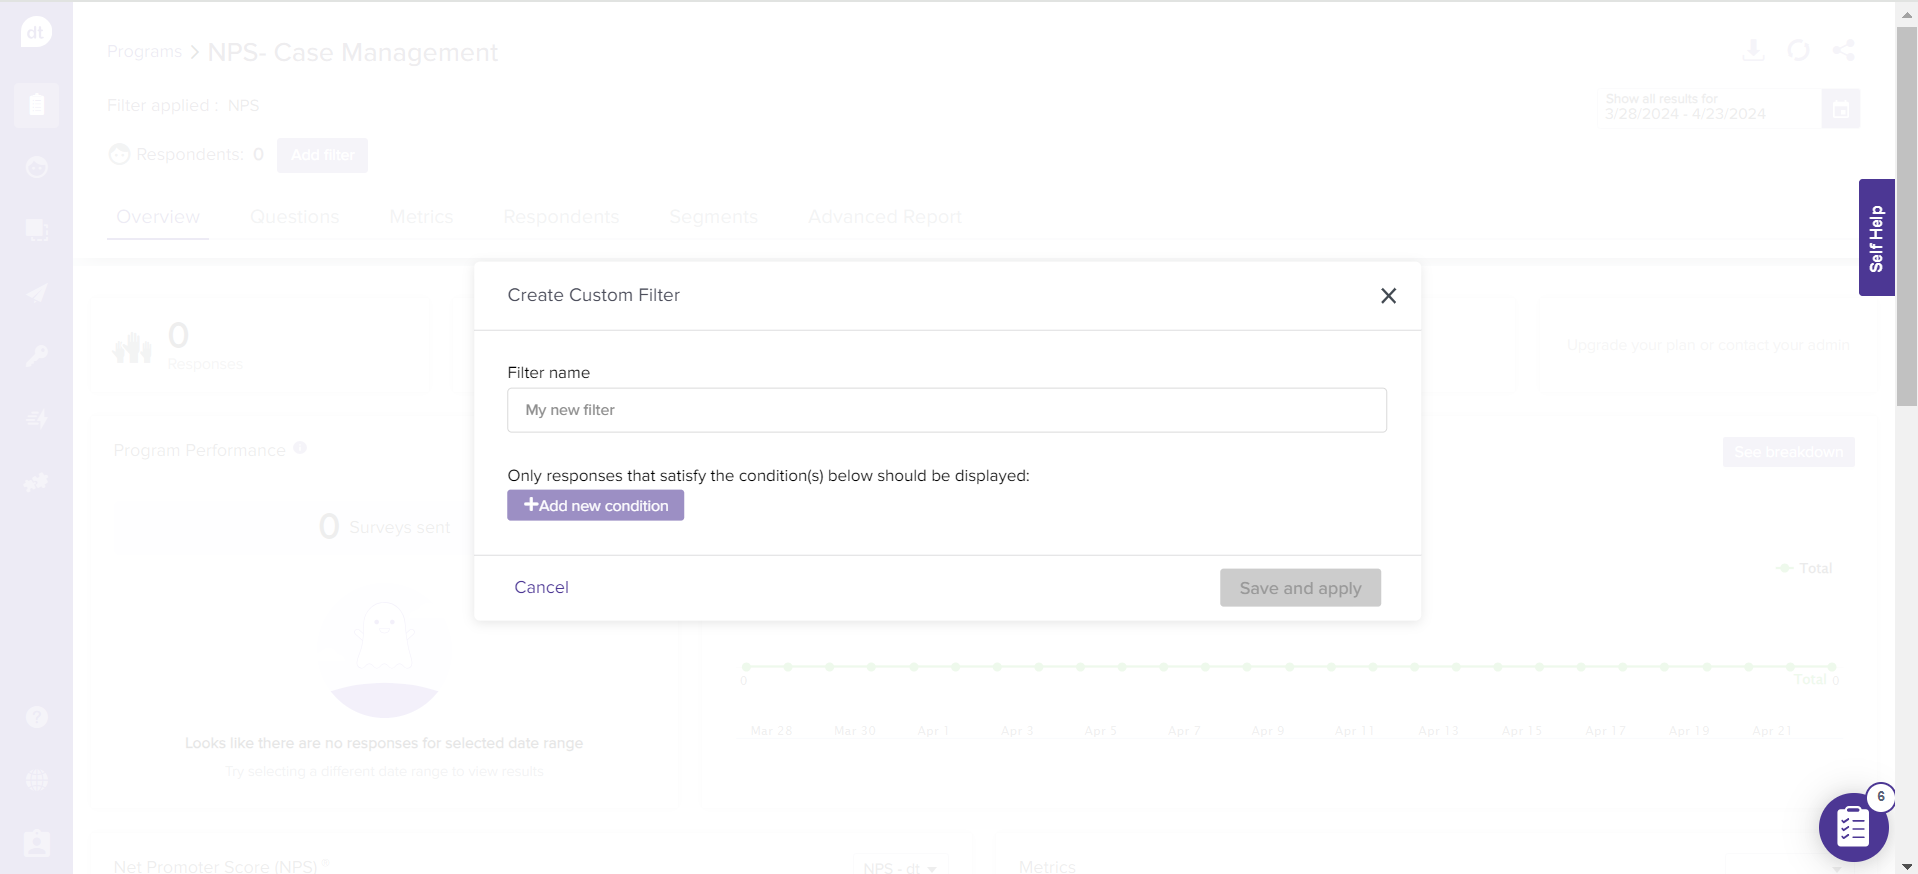
Select a filter type and add conditions as required.
Click on Save and apply. The filter will be available within Saved filters to use anytime.
Note:
If no responses or fewer than five responses are collected for the anonymous survey's metadata, the metadata labels will be disabled.
Learn more: Share Report | Download Report | Analyze Report