Adding Users
|
|
|


New users can be added only by the Admin users. The new users can be read-only or read-write users. Their access can be specified while adding them.
This article will help you understand:
Who can add a new user to Dropthought?
What are the prerequisites for adding a new user?
How to add a new user to Dropthought?
How to edit user details?
Pre-requisites
Only Admin users can add new users.
Every user must have a valid email account, which shouldn’t be duplicated.
User names and emails are limited to 256 characters.
The phone number is optional and is limited to 20 characters.
Your account will have a limit to adding new users. Upon reaching the limit, you will be notified via email. You can increase number of users by contacting the CS team.
Add Users
Follow the below steps to add a new user to your organization’s Dropthought account:
Navigate to the User Management tab.
Click on + from the top right corner to create a new user.
Select the Add Individual method from the following pop-up to add the new user.
Click on Continue.
From the following pop-up, enter the user details: name, email address, and phone number.
Further, select a role, primary or secondary manager, from the dropdown menu.

Click on Add & Send Invite.
The new user will be listed on the Users tab within User Management with the status Invitation sent until they set up the password from the email triggered from Dropthought.
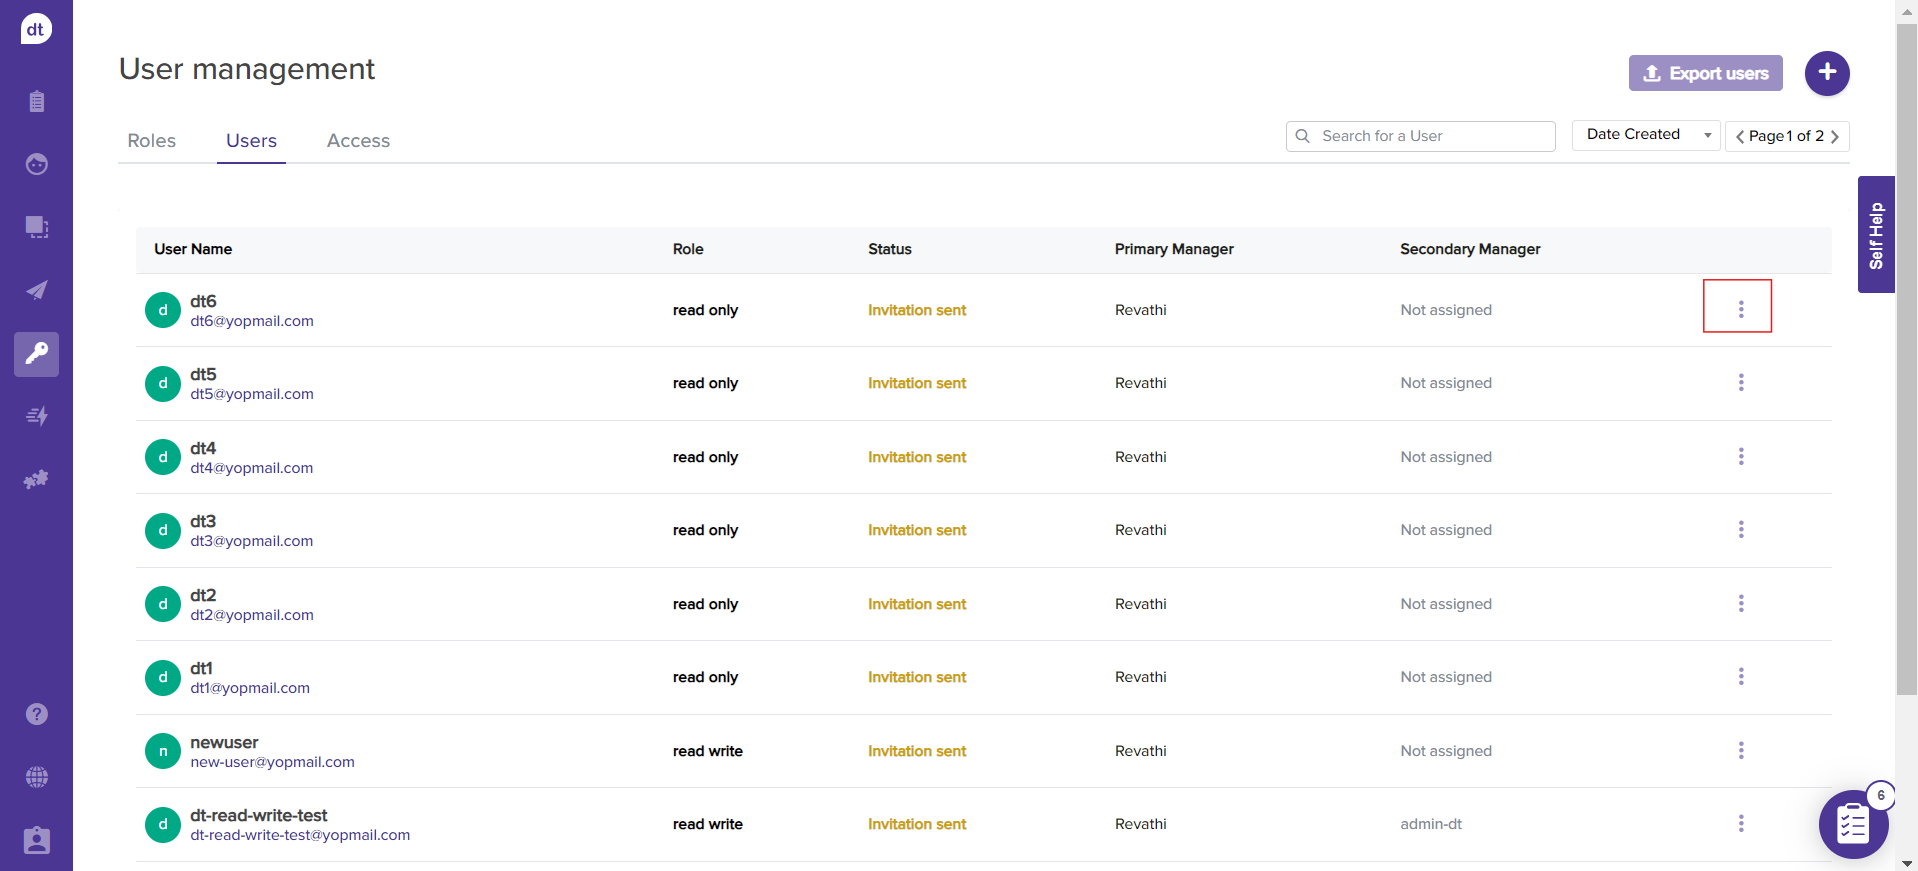
You can manage them by navigating to the Access tab within User Management or clicking the settings icon against the user name. Learn more.
Resend Invite
You can also resend the joining invite for a new user.
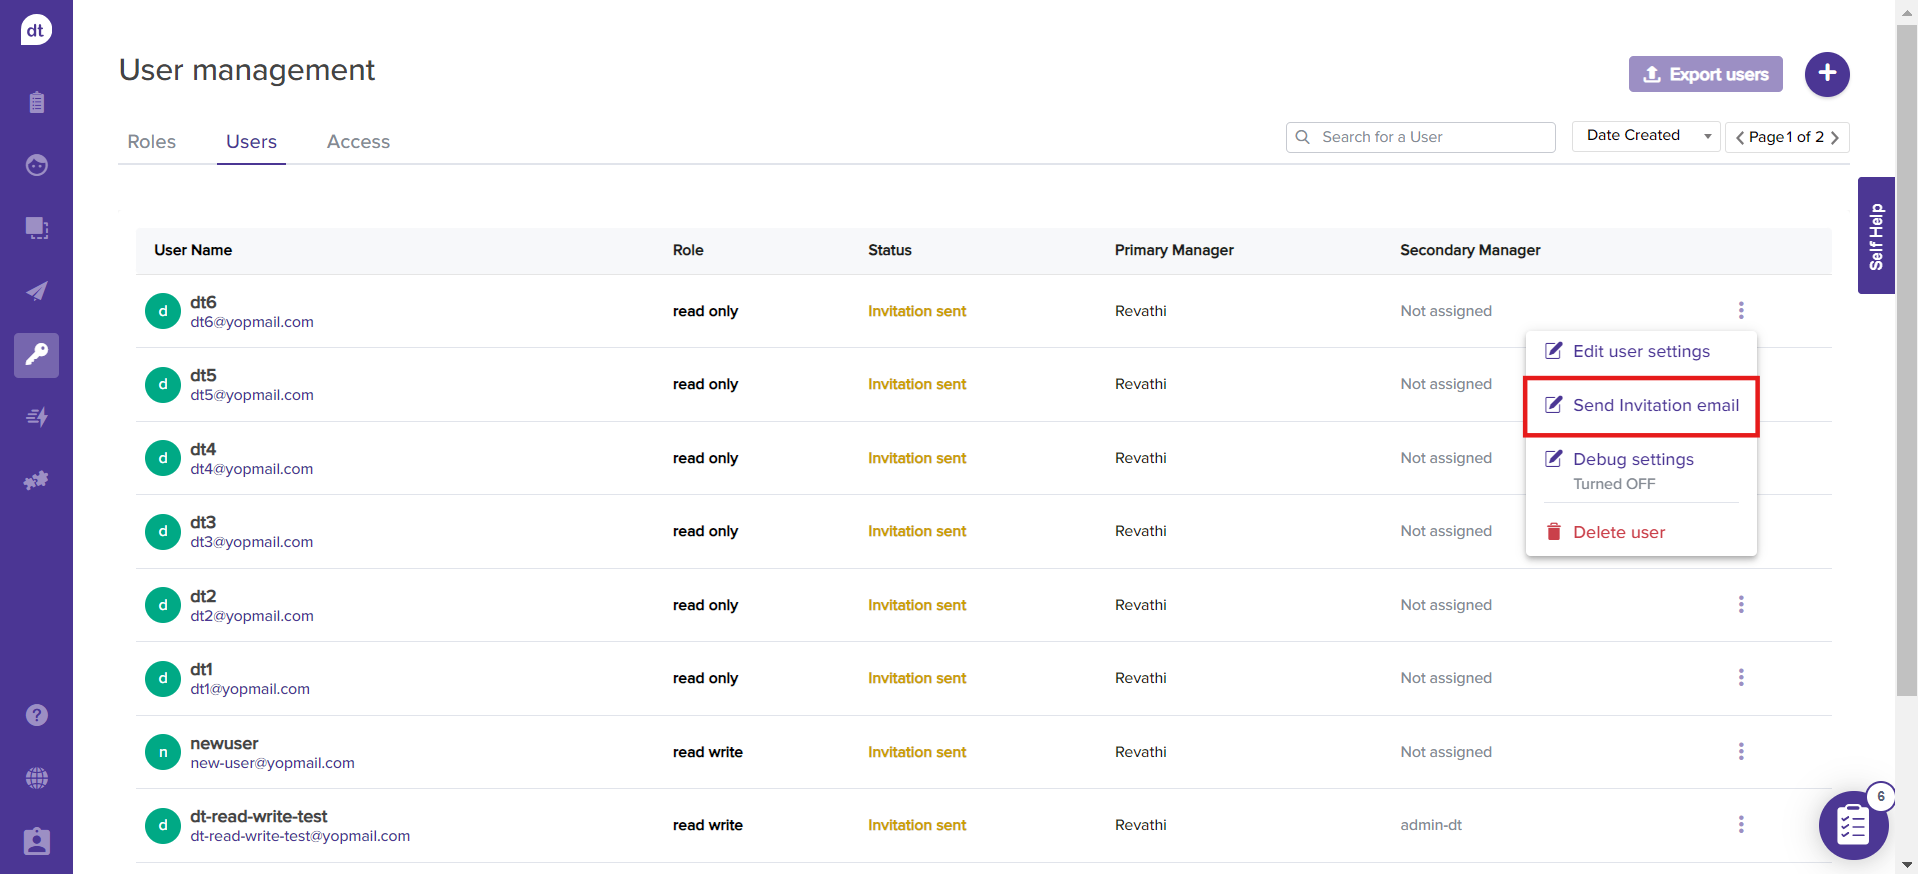
Click on the more options (three dots) provided against the new user.
Click on Resend Invitation Email. The user will receive the email invite again using the email address used to create the Dropthought account.
Edit User Details
Once you have a new user, you can edit their details from the Users tab.
Click on more options (three dots ) beside the user name.
Click on the Edit user settings.
You can edit the user details from the following pop-up.
Click on Save to save the changes.
Learn more: Bulk import users