Reports on Mobile App
Dropthought is your one-stop solution for gathering all program response insights. The dashboard in Dropthought shows real-time updates of the responses from every channel, giving you an immediate and comprehensive outlook on the feedback collected through your program.
This article will help you understand:
What are the benefits of using the Dropthought Reports tab?
How do you navigate to the Reports tab?
What are the different tabs available within Reports?
Benefits of Dropthought Reports
Dropthought's extensive reports section allows you to:
View individual responses from each respondent.
Track response trends for each question.
Monitor metrics and NPS trends daily, weekly, or monthly.
Filter and customize the reports dashboard.
Find Reports
Follow the below steps to find Reports in the Dropthought enterprise app:
Log in to the Dropthought enterprise app using your credentials.
You will be able to view the programs from your Dropthought account.
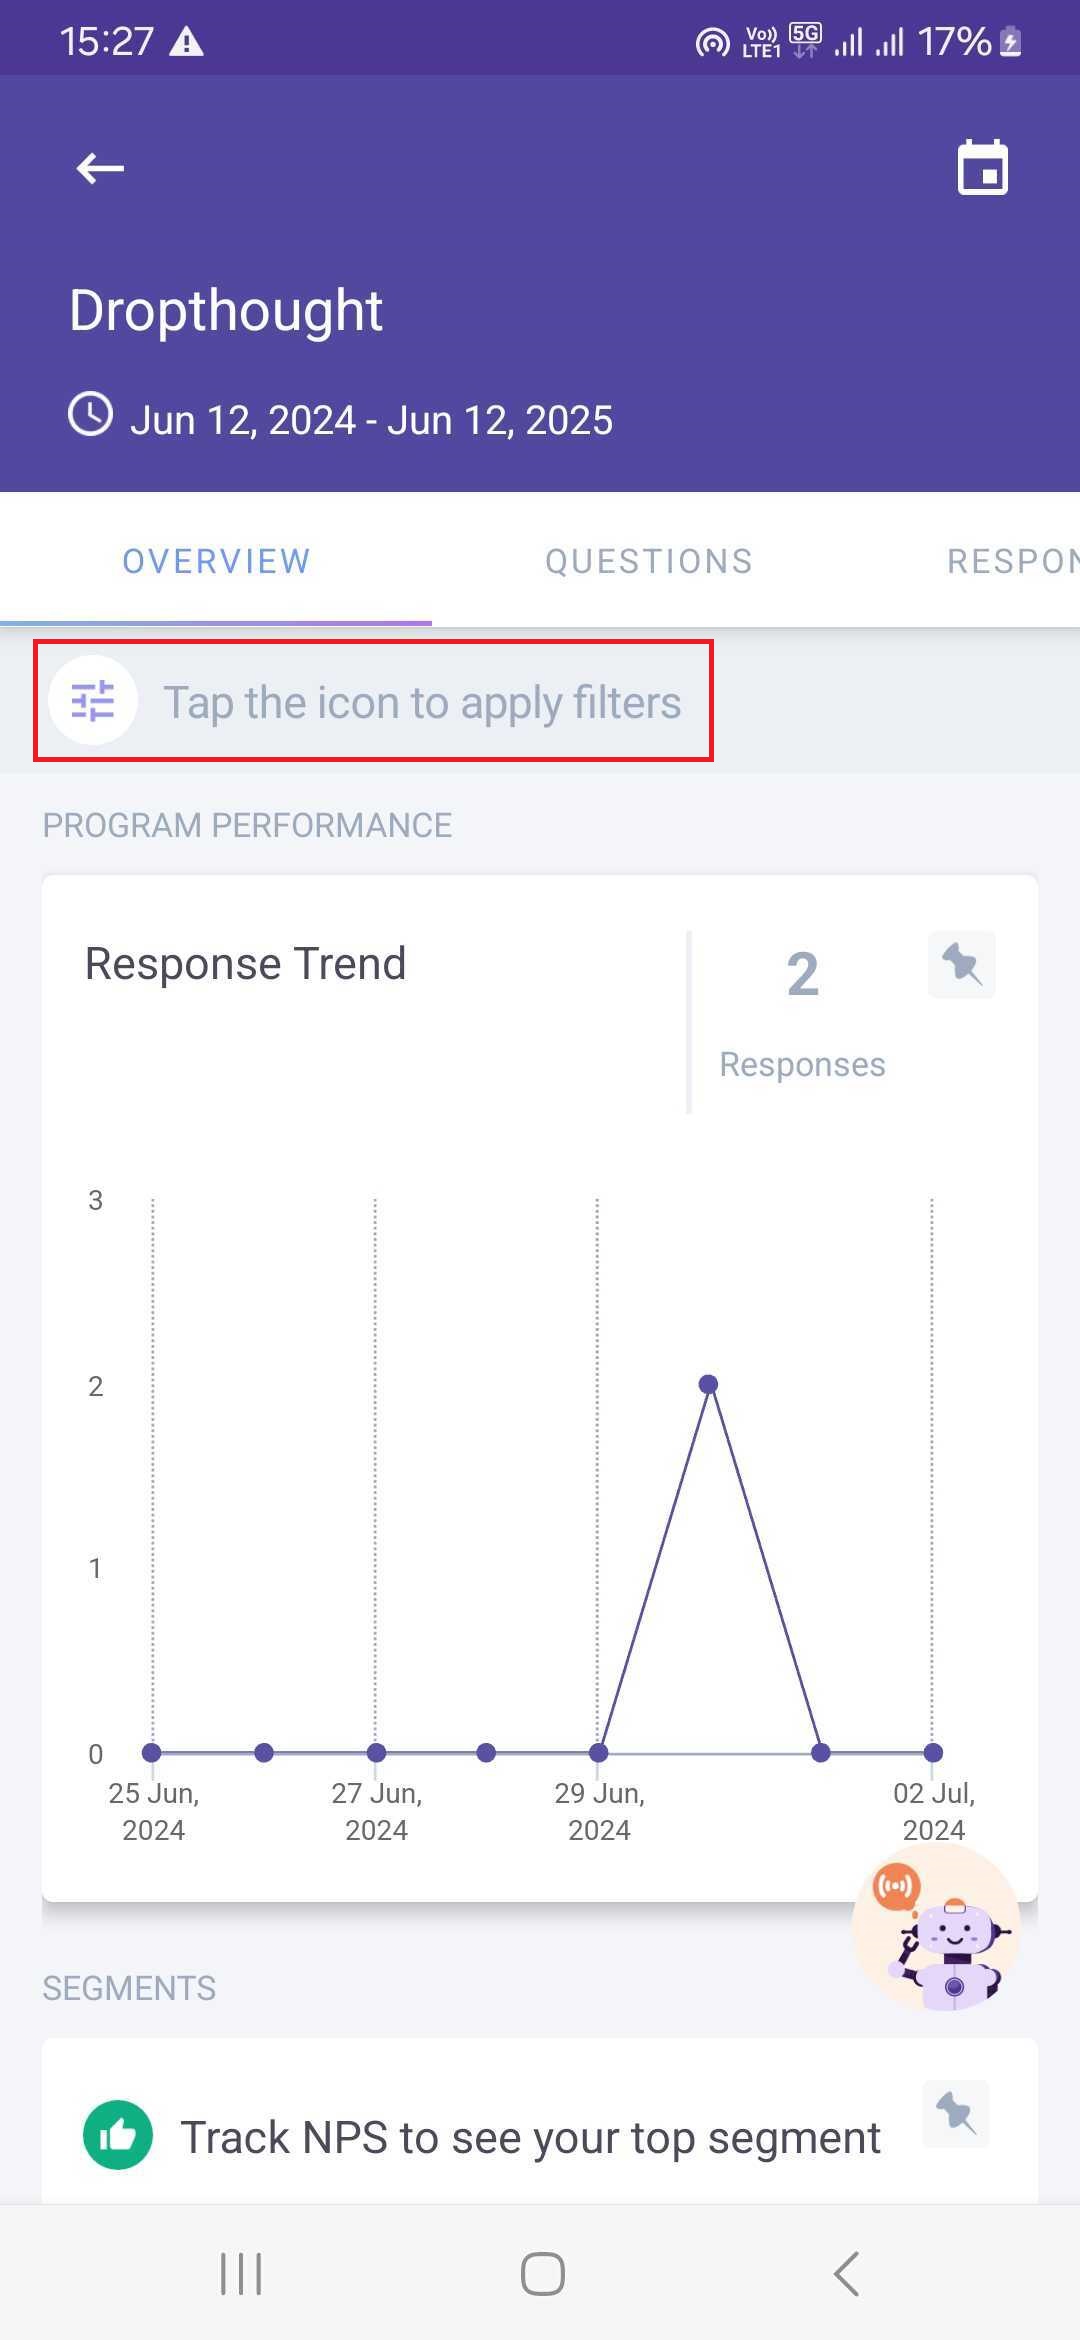
Click on any program, and you will be redirected to its Reports page.
The page will have Overview, Questions, Respondents, and Segments tabs.
These will be empty if you have selected a program that has not collected feedback for the date range or has not started collecting feedback.
Your page will look like the example below once the program has started collecting or collected feedback for the specified date range.
Each tab offers specific insights, from an overall view to detailed analytics.
This structure ensures a thorough understanding of program performance.


Learn More: Overview Tab| Questions Tab| Respondents Tab
Filters
The filters feature in the dropthought mobile app helps users quickly find specific responses to your programs, saving time and making the app easier to use.
There are two types of filters:
Metadata Filter: Adding the metadata filter to your reports makes sorting and finding data easier. You can view filtered responses in your report by choosing specific metadata, making the response chart easier to understand.
Question Filter: A question-based filter organizes data by questions, making it easier to find specific responses in your program by specifying the type of response condition needed.
Metadata
Follow the below steps to add a metadata filter:
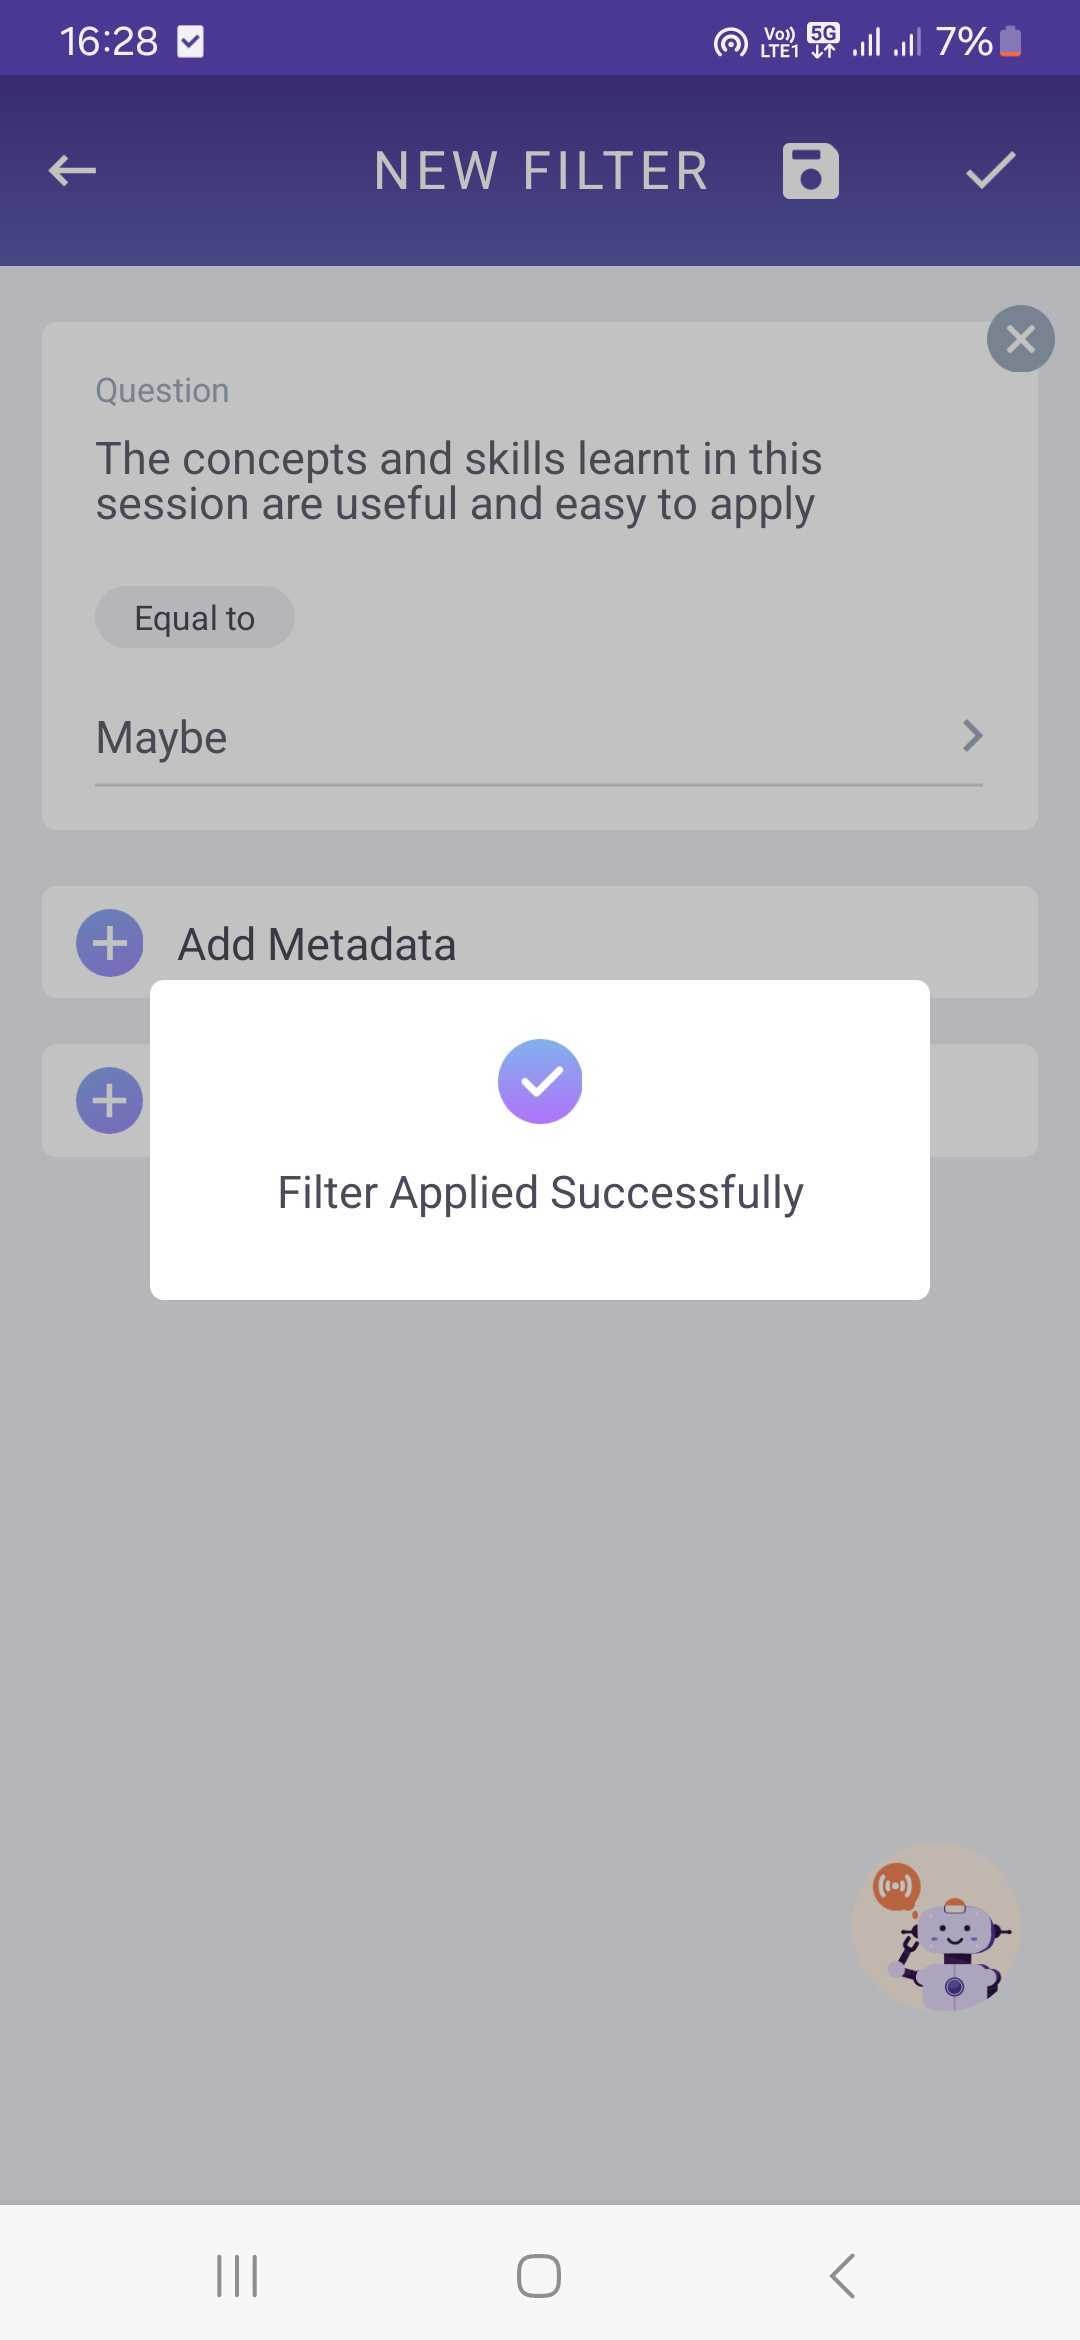
Click on Tap the icon to apply the filter from a program’s reports page.
You can find it within any tabs on the reports page.Click on New Filter.
Click on Add Metadata to see all available options.
Choose the metadata you want (e.g.: Email).
Select specific data from responses.
For example, if you choose Email, you can select specific email addresses.
Click on the Save button.
After saving, find the option to Name your filter.
Provide the name of your filter if desired.
Click Save and Apply.
You will also see a pop-up notification after saving your new filter.


Questions
Follow the below steps to add a question filter:
Click Tap the icon to apply filter.
Then, click New Filter.
Click on Add Question to add a filter based on questions.
Select the desired question from your program.
Specify the response type condition (varies by question type).
For example, Click Add Questions and select a question (e.g.: NPS question).
Set the response condition (e.g.: 1-10).
After saving, find the option to Name your filter.
Provide the name of your filter if desired.
Click Save and Apply.
You will also see a pop-up notification after saving your new filter.


Using Saved Filters
Click Tap the icon to apply filter.
All newly created metadata and question filters will be available within the saved filters option.
All your saved filters will be available for you to view.
Additionally, you have the option to edit or delete the saved filter if you wish.


.png?inst-v=03d3d293-bd62-4aaf-8fc5-0f74d934cc6a)